Imagine you’re curled up on a cold night, a cup of tea in hand, and a big, soft blanket draped over your knees. You made that blanket with just your arms and a bundle of yarn. No needles, no fancy tools—just your two strong arms. You feel proud because you just learned how to arm knit a blanket, and you can’t wait to show it off. Maybe a friend asked for a gift, or you want a cozy throw for the living room. The good news? You can do it in a few easy steps, even if you’ve never picked up a stitch before.
In this guide, I’ll walk you through every part of the process. We’ll start with the right yarn and tools, then practice the basic stitches, move on to shaping the body, and finish with neat edges and a personal flair. By the end, you’ll know exactly how to arm knit a blanket that feels plush and looks great. Ready? Let’s get those arms working and make something warm.
Step 1: Gather Materials and Choose Yarn
Before you can learn how to arm knit a blanket, you need the right supplies. The yarn you pick makes a big difference in how the blanket looks, feels, and how long it will take you. A super‑bulky yarn is key because each stitch is huge, so you need fewer stitches to cover a big area.
Here’s what to look for:
- Weight: Aim for “Jumbo” or “Super Bulky” (size 7). The yarn should be thick enough that one stitch is about 2 inches (5 cm) long.
- Fiber: Acrylic blends are cheap and soft. Wool blends feel warm and fluffy. If you want luxury, try pure merino.
- Length: You’ll need about 1 kg of yarn for a ½‑square‑metre blanket. A quick rule: width × length ÷ 5,000 = kg needed.
One knitter swears by a wool‑acrylic roving that feels light but fills the gaps in each stitch. She casts on 25 stitches with two strands and uses eight skeins for a 35 × 50‑inch throw. That yarn is sold at big craft stores and online. Another favorite is a single‑strand, plied yarn that’s easy to handle and makes soft scarves as well as blankets.
When you shop, check the “Jumbo” filter on sites like Yarnspirations or Amazon. If a yarn says “less than 60 y/100 g,” it’s usually a good pick. And don’t forget to compare price per yard – a cheap dupe can save you cash while still giving the same bulk.
Pro tip: If you’re buying online, read the product description for yardage. A yarn that’s 114 yards per ball can cut the number of joins you need.
Now that you have the yarn, you’ll also need a pair of sturdy scissors and a large crochet hook or a blunt needle to weave in ends later.
For more ideas on picking the right yarn, see How to Find Quality Knitting Classes Online for Beginners. And if you want a fun example of a finished blanket, check out How to Choose the Perfect Wedding Photo Booth Rental: A Step‑by‑Step Guide for a visual of a cozy setting.
Step 2: Master the Basic Arm‑Knitting Stitches
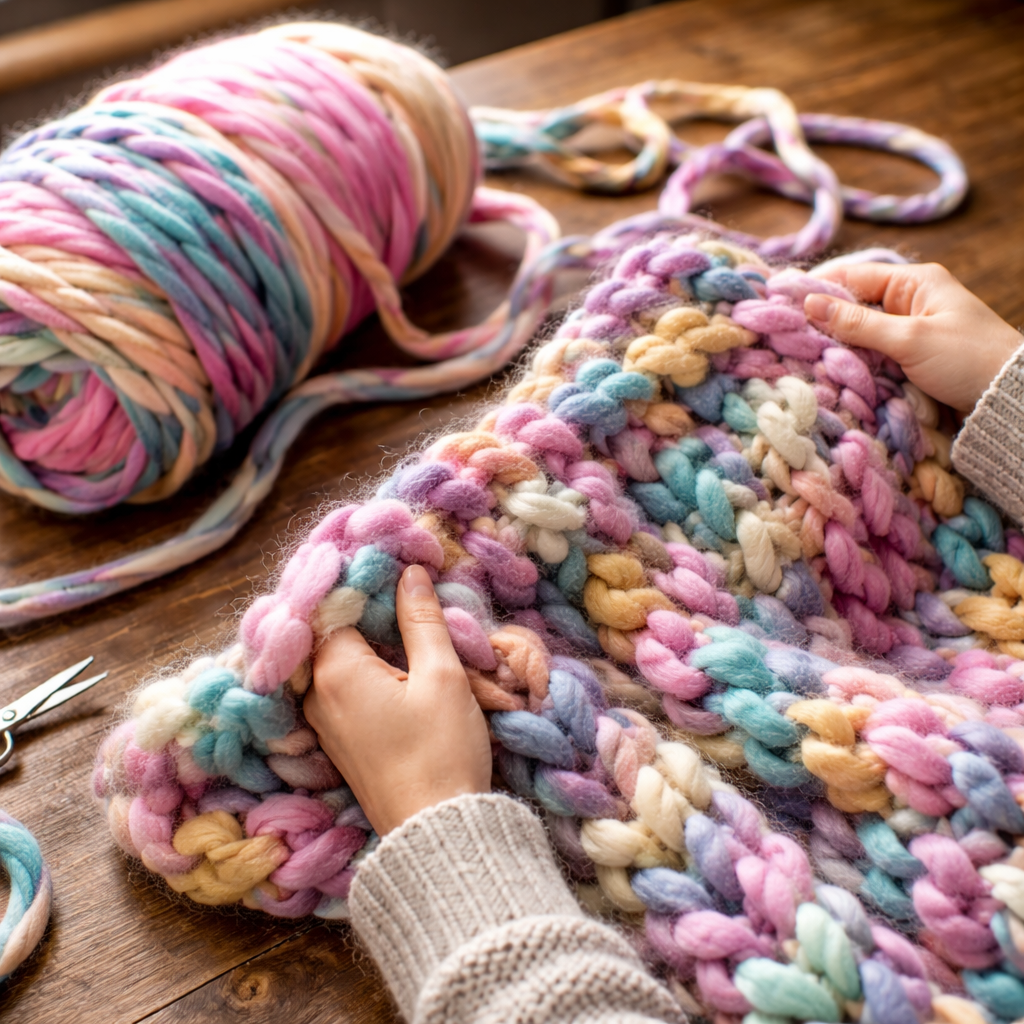
Now that you know how to arm knit a blanket, let’s learn the stitches. The core stitch is the “knit” stitch, which you’ll repeat across the whole project. It’s simple: pull a new loop through the old one using your arms as giant needles.
Cast On
Hold the yarn in your left hand. With your right hand, make a slip knot and place it on your palm. Pull a loop over your right thumb, then slip your left thumb under the loop. Lift the loop over your right thumb and drop it. Keep doing this until you have the number of stitches you need – usually 25‑30 for a blanket.
Row One
To knit a row, pull the yarn over your left hand, then use your right arm to pull a new loop through the first stitch on your left thumb. Slip that new loop onto your right thumb. Keep pulling new loops until you reach the end of the row.
Turn and Repeat
When you finish a row, turn the work so the empty side faces you. The stitches sit on your left thumb now. Repeat the knit motion. Each row adds height to your blanket.
Practice with a short swatch first. A 10‑stitch by 10‑row square will let you feel the tension and see how fast you go. If the stitches look too loose, tighten a bit by pulling the yarn tighter on the cast‑on.
Here’s a quick comparison of yarn types and the look they give:
| Yarn Type | Feel | Stitch Look | Best For |
|---|---|---|---|
| Wool‑acrylic roving | Fluffy, light | Full, pillow‑like | Cozy throws |
| Plied acrylic | Smooth, firm | Neat, even | Blankets with crisp edges |
| Pure merino | Soft, warm | Luxurious, dense | High‑end gifts |
While you practice, you might wonder how to hide the knots when you join a new ball of yarn. Slip the knot into the side of the blanket and later use a crochet hook to pull the tail through a few stitches. It’ll disappear.
If you need a visual, watch this short video that shows the cast‑on and the first two rows in action.
When you feel comfortable, you’re ready to move on to the big part: the blanket body.
Need more step‑by‑step help? Check out How to Crochet a Granny Square Blanket: Step‑by‑Step Guide for Beginners. For a different project that uses similar stitches, see How to Choose the Perfect Prom Photo Booth Rental for an Unforgettable Night.
Step 3: Build the Blanket Body
Now you know how to arm knit a blanket and you’ve practiced the basic stitch. It’s time to grow the blanket. First, decide how big you want it. A common size is 48 × 48 inches, which needs about 3 kg of yarn.
Here’s a simple plan:
- Measure the width you want. Cast on enough stitches to reach that width. For a 48‑inch blanket, 30‑35 stitches work well.
- Start knitting rows. Keep a steady rhythm. Each row adds about 2 inches of length.
- Every time you run out of yarn, join a new ball. Overlap the ends by a few inches, then weave them in later.
- Check the size as you go. If you’re close to the desired length, start planning the edge.
While you knit, watch the tension. If the blanket feels too loose, tighten a bit on each row. If it feels too tight, loosen your grip on the yarn.
Here’s a real‑world example: Sarah, a busy mom, wanted a quick gift for her dad. She chose a bright teal roving, cast on 32 stitches, and knit a 50 × 70‑inch blanket in just three evenings. She used two skeins of yarn per evening and finished with a neat fringe.
Once the body is done, you’ll need to finish the edges. That’s the next step.
For extra tips on sizing and yarn calculations, see Your Complete Guide to Photo Booth Rental San Diego. And if you love seeing how a finished blanket looks on a couch, check out Mirror Photo Booth Rental: 7 Must‑Know Tips for an Unforgettable Event.
Step 4: Finish Edges and Add Personal Touches
The last part of how to arm knit a blanket is giving it a clean look. Rough edges can catch on things and look unfinished. There are a few simple ways to finish.
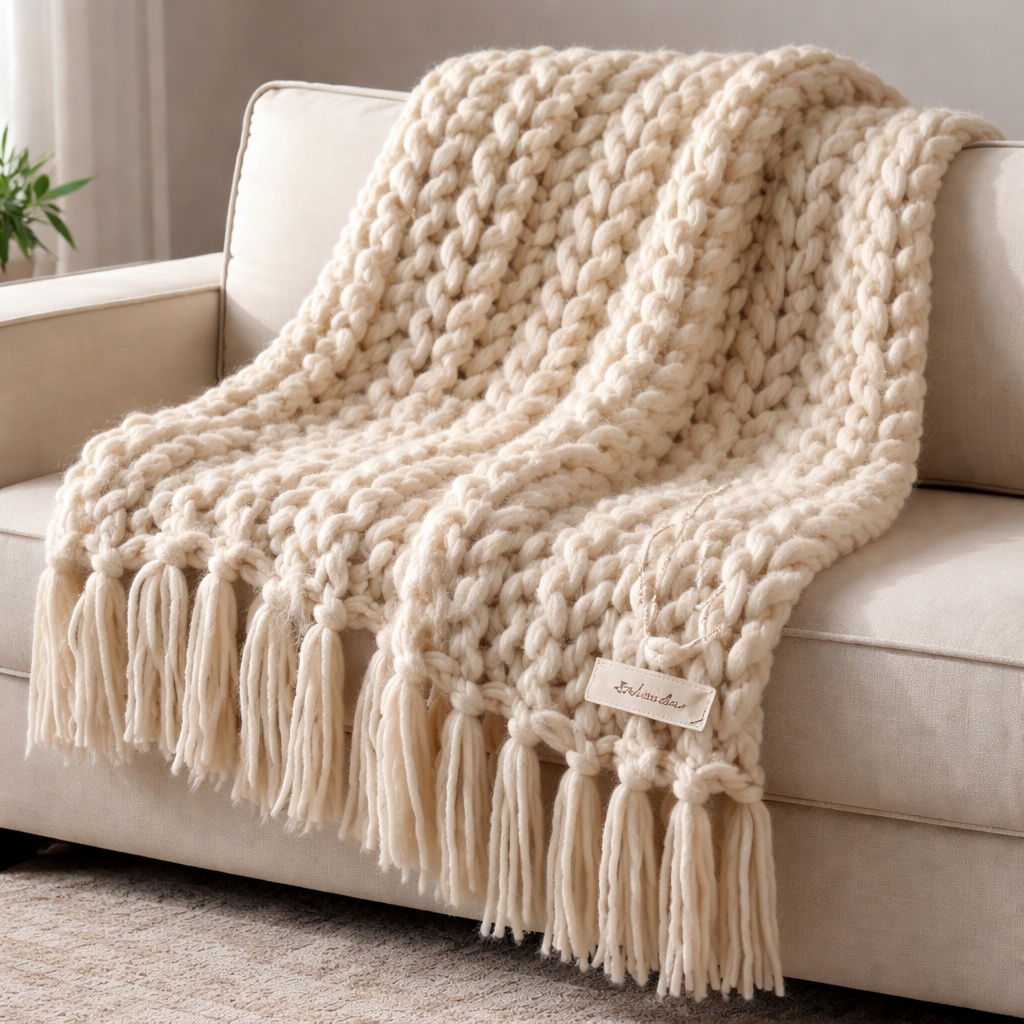
Basic Fringe
Cut the yarn into equal lengths, about 6‑8 inches each. Fold each piece in half, pull the loop through a stitch on the edge, and pull the ends through the loop. Tighten. This creates a classic fringe.
Bind‑Off
If you prefer a smoother edge, you can bind off. Pull the first two loops off the left thumb, then pull the first loop over the second and off the thumb. Continue across the row. This creates a neat edge that doesn’t unravel.
Adding a Personal Touch
Consider adding a small pom‑pom, a sewn‑on patch, or a line of contrasting yarn. A pom‑pom made from the same yarn adds a playful vibe. A patch with a name or date makes a perfect gift.
Here are three ideas you can try:
- Use a bright color for the fringe to add a pop of fun.
- Sew a small embroidered heart near a corner for a personal note.
- Attach a short strip of soft fleece inside the blanket for extra warmth.
When you’re done, wash the blanket on a gentle cycle and lay it flat to dry. The fibers will settle, and the blanket will feel even softer.
Need more inspiration? Look at Photo Booth Rental for Graduation Party: A Step‑by‑Step Guide for ideas on how to add celebratory details. For a guide on tailoring your project to a specific event, see Photo Booth Rental Murrieta: A Complete Guide for 2026 Events.
Conclusion
Learning how to arm knit a blanket is easier than you think. With the right yarn, a few basic stitches, and a bit of patience, you can make a cozy piece that feels like a hug. We walked through gathering supplies, mastering the knit stitch, building the body, and finishing with neat edges and a personal touch. You now have a clear roadmap to create your own blanket, whether it’s for a loved one or just for you.
Remember to pick a bulky yarn, keep your tension steady, and enjoy each row. When you finish, you’ll have a handmade treasure that shows off your new skill. If you liked this guide, explore more craft projects on CreativiU or try a new technique next week. Happy arm knitting!
FAQ
What yarn weight is best for how to arm knit a blanket?
Look for “Jumbo” or “Super Bulky” yarns. They are thick enough that one stitch is about 2 inches long. This weight lets you cover a large area with fewer stitches, making the project faster and the blanket extra fluffy.
How many stitches should I cast on for a medium‑size blanket?
For a blanket about 48 × 48 inches, cast on 30‑35 stitches. This gives you a width of roughly 4‑5 feet once you start knitting. Adjust the count if you want a narrower or wider throw.
Can I use a single strand of yarn instead of two?
Yes, many beginners start with a single strand of a plied yarn. It’s easier to handle, but the blanket may be a bit less bulky. If you want more loft, try two strands of a roving yarn.
What’s the fastest way to join a new ball of yarn?
Overlap the old and new yarn for a few inches, then tie a simple knot. Hide the knot later by pulling it into the fringe or a side seam. This keeps the join neat and strong.
How do I keep my arms from getting sore?
Take short breaks every 15‑20 minutes. Stretch your shoulders and wrists. If you feel strain, switch to a lighter yarn or use a larger arm position to reduce tension.
Do I need special scissors for cutting yarn?
No special tools are required. Any sharp scissors work fine. Just cut close to the stitch to avoid long tails that can snag.
Can I add color changes in the middle of the blanket?
Sure. When you want a new color, simply start knitting with the new yarn. You can blend colors by alternating rows or make blocks for a striped look.
How do I wash an arm‑knit blanket?
Use a gentle cycle with cold water. Add a mild detergent. After washing, lay the blanket flat to dry. This keeps the fibers from stretching and keeps the edge neat.
Leave a Reply