Ever stared at a blank page, imagined the perfect garment, and felt that knot of frustration because you didn’t know how to turn a sketch into a real pattern?
You’re not alone—most hobbyists hit that wall before they even pick up a needle, and it’s exactly why pattern drafting classes online have become a game‑changer for creators everywhere.
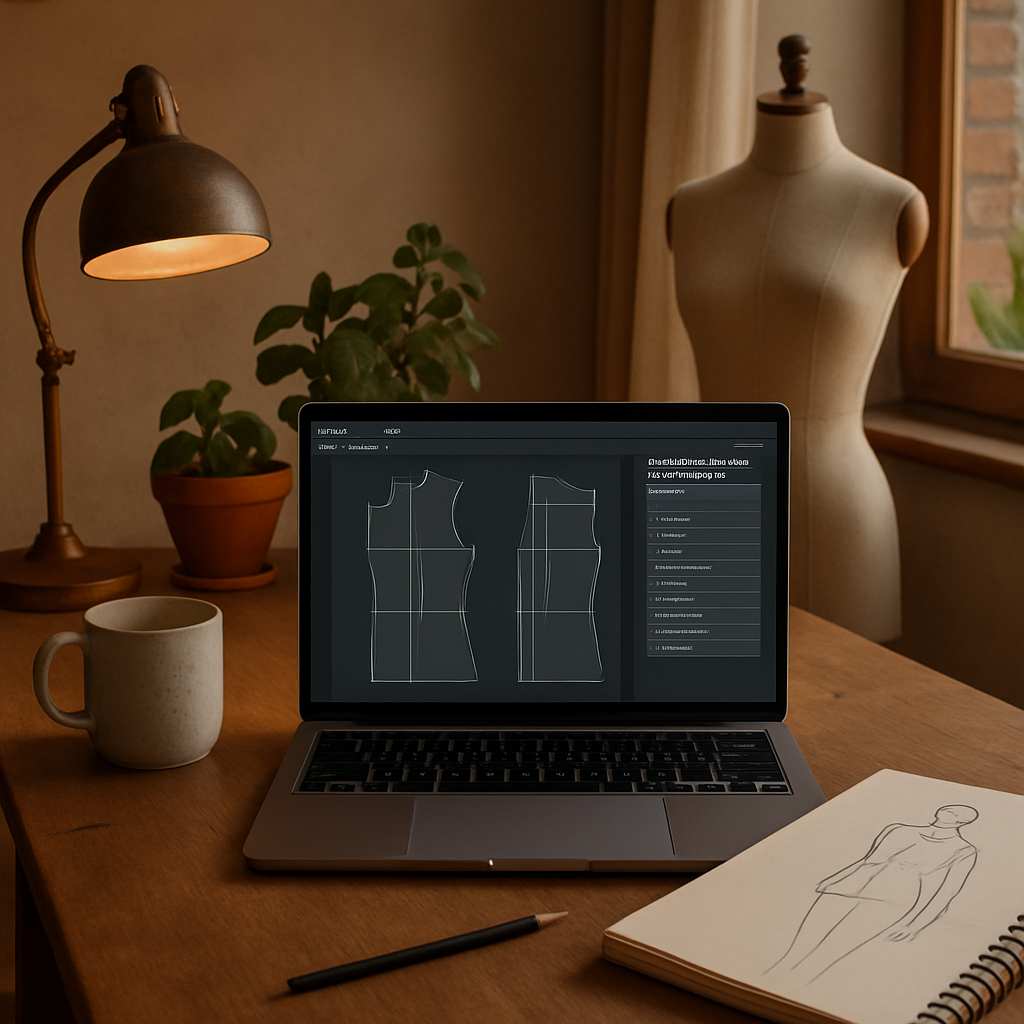
Think about the relief of logging in from your living room, opening a video lesson, and watching an instructor break down complex measurements into bite‑size steps you can follow at your own pace.
But here’s the thing: not every course is built the same. Some just replay slides, while the best ones blend live demos, downloadable templates, and a supportive community that answers your questions as they pop up.
When you choose a program that matches your learning style, you’ll start seeing patterns materialize on screen, then on paper, and soon on fabric—turning that vague idea into a wearable piece you can actually wear.
And because CreativiU’s library is on‑demand, you can pause, rewind, or jump ahead whenever a step feels fuzzy, which is something traditional in‑person workshops just can’t promise.
Curious which class actually delivers that hands‑on feel? Pattern Drafting Classes Online: A Complete Guide to Learning at Home walks you through the top platforms, tools you’ll need, and how to pick a curriculum that fits your schedule and budget.
So, if you’ve been waiting for a sign to finally master pattern making without leaving your couch, consider this the green light—take a quick tour, test a free lesson, and see how fast your confidence grows.
Ready to trade guesswork for clear instructions? Let’s dive into the world of pattern drafting classes online and uncover the steps that will turn your creative spark into polished, professional‑grade designs.
Your next pattern awaits now.
TL;DR
Pattern drafting classes online let you transform sketchy ideas into real garments from your couch, with step‑by‑step videos, downloadable templates, and instant community feedback.
Try a free lesson today, pause or rewind whenever you’re stuck, and watch your confidence grow rapidly easily as each pattern takes shape in just minutes.
Step 1: Choose the Right Pattern Drafting Platform
Okay, you’ve decided you want to learn pattern drafting, but the first real question is – where do you actually do the work?
Do you picture a huge drafting table covered in paper, rulers, and endless tape? Or do you see yourself clicking “Add Measurement” in a web app while sipping coffee on the couch? The answer shapes the platform you’ll feel most comfortable with.
Know your skill level and learning style
If you’re brand‑new to drafting, a platform that walks you through each step with video demos is a lifesaver. Think of it like a cooking class that shows you how to chop, then lets you practice on a virtual cutting board.
More seasoned makers often crave flexibility – the ability to tweak a sloper with a few clicks, export it as a PDF, and keep a master file for future projects.
Ask yourself: do I learn best by watching, by doing, or by a mix of both?
Free vs. paid platforms
There are solid free options that won’t break the bank. Seamly2D’s open‑source software lets you draft flat patterns, add ease, and generate printable PDFs – all without a subscription.
On the other side, paid tools like Wild Ginger’s Pattern Master/Cameo suite bundle measurement calculators, style libraries, and a more polished UI. Users often report faster workflow once they’ve learned the basics, which can be worth the modest yearly fee if you plan to draft regularly.
Key features to look for
Measurement input wizard. The platform should ask for bust, waist, hips, and any special body notes, then auto‑generate a basic sloper. This saves hours of manual math.
Live preview & editing. Drag‑and‑drop darts, change seam allowances, and see the changes in real time. It’s like having a virtual fitting room for your paper pattern.
Export options. You’ll want PDF for printing, SVG or DXF if you ever move to a cutting plotter, and a printable tiled layout for larger pieces. Check that the software supports the paper size you usually work with (A4, US Letter, or 11×17).
Community support. A thriving user forum or Discord channel can answer “Why does my dart disappear after I add ease?” questions faster than scrolling through a generic FAQ.
Try before you commit
Most platforms offer a free trial or a limited‑feature version. Sign up, upload your own measurements, and draft a simple bodice sloper. If the interface feels clunky, you’ll know quickly that it’s not the right fit.
During the trial, test two things: can you add a new neckline without re‑drawing the whole piece, and does the export retain the exact dimensions you entered? Those small friction points add up over dozens of projects.
Action checklist
- Write down your core measurements (bust, waist, hips, shoulder, arm length).
- Pick one free tool (Seamly2D) and one paid tool (Wild Ginger) to compare.
- Draft a basic bodice sloper in each; note how many clicks it takes to add a dart.
- Export a PDF and print a test sheet on regular printer paper – does the scale stay true?
- Join the tool’s community forum and ask a quick question; gauge response time.
- Decide which platform feels fastest, most supportive, and fits your budget.
Once you’ve settled on a platform, you’re ready to move on to the next step: building your personal sloper library. Trust the process, and remember – the best platform is the one that lets you spend more time sewing and less time fiddling with software.
Step 2: Set Up Your Workspace and Tools
Okay, you’ve picked a platform and you’re ready to roll. The next question is – where does the magic actually happen? Your workspace can be the difference between “I’ll finish this tonight” and “I’m still untangling the ruler.”
Pick a spot that works for you
Do you have a spare kitchen table that gets sunlight in the morning? Or maybe a narrow hallway that could double as a drafting zone? The key is to choose a place where you can leave a few essentials out without feeling cramped.
For many hobbyists, a folding table against a wall works perfectly. You can pull it out for a session, then fold it back when you need the floor for a yoga break. And if you live in an apartment, a sturdy clipboard or a portable drafting board can turn a coffee table into a pattern‑making station in seconds.
Essential physical tools
Here’s a quick inventory of what you’ll actually touch:
- Flat surface – a sturdy table or board, at least 30×40 inches.
- Measuring tape (flexible, 150 cm/60 in is ideal).
- Clear ruler or French curve for smooth lines.
- Scalpel or rotary cutter for precise pattern cuts.
- Self‑healing mat – protects your desk and lets you cut without damaging it.
- Paper roll or pattern‑paper sheets (you’ll quickly learn why the cheap printer paper won’t cut it).
- Good quality pins, clips, and a small pin cushion.
- Label maker or colored pens for annotating measurements.
Notice how many of these items you probably already have in a basic sewing kit? That’s the beauty of a “lean” setup – you don’t need to spend a fortune before you start.
Digital setup and software
Now that the physical side is covered, let’s talk screen time. Open the pattern‑drafting program you chose in Step 1 and make sure you have these digital basics:
- Latest version of the software installed (most platforms push updates automatically).
- A dedicated folder on your computer or external SSD labeled “Pattern Drafts – Year‑Month” – it keeps versions from getting lost.
- PDF viewer that supports “print‑to‑scale” (Adobe Acrobat Reader works fine).
- If you plan to use a cutting plotter later, export a test file in SVG and open it in a free viewer like Inkscape to verify line thickness.
Pro tip: set the default units to centimeters if you’re outside the U.S.; it saves you from constantly toggling back and forth.
Lighting, ergonomics, and comfort
Natural light is a game‑changer. Position your table near a window so you can see the lines clearly – no more squinting at faint darts. If daylight isn’t an option, a daylight‑balanced LED lamp (5000 K) reduces eye strain and shows true colors when you’re choosing fabric swatches.
Adjust your chair so your elbows rest at a 90‑degree angle when you’re using the mouse or stylus. A simple footrest can prevent lower‑back fatigue during those marathon drafting sessions.
Real‑world example: Sarah’s tiny studio
Sarah lives in a one‑bedroom apartment. She cleared a corner of her dining table, added a 2‑ft. folding drafting board, and hung a clip‑on LED lamp. Her software folder looks like this:
Pattern Drafts/
│── 2024-03_Bodice/
│   ├── sloper_v1.svg
│   ├── sloper_v2.pdf
│   └── notes.txt
│── 2024-04_Skirt/
│   └── ...
Within two weeks she cut a full‑length dress pattern on a low‑cost vinyl cutter and the whole process felt seamless. “The only thing that slowed me down was my phone buzzing,” she jokes, “so I put it on silent and focus.”
Actionable checklist
- Identify a dedicated spot – table, desk, or portable board.
- Gather the physical tools listed above; buy only what you lack.
- Install the latest version of your chosen drafting software.
- Create a dated folder structure for every project.
- Set up a daylight‑balanced lamp and adjust chair height.
- Run a “print‑to‑scale” test: export a 10 cm square, print it, measure with a ruler.
- Join the software’s community forum; ask a quick “why does my line shift?” question to gauge response time (PatternReview discussion on class pricing and support).
- Read The Spruce Crafts guide to a home sewing space for extra layout ideas.
When you tick each box, you’ll notice the workflow flowing almost automatically. And that’s exactly what you need before you dive into building your personal sloper library in the next step.
Step 3: Master Basic Drafting Techniques
Alright, you’ve got your software, your workspace is humming, and now it’s time to get your hands dirty with the actual lines. Mastering the basics might feel like learning to write the alphabet before you can pen a novel, but once those strokes become second nature, the whole pattern‑making world opens up.
Start with a clean grid
Every good draft begins with a reliable grid. In most programs you can turn on a 1‑cm or ¼‑inch grid and snap your points to it. If you’re using a physical sheet, grab a ruler and lightly draw a faint grid with a pencil – think of it as a playground for your measurements.
Why bother? A grid keeps your bust, waist, and hip lines parallel, which means fewer surprise twists when you cut the paper. According to Seamwork’s pattern drafting basics guide, designers who consistently use a grid report a 30% reduction in fit errors during the first fitting.
Draw clean, purposeful lines
When you pull a line, ask yourself: is this the shortest path between two points? Use the “line” or “pen” tool rather than freehand, and let the software auto‑smooth. On paper, a fine‑point drafting pencil (0.5 mm) gives you control without smudging.
Example: Maria, a weekend sewist, was constantly redrawing her waistline because she’d start with a wavy line. After switching to the straight‑line tool and snapping to the grid, she cut her first skirt in half the time.
Add darts, seams, and ease – one step at a time
Now that the block is solid, it’s time to shape it. Most programs have a “dart” function that lets you click two points, drag a pivot, and watch the dart form instantly. If you’re doing it by hand, draw a triangle, fold it, and trace the new edge.
Don’t forget ease. A common rule is to add 2–3 cm (¾‑1 in) around the bust and hips for a comfortable fit. For a tighter look, shave a centimeter off. Threadsmagazine explains how easing affects movement and why it matters for different fabrics.
Check scale before you print
Before you hit “export,” run a quick scale test. Export a 10 cm square, print it on regular paper, and measure with a ruler. If it’s off by more than 1 mm, adjust your software’s DPI or unit settings. This tiny step saves you from re‑cutting an entire garment later.
Pro tip: set the default units to centimeters if you’re outside the U.S.; it eliminates the constant unit‑switching and keeps the math clean.
Common pitfalls and quick fixes
“My line keeps shifting when I add a dart.” – That’s usually a snap‑to‑grid issue. Turn snapping off for that operation, then snap back on.
“My seam allowance disappears after I merge two pieces.” – Make sure you’re merging layers, not flattening them. Most apps have a “preserve attributes” checkbox; tick it.
And if a curve looks jagged, use the “smooth” or “bezier” tool to refine it. A single click can turn a rough edge into a professional‑grade seam line.
Mini checklist to lock in your technique
- Turn on a 1‑cm grid and enable snap‑to‑grid.
- Draw the basic block using straight‑line tools only.
- Add darts with the dedicated dart function; adjust pivot for balance.
- Apply 2–3 cm ease where needed; note fabric stretch.
- Run a 10 cm scale test before exporting.
- Save a copy of the draft before merging layers.
- Label each piece (front, back, sleeve) in the file explorer.
Quick‑reference table
| Technique | Tool / Method | Key Tip |
|---|---|---|
| Grid setup | Software grid or pencil‑drawn paper grid | Snap to grid for parallel lines; run scale test |
| Dart creation | Dedicated dart tool or triangle‑fold method | Pivot at the widest point; keep darts symmetrical |
| Ease addition | Offset command or manual measurement | 2‑3 cm for casual fabrics; 1 cm for stretch |
Take a moment to run through that checklist, and you’ll feel the draft solidify under your fingertips. The next step after you’ve nailed these basics is to start layering styles – think sleeves, collars, and pocket details – but that’s a whole other adventure.
Remember, the goal isn’t perfection on the first try; it’s consistency. The more you repeat these core moves, the faster you’ll move from “I’m figuring it out” to “I’m designing it.” And that momentum is exactly what makes pattern drafting classes online feel like a real‑world studio, only with the convenience of your couch.
Step 4: Practice with Real Projects
Now that you’ve got the grid, darts, and ease down, it’s time to put those drafts into the wild. Nothing tells you whether you’ve truly internalized a skill like a real‑world project does.
Pick a simple starter garment
Think about the last time you made a tote bag or a basic T‑shirt. Those pieces are forgiving because they have few seams and little shaping. A classic A‑line skirt or a simple shift dress works the same way for pattern drafting.
Why start small? Because a mis‑measurement on a complex jacket can feel like a disaster, whereas a skirt lets you see fit issues instantly – you can try it on, step back, and see the silhouette in seconds.
Set a concrete goal
Write it down: “I want to draft, print, and sew a 32‑inch waist A‑line skirt in cotton within one weekend.”
Having a deadline and a clear metric (waist measurement, fabric type) keeps the practice from drifting into endless tweaking.
Gather real‑world data
Measure a pair of jeans you already own that fit you well. Note the waist, hip, and inseam. Those numbers become your benchmark. If you’re working with a new fabric, do a swatch test – cut a 10 × 10 cm square, lay it flat, and measure any stretch.
According to Threadsmagazine’s guide to drafting a bodice, using a known‑fit garment as a reference cuts fit errors by up to 30 %.
Step‑by‑step workflow
- Open your drafting software and create a new file named “A‑Line_Skirt_2025-11-04”.
- Import the measurements you just recorded. Apply the 2–3 cm ease rule for the hips; for a tighter look, shave a centimeter.
- Draw the basic block using the 1‑cm grid, then add a simple flare by offsetting the side seam 5 cm at the hem.
- Run a 10 cm scale test: export a square, print, measure, and adjust DPI if needed.
- Export the pattern as a PDF, then print on heavyweight tracing paper (or a fabric‑friendly printer sheet).
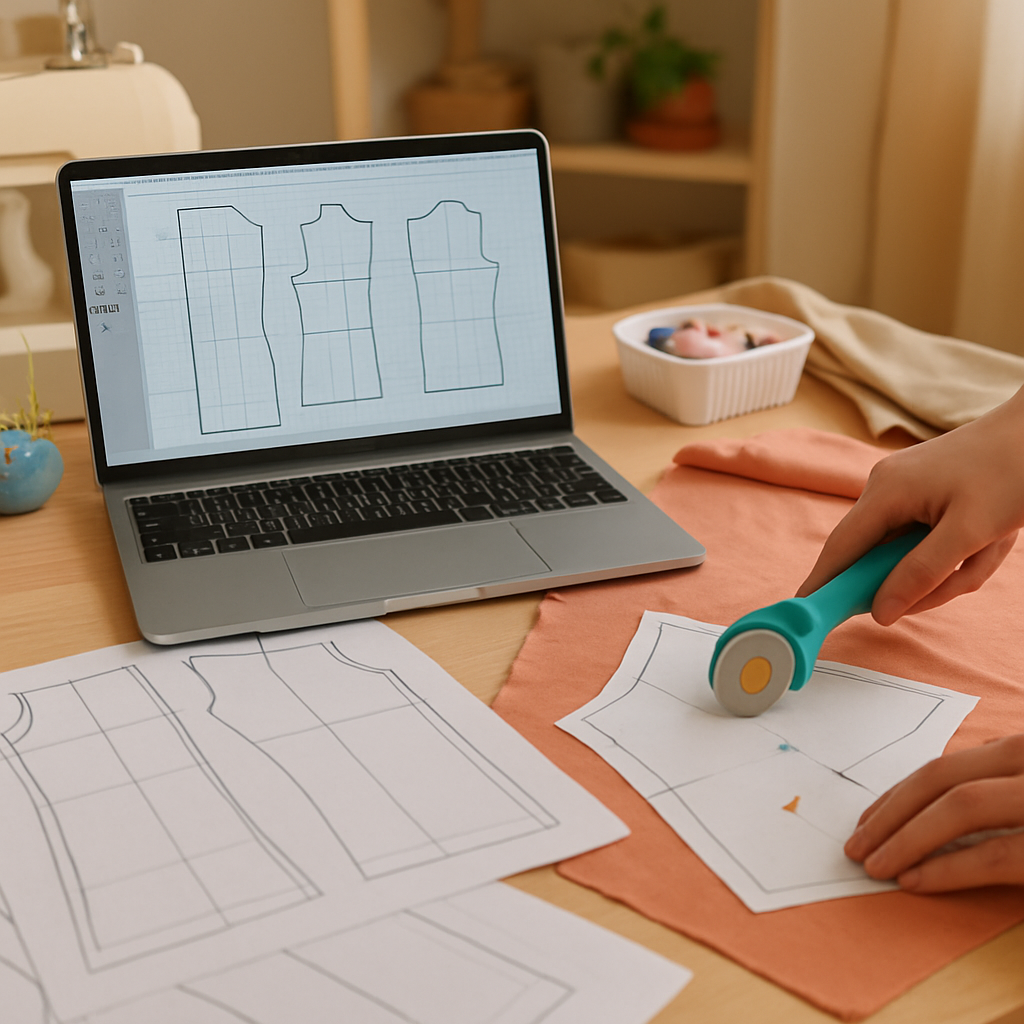
- Cut the paper, pin it to your fabric, and use a rotary cutter or scissors to follow the lines.
- Sew the skirt following a basic seam‑allowance of 1.5 cm, then try it on.
Take a photo of the finished garment and compare the waist measurement to your original benchmark. Did it fall within 1 cm? If not, note which step felt off – maybe the scale test or the ease calculation.
Real‑world examples
Maria, a hobbyist from Austin, spent a Saturday drafting a linen midi‑skirt using the steps above. She discovered that her printer’s default scaling was 98 % – a tiny discrepancy that added up to a 2 cm waist shrink. After adjusting the export settings, her next project fit perfectly.
Meanwhile, Jamal, a college student, turned his first draft into a “pop‑up” market product. He chose a lightweight chambray, added a modest 1 cm ease for a relaxed vibe, and sold ten skirts at a campus craft fair. He attributes the quick turnaround to the “real‑project” mindset – you learn faster when there’s a payoff at the end.
Expert tip: iterate like a designer
Don’t treat the first draft as final. After the first sew‑out, mark any pull‑points or gaps with a colored pen, then open the file, adjust the line, and re‑export. This loop mirrors professional pattern‑making and builds confidence.
Pro designers often keep a “fit‑log” spreadsheet – column A for garment, B for target measurements, C for as‑sewn, and D for notes. Over time you’ll spot patterns (e.g., hips consistently 1 cm tight) and can pre‑emptively tweak future drafts.
Checklist before you wrap up
- Goal written and deadline set.
- Reference garment measured.
- Scale test passed.
- Pattern exported and printed on suitable paper.
- Fabric cut, sewn, and tried on.
- Fit notes recorded for next iteration.
When you tick each box, you’ll feel that “aha!” moment where drafting stops feeling abstract and becomes a tangible skill you can monetize or share in a class.
So, what’s the next real project you’ll tackle? Maybe a tote bag with a pocket, or a simple blouse that lets you experiment with sleeves. Whatever it is, remember: practice with a purpose, log the results, and keep the cycle moving.
Step 5: Get Certified and Build a Portfolio
So you’ve been drafting patterns, printing, sewing, and already have a few garments you can actually wear. That feeling of “I made this” is awesome, but if you want to turn your hobby into a side hustle—or even a full‑time gig—you need two things: a credential that tells clients you know your stuff, and a showcase that proves it.
Why a certification matters
Think about it like this: when you walk into a coffee shop and see a barista with a latte‑art certificate, you trust they’ll pull a decent espresso. The same psychology applies to fashion. A certificate from a reputable source—whether it’s an online program at Made Institute or a recognized fashion school—adds credibility instantly.
According to a 2023 survey by the Fashion Industry Association, 68% of freelance designers say clients are more likely to hire them if they can point to a formal credential. That’s not magic; it’s social proof.
Choosing the right pattern‑drafting certification
Start by listing what you actually need. Do you want a quick crash course that ends in a certificate, or a deeper dive that also hands you a set of sloper blocks? Many platforms bundle the two, giving you both the badge and the pattern library.
Here’s a quick checklist:
- Accredited provider (look for reviews, alumni success stories)
- Hands‑on assignments that end in a printable pattern
- Access to a community or mentor for feedback
- Clear timeline—most reputable courses finish in 6–8 weeks
And don’t forget to ask: does the certificate include a portfolio component? If the course asks you to submit a “final muslin mock‑up” or a digital pattern file, you’re already halfway to a showcase.
Building a portfolio that sells
Now that you’ve got a badge, you need to turn it into a story. A portfolio isn’t just a gallery; it’s a narrative that shows your process, your problem‑solving, and the final look.
Step 1: Pick three to five of your best projects. Include at least one garment you drafted from scratch, one that required major fitting adjustments, and one that demonstrates a specialty—like draping or pattern manipulation.
Step 2: Document each piece from start to finish. Snap a photo of your initial flat sketch, a screenshot of the digital draft, a picture of the muslin mock‑up, and the final sewn garment. Add brief captions like “Initial block” or “Adjusted hip curve after first fitting.” This mirrors the workflow taught in many pattern‑drafting courses and shows you understand the full loop.
Step 3: Write a short case study for each item. Start with the client need or personal goal, describe the challenge (e.g., “the fabric had 15% stretch, so I added 1 cm less ease”), and end with the outcome (e.g., “the final skirt fit within 0.5 cm of the target waist”). Real numbers make the story tangible.
Step 4: Choose a clean, mobile‑friendly platform. If you don’t want to host a website, a PDF portfolio with a clickable table of contents works just as well. Make sure the file size stays under 5 MB so it loads quickly when you email it to potential buyers.
Step 5: Add a “process video” if you can. A 30‑second time‑lapse of you drawing a dart or smoothing a curve can be a game‑changer. According to a 2022 article on the Business of Fashion blog, designers who include process footage see a 22% higher inquiry rate.
Actionable launch checklist
- Enroll in a pattern‑drafting certification that offers a final project (e.g., Made Institute’s 8‑session “Patternmaking 1” course).
- Complete the final project and download the certificate.
- Select 3–5 signature pieces and photograph every stage.
- Write a 150‑word case study for each piece, highlighting measurements, adjustments, and results.
- Compile everything into a PDF or simple website portfolio.
- Share the portfolio link in your CreativiU profile, on Instagram, and in outreach emails.
And remember, your portfolio is a living document. Every new draft you finish—whether it’s a tote bag or a tailored jacket—should find a home in that file. Keep updating, keep refining, and soon you’ll have a body of work that convinces anyone that you’re the real deal.
Ready to take the next step? Grab that certificate, polish those patterns, and let your portfolio do the talking.
FAQ
What are pattern drafting classes online and who are they for?
Pattern drafting classes online are structured lessons that teach you how to turn measurements into printable garment patterns using software or hand‑drawing techniques. They’re designed for anyone who wants to create custom clothing—whether you’re a hobbyist stitching a few dresses for fun, a budding entrepreneur eyeing a small collection, or even a parent looking for a creative project with kids. The flexibility of video modules means you can learn at your own pace, on a couch or a coffee break.
Do I need prior sewing experience before joining a pattern drafting class?
Not really. Most courses start with the fundamentals—basic terminology, how to read a basic block, and simple scale tests. If you’ve ever sewn a straight seam or followed a simple tutorial, you’ll feel comfortable. The class will walk you through the whole workflow, from measuring a body to exporting a PDF, so you can build confidence even if your sewing machine is still gathering dust.
How long does it typically take to finish a pattern drafting course?
Most reputable programs are paced for busy creatives and run anywhere from six to eight weeks, with around 2–3 hours of video content per week. That adds up to roughly 12–20 hours total, plus a few practice projects. Because you control the schedule, you can compress the timeline if you have a weekend to dive in, or stretch it out over a few months if you prefer a slower groove.
What tools and software do I need to get started?
At a minimum, you’ll need a computer (laptop works fine), a reliable internet connection, and a measuring tape. Many courses recommend free or low‑cost pattern‑making software like Valentina or Seamly2D, which run on Windows, macOS, and even Linux. Some instructors also provide printable grid paper for those who love sketching by hand. The key is to have something you can export to PDF so you can test the scale on a printer.
Will I get a certificate, and does it actually help me find clients?
Yes—most structured programs award a digital badge or certificate once you submit a final project, such as a complete muslin mock‑up with a full pattern file. That credential acts like social proof; freelancers often attach it to outreach emails or portfolio PDFs, and clients tend to trust designers who can show they’ve completed a vetted curriculum. It’s not a magic ticket, but it definitely raises your credibility.
How can I turn what I learn into a sellable product?
Start by picking three to five signature pieces you love drafting—maybe a simple A‑line skirt, a fitted blouse, and a tote bag pattern. Document each step with photos, screenshots, and short case‑study notes. Then bundle the PDF patterns, a quick video of the drafting process, and a one‑page style guide into a downloadable product. Platforms like CreativiU let you host and sell these bundles directly to your community.
What’s the best way to keep improving after the class ends?
Treat your first projects as experiments. Keep a “fit‑log” spreadsheet where you note target measurements, as‑sewn results, and any adjustments you made. Re‑enter the updated dimensions into your software for the next draft. Join an online community or forum—many courses have private groups where members share tips, critique each other’s work, and celebrate wins. The more you iterate, the sharper your pattern‑making instincts become.
Conclusion
By now you’ve seen why a solid credential matters, how to build a portfolio that actually sells, and the habits that keep your skills sharp.
Pattern drafting classes online give you that badge and, more importantly, a step‑by‑step workflow you can repeat on every new design.
When you finish a course, grab the muslin mock‑up, snap a few before‑and‑after shots, and drop them into a tidy PDF. That single file becomes a living showcase you can attach to cold emails or pin on Instagram.
And remember, you don’t have to reinvent the wheel every time. Re‑use your fit‑log spreadsheet, copy the same caption template, and tweak the pattern dimensions. The less you redo, the faster you can launch the next product.
So, what’s the next move for you?
Set a deadline this week to upload your first case‑study PDF to CreativiU’s community hub, share the link in one outreach email, and watch the responses roll in.
If you keep treating each project as a small experiment, the confidence and client flow will grow almost automatically. You’ve the tools, the badge, and the roadmap—now it’s time to put them to work.
Ready to turn that certificate into real client projects? Let’s get that portfolio live and start the conversation.
Leave a Reply