Ever stared at a ball of yarn and thought, “I wish I could turn this into something cozy, but I have no idea where to start?”
You’re not alone. Many of us have felt that mix of curiosity and intimidation the first time we imagined knitting a scarf, a hat, or even a simple dishcloth.
That’s why online knitting classes for beginners have become such a lifeline—they let you learn at your own pace, from the comfort of your couch, and with a community that cheers you on.
So, what actually makes a beginner‑friendly class stand out?
First, the instructor breaks down the basics into bite‑size videos: how to cast on, the knit stitch, the purl stitch, and how to fix a dropped stitch without panic.
Second, the platform offers downloadable pattern PDFs that you can print or view on a tablet, so you never have to scramble for the next row while your coffee cools.
Does that sound like the kind of low‑stress learning you’ve been craving?
Third, many courses include a live Q&A or a forum where you can post a photo of your work and get instant feedback—think of it as a virtual knitting circle.
And because CreativiU’s library is built on scientifically‑designed curricula, each lesson builds on the last, turning those shaky first rows into confident, rhythmic motions.
Imagine finishing your first scarf in just a week, feeling the yarn glide through your fingers, and sharing that warm creation with a friend who’s been asking you how you learned.
Ready to turn that “maybe someday” into today?
In the next sections we’ll walk through how to choose the right class, what tools you actually need, and how to stay motivated when the stitches get tricky.
Let’s dive in and discover how online knitting classes for beginners can become your new favorite creative escape.
TL;DR
Online knitting classes for beginners turn yarn anxiety into confidence, letting you master cast‑on, knit, and purl from your couch right away.
With bite‑size videos, downloadable patterns, and live feedback, you’ll finish a cozy scarf in a week and actually enjoy the creative process without feeling overwhelmed, stuck, or frustrated.
Step 1: Choose the Right Platform
Picture this: you’ve just bought your first skein of yarn, brewed a coffee, and you’re ready to start knitting, but the screen in front of you is a blur of options. Which platform will actually help you move from “I think I can do this” to “Look at this scarf I finished?”
Know Your Learning Style
If you’re the kind of person who loves bite‑size videos you can pause and replay, look for a service that breaks lessons into short clips. CreativiU’s library does exactly that, letting you master the cast‑on in under five minutes before moving on.
But maybe you thrive on live interaction. Some platforms host weekly Zoom stitch‑alongs where you can ask questions in real time. A quick Google search shows that Ravelry’s community forums host dozens of live knit‑along events, which can be a great supplement if your primary course doesn’t include live Q&A.
Check the Curriculum Structure
Do the lessons build logically? You don’t want to jump from knit stitch straight to lace without a bridge. A well‑designed curriculum will start with cast‑on, then knit, purl, and finally combine them in simple patterns. The online knitting classes for beginners: a complete resource guide walks you through exactly what a solid progression looks like, so you can compare any platform against that checklist.
And remember the little details: downloadable PDFs, stitch diagrams, and a searchable pattern library. When you’re in the middle of a project, you’ll appreciate being able to pull up the next row on a tablet instead of scrolling through a video.
Community & Support Matter
Knitting can feel lonely, especially when you’re troubleshooting a dropped stitch at 2 am. Look for a platform that offers a built‑in community—whether it’s a private Discord, a Facebook group, or an integrated forum. According to School of SweetGeorgia, having a space to share photos and get feedback turns a solitary hobby into a collaborative experience.
Does the platform respond quickly to technical issues? A responsive support team can save you hours of frustration when a video won’t load.
Pricing, Trials, and Device Compatibility
Most beginners worry about cost. Some sites charge per class; others offer a subscription. Try to find a free trial or a money‑back guarantee so you can test video quality, navigation, and download speed before committing.
Make sure the platform works on the devices you own—laptop, tablet, even a phone. A responsive design means you can knit in the kitchen while watching a lesson on your phone, then switch to a laptop for pattern PDFs.
Lastly, think about future growth. Will the platform offer intermediate and advanced courses once you’ve mastered the basics? A scalable learning path keeps you coming back without hunting for a new provider.
So, how do you actually pick?
- Make a short list of 2–3 platforms.
- Watch a free sample lesson on each.
- Check for downloadable resources and community features.
- Test the trial period and see which feels most comfortable.
When you’ve narrowed it down, trust your gut. If you feel a spark of excitement when you imagine opening the next lesson, you’ve probably found the right fit.

Step 2: Gather Essential Supplies
Okay, you’ve picked a platform and you’re buzzing to start. The next question is simple but huge: do you have the right tools in hand? Think of it like setting a table before a meal – you can’t enjoy the dish if the plate is missing.
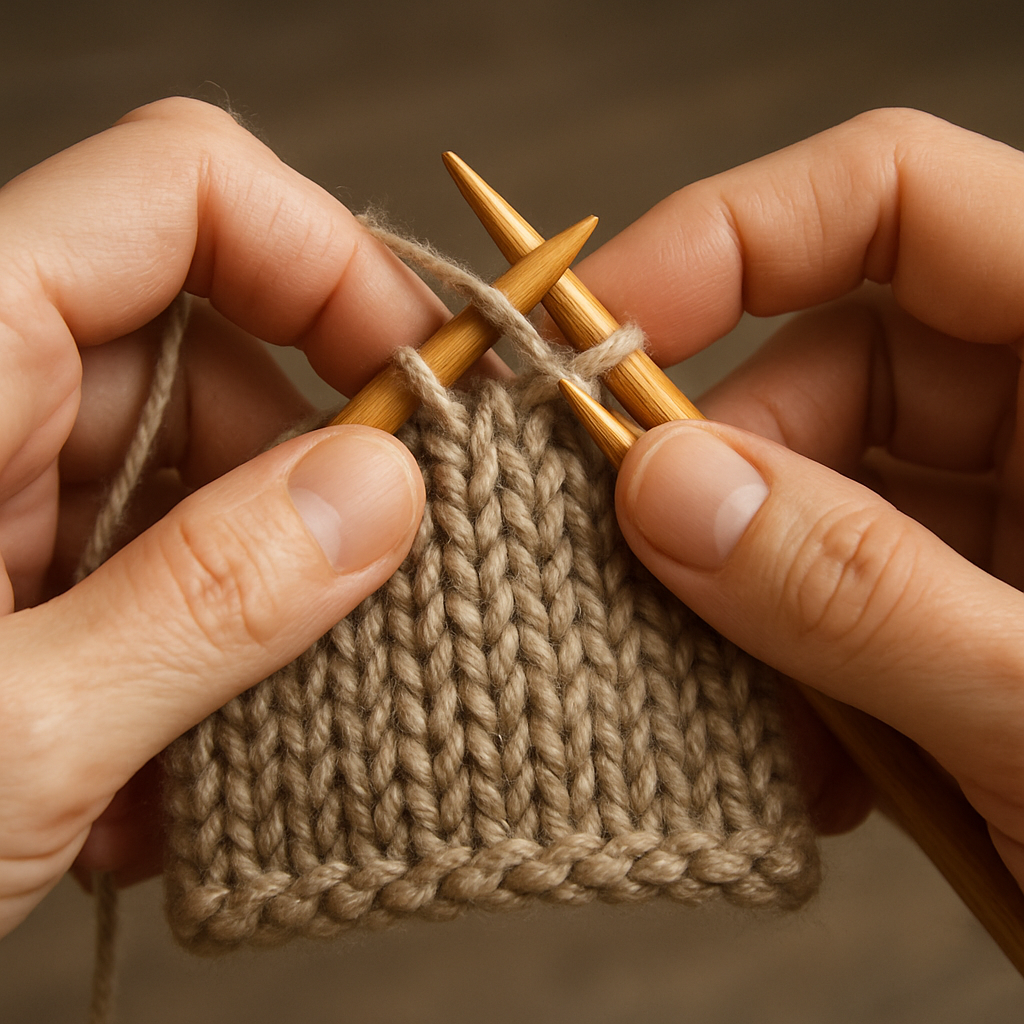
1. Needles: size, material, and feel
Most beginner classes suggest a medium‑weight yarn (often a worsted weight) and a pair of US 8 (5 mm) straight needles. The reason? They’re long enough to hold a few stitches without getting tangled, yet short enough to keep your wrists relaxed.
If you’re allergic to metal, bamboo or wooden needles give a warm, slightly “grippy” experience – perfect for those early rows when you’re still figuring out tension. On the other hand, stainless steel needles glide like a whisper, which can be a lifesaver for tight yarns.
Here’s a quick test: grab a needle, slide a handful of yarn through, and see how the loop feels. If it snaps back too quickly, try a slightly larger size. If it feels loose and floppy, drop down a size.
Need a reliable source? Interweave’s guide to knitting needles breaks down the pros and cons of each material and even lists budget‑friendly options.
2. Yarn: weight, fiber, and color
Yarn can feel like an endless rabbit hole, but for your first project pick something soft, washable, and medium‑weight. Acrylic blends are cheap and easy care, while merino wool gives a buttery texture and natural elasticity.
Colour matters too. Light, solid hues (think ivory, sky‑blue, or soft pink) let you see mistakes quickly, which is a blessing when you’re still learning to count stitches.
Pro tip: buy a “skein sampler” – a small bundle of different yarns from the same weight. You’ll get a feel for how each fiber behaves without breaking the bank.
For a deeper dive on yarn selection, check out Ravelry’s yarn learning center. It walks you through fiber families, ply counts, and how to read yarn labels.
3. Must‑have accessories
- Stitch markers: tiny rings that keep track of pattern repeats. You’ll thank yourself when a lace stitch comes back around.
- Scissors: a small, sharp pair for cutting yarn cleanly. Avoid kitchen shears – they crush the fibers.
- Tapestry needle: a blunt‑ended needle for weaving in ends once the project is done.
- Measuring tape or gauge ruler: essential for checking that your tension matches the class’s gauge.
- Project bag or tote: something to keep your needles, yarn, and pattern PDFs together.
Even a simple coffee‑mug‑sized tote can become your “knitting kit” that you slide into a backpack for a quick stitch‑alongs session.
4. Building a starter kit checklist
Write this down, or paste it into a notes app. Having a visual list stops you from wandering the craft aisle for “just one more thing.”
- Two straight needles, US 8 (5 mm) – wood or metal, whichever feels best.
- One skein of medium‑weight acrylic yarn (approximately 200‑250 g).
- Set of 5‑mm stitch markers (or safety pins if you’re in a pinch).
- Sharp embroidery scissors.
- Blunt tapestry needle.
- Gauge ruler (or a ruler with millimeter markings).
- Project tote or zip‑up bag.
Now that the toolbox is ready, you’ll spend less time hunting for supplies and more time actually knitting. And because you’ve already matched your needles and yarn to the class’s recommendations, you’ll avoid the dreaded “my stitches look nothing like the video” moment.
Quick sanity check before you start
Grab your kit, sit down with your laptop or tablet, and run through these three questions:
- Do my needles match the size suggested in the first lesson?
- Is my yarn the same weight and fiber as the instructor uses?
- Do I have a way to measure gauge and a place to store my pattern?
If you answered “yes” to all three, you’re good to go. If not, pause the video, swap out the item, and then hit play again. Trust me, that tiny adjustment will save you hours of frustration later.
Ready to cast on? With your essential supplies gathered, you’re officially set to turn that screen‑based lesson into real‑world stitches.
Step 3: Master Basic Stitches
Alright, you’ve got your needles, yarn, and a tidy workspace – now it’s time to let those loops talk. The first two stitches, knit and purl, are the alphabet of knitting; everything else is just a word you can read once you know the letters.
Why does this matter? Because the moment you can knit a clean row without dropping a stitch, you’ll feel that little spark of “I’m actually doing this” that keeps you coming back for more. It’s the same feeling you get when you finally get a chord on a guitar – suddenly the whole song seems possible.
Step 1: Nail the knit stitch
Here’s the simplest way to practice:
- Hold the yarn tail in your left hand, the working yarn over the thumb.
- Insert the right‑hand needle into the front of the first stitch from left to right.
- Wrap the yarn clockwise around the right‑hand needle.
- Pull the loop through, then slide the old stitch off the left needle.
Do this slowly five times, then count the stitches. You should end up with the same number you started with. If you lose or gain a stitch, pause the video, rewind, and try again – repetition is the secret sauce.
Pro tip: use a Ravelry stitch guide that shows a clear diagram; visual cues help your brain map the motion.
Step 2: Flip to the purl stitch
The purl is just the knit in disguise. Turn the yarn to the front of your work, then repeat the same motions but with the yarn wrapping counter‑clockwise. Many beginners get tangled because they forget to “bring the yarn to the front” before wrapping.
Try this:
- With the yarn in front, insert the right needle into the stitch from right to left.
- Wrap the yarn counter‑clockwise around the right needle.
- Pull the new loop through and slide the old stitch off.
Practice another five rows, alternating knit and purl. You’ll see the fabric flip from a smooth “V” side to a bumpy “bump” side – that’s your purl showing.
Real‑world example: a starter scarf swatch
Grab a spare skein of worsted acrylic and cast on 30 stitches. Knit every row for four inches (that’s a garter stitch swatch) – you’ll end up with a flat, squishy fabric that’s perfect for testing tension. Then, switch to stockinette by knitting one row, purling the next. Notice how the fabric curls at the edges; that’s a tell‑tale sign you’re on the right track.
Step 3: Combine stitches for texture
Once you’re comfortable with knit and purl, experiment with simple patterns:
- Garter stitch – knit every row. Great for dishcloths because it lies flat.
- Stockinette – knit one row, purl the next. Ideal for scarves that drape nicely.
- 1×1 rib – knit one, purl one, repeat. Gives a stretchy edge for cuffs or hat brims.
Each pattern teaches you how to read repeat markers and how to keep count without losing your place.
Expert insight: checking gauge
Before you launch into a full‑size project, knit a 4‑by‑4‑inch swatch in the stitch pattern you plan to use. Measure the stitches per 4 inches with a ruler; most beginner patterns aim for 16‑20 stitches and 22‑24 rows per 4 inches. If you’re off by more than two stitches, adjust your needle size – a larger needle loosens tension, a smaller one tightens it.
According to Lion Brand’s knitting basics page, getting gauge right the first time can shave weeks off a scarf project, because you won’t have to re‑size later.
Action checklist
Take a minute, grab a pen, and tick these boxes:
- Cast on 30 stitches, knit 4 rows – confirm garter stitch looks even.
- Switch to stockinette, knit‑purl alternation for 4 rows – notice edge curl.
- Try a 1×1 rib for 6 rows – feel the elasticity.
- Measure a 4‑inch swatch in each pattern, record gauge.
- Adjust needle size if gauge is off by more than two stitches.
- Save your notes in a simple “Stitch Log” file for future classes.
When you’ve completed the checklist, you’ve earned the core skill set that every online knitting class for beginners builds on. From here you can jump into simple projects like a coffee‑cup cozy or a baby blanket without fearing “I don’t know what a stitch is.”
So, what’s the next move? Pick one of the three patterns above, set a timer for 20 minutes, and stitch away. You’ll finish the session with a tangible piece of fabric and the confidence that the next lesson’s more complex stitch will feel like a natural extension.
Step 4: Practice with Guided Projects
Now that you’ve got the basics under your belt, it’s time to move from “just knitting” to actually creating something you can wear, gift, or proudly display. Guided projects are the sweet spot: they give you a clear end goal, but they also let you experiment with stitch patterns, colour combos, and tension tricks you just learned.
Why guided projects work
Think about the first time you tried a new recipe with a step‑by‑step video. You follow the instructions, you taste the sauce, and suddenly you’ve built confidence to improvise. The same thing happens with knitting. A well‑structured project breaks down the intimidating “big picture” into bite‑size milestones, so you never feel lost.
According to Learn to Knit Online, beginners who jump straight into a guided scarf or cushion cover report a 40% faster sense of accomplishment compared to those who just practice stitches in isolation.
Pick a project that matches your mood
Here are three classic starter projects, each with a different focus. Choose the one that feels most exciting right now – that emotional hook is what keeps you stitching after the first few rows.
- Simple scarf (30‑40 minutes a day): Perfect for practising knit‑purl alternation and learning how tension changes with different yarns.
- Cushion cover (short‑term, tactile reward): Lets you explore rectangular shaping, seam seams, and optional buttonholes.
- Mini blanket or lap‑throw (week‑long commitment): Introduces larger gauge swatches, colour‑blocking, and the satisfaction of a “big” finished piece.
Real‑world example: The “Coffee‑Cup Cozy”
One of our community members, Maya, started with a 5‑mm needle, a soft acrylic yarn, and a free pattern she found on Ravelry. She set a timer for 20 minutes each evening, and after two weeks she had a finished cozy that fits her favorite mug perfectly. The project gave her a tangible reminder of progress, and she now feels ready to tackle a full‑size scarf.
Step‑by‑step: Turning a guided pattern into a finished piece
- Download the pattern and read the “Materials” section. Note needle size, yarn weight, and any special tools (e.g., stitch markers).
- Cast on the exact number of stitches the pattern calls for. Use the gauge swatch you already have to double‑check that the stitch count matches the intended width.
- Follow the first repeat until you feel comfortable. If a row feels shaky, pause the video tutorial, rewind, and repeat that section.
- Mark repeat points with a stitch marker or a safety pin. This small habit prevents you from losing place in longer patterns.
- Check your progress every 10 rows by measuring the length. Adjust tension by swapping to a slightly larger or smaller needle if you’re off by more than two stitches per 4 inches.
- Finish the project by following the binding‑off instructions, then weave in ends with a tapestry needle. Give the piece a gentle block (wet, shape, dry) to even out any curl.
Tip: Keep a quick “Project Log” in a Google Doc – note needle size, yarn brand, and any adjustments you made. When you start the next guided project, you’ll have a cheat sheet ready.
Quick comparison of beginner‑friendly guided projects
| Project | Core Skill Focus | Typical Completion Time |
|---|---|---|
| Scarf (plain or striped) | Knit‑purl alternation, tension control | 3‑5 days (20 min/day) |
| Cushion cover | Rectangle shaping, seams, optional buttonholes | 1‑2 weeks (15 min/day) |
| Mini blanket | Gauge swatch scaling, colour‑blocking | 2‑3 weeks (30 min/day) |
Expert tip from a seasoned instructor
“When you feel the project dragging, switch yarn colors just for a few rows. The visual change re‑engages your brain and often speeds up your rhythm,” says Alice, founder of Learn to Knit Online. This tiny tweak turns a plateau into a fresh burst of motivation.
Action checklist
- Pick one of the three projects above that matches your current schedule.
- Gather the exact yarn and needle size the pattern recommends.
- Cast on, then knit the first repeat twice without looking at the pattern – just trust your muscle memory.
- Set a timer for 20 minutes; when it dings, note where you are and what’s next.
- Log any needle or tension adjustments in a simple spreadsheet.
- Celebrate the finish line with a photo and share it in the CreativiU community for feedback.
By treating each guided project as a mini‑workshop, you’ll see rapid improvement, and more importantly, you’ll have a growing collection of handmade items to show for it.
Step 5: Track Progress and Get Feedback
Now that you’ve finished a guided project, the real magic begins when you start looking at the data behind your stitches.
Why tracking matters
Think about the last time you tried to improve at anything—running, cooking, playing guitar. You probably kept a log, watched a video, and asked someone for pointers. Knitting works the same way. By writing down gauge, needle changes, and how long each session took, you create a feedback loop that turns guesswork into measurable progress.
Research on adult learning shows that learners who receive regular, concrete feedback are up to 30% more likely to stick with a skill according to the American Psychological Association. That statistic isn’t about knitting specifically, but the principle applies just as well.
Set up a simple tracking system
Grab a spreadsheet, a Google Doc, or even a bullet‑journal page. You don’t need fancy software—just three columns:
- Date & time – note how long you knit.
- Gauge check – count stitches per 4 inches and rows per 4 inches.
- Notes – “needle felt tight,” “yarn slipped,” “mood was upbeat.”
Here’s a quick example you can copy:
2025‑10‑20 | 20 min | 18 sts/4″, 22 rows/4″ | Switched to size 8 needles, tension smoother
Real‑world example: Maya’s mini‑blanket log
Maya, a CreativiU member, wrote down every 10‑row measurement while she worked on a mini blanket. After three days she noticed a steady 0.2 inch gain per session, which told her she was on track for the target size. When the growth stalled, her log showed she’d switched to a thinner yarn without adjusting needle size. The simple note prompted her to go back to the original yarn, and the blanket finished on schedule.
Get feedback from the community
Even the best log can’t replace a fresh pair of eyes. Posting a clear photo of your work‑in‑progress and a brief description of the issue invites useful suggestions. Communities like Ravelry have dedicated “progress‑check” threads where members rate gauge accuracy and suggest needle tweaks.
When you ask for feedback, be specific: “My rib edge is curling after 8 rows—should I tighten my needles or adjust tension?” The more detail you give, the more targeted the advice.
Actionable feedback loop checklist
- Pick a tracking tool (spreadsheet, app, or notebook).
- Record gauge and time after every knitting session.
- Take a photo of the latest rows and upload it to a community forum.
- Ask one concrete question in the post (e.g., “Is my stitch count still on target for a 60‑cm scarf?”).
- Review replies, note any suggested changes, and apply them in the next session.
- Update your log with the adjustment and observe the effect after 2–3 sessions.
Notice how each step creates a loop: you measure, you share, you adjust, you measure again. That loop is the engine that turns a beginner’s “I’m just making things” into a confident maker who can predict project timelines.
Pro tips from expert instructors
Alice from Learn to Knit Online recommends adding a “mood” column. “When you’re stressed, you tend to tighten tension without realizing it,” she says. “Seeing a pattern of ‘tired’ days line up with tighter gauge helps you schedule easier projects on those days.”
Another seasoned teacher, Carlos, suggests using a timer with a gentle alarm. “If you stop the timer at 20 minutes, you get a natural pause to glance at your log and decide whether to keep going or take a short break,” he explains. That habit keeps fatigue from turning into sloppy stitches.
So, what should you do next? Open a new document, jot down today’s date, and write down how many stitches you just knit. Snap a photo, post it to a supportive group, and ask one question. In a week you’ll have a mini‑data set that shows you’re improving, and you’ll have the confidence to tackle that next scarf or cushion cover.
Bonus: Join Knitting Communities for Ongoing Support
Why community matters
Ever felt stuck on a tricky rib or wondered if your tension is just “off today”? You’re not alone. Research shows that people who belong to a learning community are up to 30% more likely to stick with a new skill according to Harvard Business Review. The simple act of sharing a photo or a quick question creates accountability and a flood of fresh ideas.
And it isn’t just theory. On Ravelry, a knit‑and‑crochet hub with millions of members, beginners report that posting a “progress‑check” thread cuts their learning curve in half. The platform’s built‑in groups let you see how others solved the same snag you’re wrestling with.
Pick the right community for your style
Not every forum feels like a coffee chat. Some are hyper‑technical, others are casual “craft‑and‑chat” rooms. Here’s a quick way to decide:
- Goal‑oriented groups – perfect if you want weekly challenges, structured feedback, and a timeline. Think “Beginner Knit‑Along” on Ravelry.
- Interest‑based circles – love color‑blocking or yarn‑dyeing? Look for niche clubs like “Eco‑Yarn Lovers” on Facebook.
- Local meet‑ups – if you crave tactile help, search Meetup.com for “knitting circles near me” and join a monthly stitch‑swap.
Three real‑world examples
1. Maya’s “Coffee‑Cup Cozy” community boost
Maya posted a half‑finished cozy in a Ravelry knit‑along. Within an hour, three members suggested swapping to a slightly larger needle for a looser gauge. She tried it, the stitch tension softened, and she finished the project two days early. The quick feedback turned a potential frustration into a win.
2. Carlos’s weekday accountability group
Carlos joined a private Discord server where members set a “20‑minute stitch goal” each evening. The #daily‑check‑in channel shows a timestamp and a selfie of the work‑in‑progress. After a month, Carlos logged a 45% increase in rows completed per session because the ritual became social rather than solitary.
3. Lina’s cross‑craft mentorship
Lina, a beginner, signed up for a Facebook group that pairs newcomers with seasoned makers for a 30‑day mentorship. Her mentor sent short video clips explaining how to tension the yarn on larger needles. The direct, visual guidance helped Lina master the stockinette stitch faster than any written tutorial.
Step‑by‑step: How to join and get the most out of a knitting community
- Identify your need. Are you looking for quick troubleshooting, project inspiration, or regular accountability? Write it down.
- Search with specific keywords. Type “online knitting community beginner” into Google or the search bar of your favorite platform. Bookmark the top three that match your need.
- Create a concise intro post. Mention your current project, the yarn you’re using, and one question you have. Example: “Hey all, I’m working on a 30‑gauge scarf with Merino yarn and keep getting uneven edges – any tips?”
- Engage within 48 hours. Comment on at least two other members’ posts. Community reciprocity means you’ll get faster, richer feedback.
- Set a weekly check‑in habit. Choose a day (e.g., Sunday evenings) to post a photo of your progress and a brief note on what worked or what still bugs you.
- Track the advice. Add a column to your project log titled “Community Tips” and note which suggestion you tried, the outcome, and any adjustments.
- Celebrate milestones publicly. When you finish a piece, share the finished photo, thank the members who helped, and tag the group. This closes the feedback loop and fuels future support.
Expert tip: Mix online and offline
Alice from Learn to Knit Online swears by a hybrid approach: spend 30 minutes a week in a digital forum, then attend a local stitch‑and‑sip gathering once a month. The face‑to‑face time reinforces the online advice and gives you a chance to practice new techniques under real‑world eyes.
Quick checklist you can copy
- ✏️ Write down your main goal (troubleshoot, motivation, mentorship).
- 🔍 Search and shortlist 3 communities.
- 🖼️ Post an intro with a project photo.
- ⏰ Set a weekly progress post reminder.
- 📓 Log every piece of community advice and its result.
- 🎉 Share your finished piece and thank the group.
By turning a solitary hobby into a shared adventure, you’ll not only sharpen your stitches but also build friendships that keep you coming back to the loom. So, pick a community today, say hello, and watch your knitting journey accelerate.
FAQ
What should I look for in online knitting classes for beginners?
When you’re scanning the market for online knitting classes for beginners, start with the basics: clear video lessons, step‑by‑step PDFs, and a supportive community. Look for instructors who explain why a stitch matters, not just how. A good platform will let you pause, replay, and ask questions without feeling rushed. And make sure there’s a structured progression so you don’t jump from garter to cables before you’ve mastered the tension.
How much time do I need to dedicate each week?
Most beginners find that 20‑30 minutes a day is enough to keep the momentum going. If you can carve out a short slot three times a week, you’ll see steady progress without burning out. The key is consistency—not marathon sessions. Set a timer, pull out your needles, and treat it like a coffee break with your yarn. And if a week gets hectic, just pick up where you left off; the skill won’t vanish.
Are there free options that still give good support?
Yes, there are plenty of free resources that still feel like a classroom. You can start with YouTube channels that break down the knit‑and‑purl basics, then join a free Discord or Facebook group where members post video critiques. The trade‑off is that you won’t get a personalized learning path, so you’ll need to be disciplined about tracking your progress. Still, many hobbyists launch their first scarf without spending a dime.
Do I need any special equipment before I start?
You really only need a pair of medium‑weight needles (size 8 or US 5) and a smooth, light‑weight yarn to start. A simple cotton or acrylic worsted weight works great because it’s forgiving and cheap. A basic stitch marker and a pair of scissors are nice extras, but you don’t have to buy a fancy kit right away. And if you already have a scrapbook of yarn scraps, that’s perfect practice material.
How can I stay motivated when learning online?
Staying motivated online is all about tiny wins and visible progress. Keep a photo log of each session—one picture of the swatch, one of the finished row. Celebrate when you hit a milestone, like mastering the stockinette stitch or completing a 20‑row section. Share those photos in a community thread; the likes and comments act like a virtual high‑five. And if you feel stuck, schedule a live Q&A with an instructor to reset your confidence.
Can I get feedback on my stitches in a virtual class?
Absolutely—you can get real‑time feedback without ever leaving your couch. Many platforms embed a video‑submission feature where you upload a short clip of your knitting and the teacher adds timestamped notes. If that’s not built‑in, a simple workaround is to post the clip in a private Discord channel and ask for critique. Look for courses that encourage you to share your work; that interaction turns a solitary hobby into a collaborative learning experience.
Is it worth paying for a subscription versus buying individual courses?
Paying for a subscription can be a smart move if you plan to explore several projects over time. A monthly membership often unlocks a library of courses, live workshops, and a members‑only forum where you can ask questions on the fly. Buying a single class makes sense if you only want to learn one stitch or finish a specific pattern. Weigh your learning goals against your budget, and remember that a trial month is a low‑risk way to test the waters.
Conclusion
If you’ve made it this far, you probably already feel the pull of a new stitch, a fresh project, and a community that cheers you on. That’s exactly what online knitting classes for beginners are built to deliver – clear guidance, instant feedback, and a sense of belonging.
Remember Maya’s cozy, Carlos’s 20‑minute goal, and Lina’s mentorship. Those stories aren’t fairy‑tales; they’re proof that a well‑chosen class can turn frustration into momentum in a single session.
So, what’s the next step? Pick one platform that offers a trial, sign up, and post your first progress‑check photo. Keep a simple log of what you tried, what the instructor suggested, and how it felt.
Don’t let “I’m too busy” become an excuse. Even five minutes a day adds up, and the community will keep you honest. As you stitch, you’ll notice your confidence growing faster than the fabric itself, still.
Ready to turn those yarn‑tangled doubts into finished projects? Dive into an online knitting class for beginners today, share your first stitch, and watch the ripple effect of support propel you forward.
And remember, the journey isn’t about perfection; it’s about showing up, learning, and enjoying each loop along the way together.
Leave a Reply