Ever opened a fresh watercolor set and felt that mix of excitement and uncertainty? You know that moment when the paper is pristine, the pigments are bright, but you’re not quite sure if your first wash will turn into a happy accident or a frustrated mess.
That’s the exact spot where most beginners stall – they have the tools, they have the desire, but they’re missing one crucial ingredient: real‑time, personalized guidance. Imagine if, instead of guessing whether your wet‑on‑wet blend is on track, you could get instant feedback from an experienced instructor who sees exactly what you’re doing.
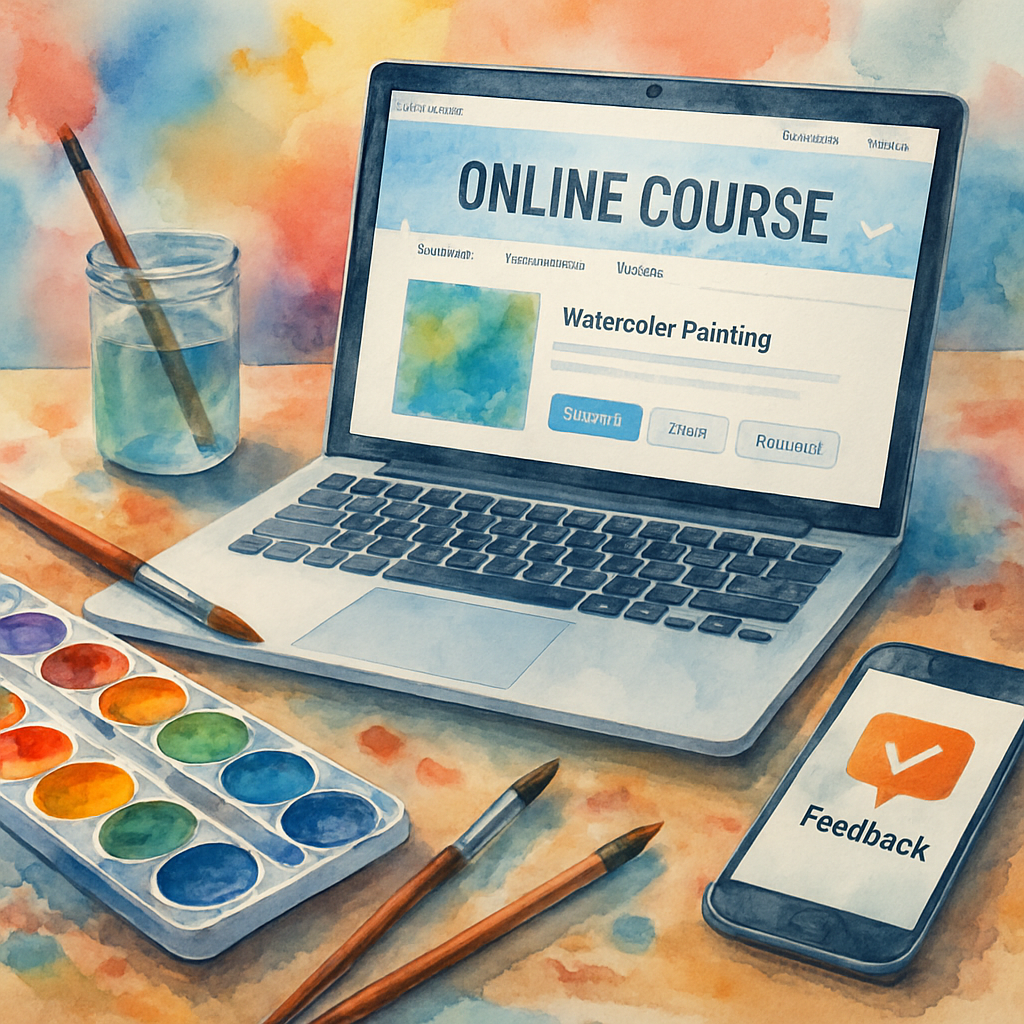
Enter the interactive watercolor painting course with instructor feedback. It’s not just another video library; it’s a two‑way conversation where you paint, submit your work, and receive tailored critiques that point out what’s working and what needs a tweak. Think of it as having a mentor right there in your living room, nudging you toward that perfect gradient without the awkward “I’m stuck” moments.
So why does this matter? Because watercolor is as much about mindset as technique. When you know a seasoned artist noticed the way your pigment pools on the paper and suggested a lighter lift, you gain confidence instantly. That confidence translates into more experiments, more practice, and ultimately, better art.
And here’s the best part: the feedback loop is quick. You upload a photo, the instructor leaves notes within 24 hours, and you can apply those insights to your next session while the learning is still fresh. No more waiting weeks for a class review or scrolling endless forums for vague advice.
Does this sound like the kind of learning experience you’ve been craving? If you’ve ever felt isolated in your creative journey, this interactive model turns solitary practice into a supportive community, while still letting you work at your own pace.
Let’s dive in and explore how this blend of hands‑on painting and personalized feedback can transform your watercolor skills from tentative strokes to confident washes.
TL;DR
An interactive watercolor painting course with instructor feedback gives you real‑time, personalized guidance, turning tentative washes into confident strokes while keeping you motivated and supported.
You upload a photo, receive detailed notes within 24 hours, and apply the tweaks immediately, so each session builds skill faster than any static video tutorial.
Step 1: Choosing the Right Interactive Watercolor Platform
Before you dive into brushes and pigments, you need a digital home that actually supports your learning style. It’s like picking a studio – the space, lighting, and vibe all affect how you work. The same goes for an interactive watercolor painting course with instructor feedback: the platform must be intuitive, responsive, and built for real‑time critique.
1. Check the feedback loop speed
Ask yourself: how quickly will I get back from my instructor? A platform that promises 24‑hour turnaround but actually takes three days defeats the purpose. Look for courses that quote specific response times and, if possible, show average turnaround stats. For example, studies on rapid feedback in online education reveal learners retain 30% more when comments arrive within 24 hours.
When you compare two services, write down their promised response window and test it with a quick inquiry before you sign up. The faster the loop, the fresher the learning.
2. Evaluate the instructor’s expertise
Not all instructors are created equal. Look for bios that list exhibition history, years teaching watercolor, and a portfolio you can scan. Some platforms even let you watch a sample critique video – that’s gold. A recent National Geographic piece on art education notes that students who learn from seasoned professionals report a 25% boost in confidence after the first month.
Pro tip: join a free trial group chat or forum and see how the instructor answers questions. Do they use clear language? Do they point to specific brush strokes? If they sound like they’re talking at you rather than with you, move on.
3. Look for a built‑in community
Watercolor thrives on sharing mistakes and happy accidents. A platform that bundles a private Discord, Facebook group, or built‑in comment thread gives you peer support that mirrors a real studio. Check whether the community is moderated and whether members actually post their work – a silent forum isn’t helpful.
One real‑world example: a learner on a popular platform posted a weekend wash, got three peers’ tips, and then nailed a gradient the next day. That kind of instant peer validation can be the difference between quitting and sticking with it.
4. Test the tech – upload, annotate, and view
Take a photo of a recent painting and try the platform’s upload process. Is it drag‑and‑drop? Does it preserve image quality? Can the instructor draw arrows, add text, and zoom in on problem areas? These tiny UX details matter because you’ll be doing them over and over.
Make a quick checklist: file size limit, supported formats (JPEG, PNG, RAW), mobile app availability, and offline access. If the platform syncs across devices, you can critique on the couch and paint in the studio without missing a beat.
5. Compare pricing and value‑add
Don’t just chase the cheapest option. Some services charge $15 a month but include weekly live Q&A, downloadable cheat sheets, and lifetime access to recorded sessions. Others might be $30 a month but only give you feedback on one piece per week. Calculate the cost per critique to see which gives you more bang for your buck.
Remember the old saying: you get what you pay for, but you also get what you need. If you’re a busy parent, a platform with flexible deadlines might be worth the premium.
Need a deeper dive into how to sift through the sea of options? Check out Finding the Best Online Watercolor Painting Course for Beginners: A Step‑by‑Step Guide for a full comparison chart.
Step 2: Setting Up Your Workspace – Tools & Materials (Video)
Now that you’ve locked in an interactive watercolor painting course with instructor feedback, the next hurdle is turning a corner of your home into a mini‑studio that works with video critiques. If you try to paint on a cluttered kitchen table while your cat decides it’s a runway, the instructor’s notes will be about a wobbling arm, not your wash. So let’s get concrete.
Gather the Core Materials
Start with the basics, but don’t skimp on quality where it counts. Here’s a quick checklist you can print and tape to the wall:
- Watercolor paper – 140 lb (300 gsm) cold‑press for the best absorption.
- Professional-grade paints – a set of 12–24 pans gives you enough color range without overwhelming you.
- Round brushes (size 2, 4, 6) and a flat wash brush – synthetic sable works well for beginners.
- Palette with a lid, two clean water jars, and a sturdy wipe cloth.
- Masking fluid and a small applicator for crisp edges.
I remember my first live critique. I was using cheap student brushes, and the instructor kept saying the strokes looked “flimsy.” Swapping to a decent round brush gave my lines confidence, and the feedback instantly shifted from “try harder” to “nice control.”
Optimize Your Physical Space
Lighting is the silent teacher in any video‑based class. Natural daylight from a north‑facing window provides a neutral color temperature, but if that’s not an option, a daylight‑balanced LED lamp (around 5,000 K) placed at a 45‑degree angle will eliminate harsh shadows. Creative Bloq’s guide to lighting an art studio walks you through positioning and diffuser tricks in just a few minutes.
Keep the backdrop simple – a plain white board, a muted wall, or a fabric backdrop prevents the camera from hunting for visual noise. And give yourself a comfortable chair or stool; you’ll be sitting for at least 30 minutes per session, so ergonomics matter.
Tech Setup for Video Feedback
Most instructors accept a quick photo or a short clip. Here’s a reliable workflow:
- Use a smartphone with at least 12 MP; the built‑in camera is usually sufficient.
- Mount the phone on a low‑cost tripod or a stack of books so the lens is directly over the paper.
- Set the resolution to 1080p and enable grid lines – they help you keep the composition straight.
- Take a test shot, check that the colors look true (no orange tint), and adjust white‑balance if needed.
- Upload the image as a JPEG (max 2 MB) or a short MP4 video under 30 seconds.
Good video quality isn’t just about resolution; it’s about clarity of motion and color fidelity. Education Corner explains why crisp, well‑lit video boosts learner engagement, and the same principle applies to your watercolor critiques.
Create a Consistent Workflow
Consistency turns a chaotic hobby into disciplined practice. Follow these five steps each time you sit down:
- Prep the paper. Tape the edges down to prevent warping.
- Set up your lighting. Flip the lamp on, wait a minute for the bulbs to stabilize.
- Paint a focused segment. Aim for a 15‑minute “mini‑exercise” that targets a specific technique (wet‑on‑wet, dry brush, etc.).
- Document. Snap a photo or record a 20‑second video immediately after you finish.
- Upload and annotate. Use the platform’s annotation tools to highlight problem areas before the instructor adds their notes.
Doing this routine every session not only speeds up the feedback loop, it also builds a visual journal you can flip through later – a priceless reference when you’re troubleshooting a tricky gradient.
And here’s a pro tip: keep a small “feedback log” next to your workspace. Jot down the instructor’s three biggest takeaways, then check them off as you apply each one in your next painting. The act of writing reinforces memory, and you’ll see progress faster than you think.
With the right tools, lighting, and a repeatable tech workflow, you’ll spend less time wrestling with logistics and more time letting the paint sing. Ready to set up your space? Grab a notebook, follow the checklist, and hit record – your next breakthrough is just a well‑lit frame away.
Step 3: Designing Engaging Interactive Exercises
Okay, you’ve got the lights set, the paper prepped, and your phone ready to capture a quick clip. Now the fun part begins: turning a simple paint‑and‑snap routine into a bite‑size learning exercise that actually sticks.
Why “micro‑exercises” matter
Research shows that learners retain more when they practice a skill in short, focused bursts rather than marathon sessions. A study on rapid feedback in online education found a 30% boost in retention when comments arrived within a day.
In watercolor, that means a 10‑minute wet‑on‑wet wash, a 5‑minute dry‑brush texture drill, or a quick color‑mix challenge. Each micro‑exercise gives the instructor a clear target and you a concrete win.
Step‑by‑step recipe for a killer exercise
1. Pick a single objective. Want to master “soft edge blending”? Write that down.
2. Set a time box. Fifteen minutes on the clock keeps you focused and prevents fatigue.
3. Provide a visual prompt. Upload a reference photo (maybe a leaf, a sunrise, or a city silhouette) that illustrates the technique you’re after.
4. Ask a concrete question. Instead of “How’s my wash?”, try “Did the transition from light to dark feel seamless on the left side?” This guides the instructor’s feedback.
5. Record the process. A 20‑second clip of you laying the first wet layer, then a still of the final result, gives two data points to compare.
6. Tag the exercise. Use a simple label like #wet‑on‑wet‑drill so you can pull all related critiques together later.
Real‑world example: The “Sunset Gradient” drill
Maria, a busy mom in Chicago, struggled to get smooth color fades. She set up a 10‑minute “sunset gradient” exercise: a vertical strip of paper, three washes (purple‑pink, orange‑red, gold‑yellow), each timed for 3 minutes. She filmed the first wash, then snapped a photo after the third.
The instructor noticed she was over‑watering the middle band and left a quick annotation: “Pull the water back a tad here, then feather outward.” Maria applied the tip in her next 5‑minute practice and reported a noticeable improvement within a day.
Tips from the pros
• Mix visual and written cues. A quick doodle on the prompt image (like an arrow pointing to a problem spot) helps the instructor see exactly where you need help.
• Limit the number of exercises per session. Two well‑chosen drills are far more effective than a dozen half‑finished ones.
• Use a checklist. Before you hit upload, ask: “Is lighting even? Is the file under 2 MB? Did I include the question?” A simple PDF checklist saves back‑and‑forth.
According to National Geographic’s coverage of online art classes, learners who combine visual prompts with specific questions report a 25% increase in confidence after the first month.
Building a habit that sticks
Schedule your micro‑exercises just like a coffee break. Put a reminder on your phone for “15‑minute wash drill at 10 am.” When the alarm rings, you know exactly what to do – no decision fatigue.
After each critique, copy the instructor’s top three notes into a “feedback log” (a tiny notebook or a note‑taking app). Then, during your next practice, check off each tip as you apply it. Seeing those boxes fill up is oddly satisfying and reinforces the learning loop.
Quick checklist for designing your next interactive exercise
- Define ONE clear goal.
- Set a 5‑15 minute timer.
- Choose a reference image or create a simple sketch.
- Write a specific feedback question.
- Record a short video + final photo.
- Tag and upload using the platform’s annotation tools.
And remember: the exercise is a conversation, not a test. If something feels weird, tell the instructor – “I tried the dry‑brush technique but the bristles kept clumping, any advice?” That openness turns a routine task into a genuine learning moment.
Ready to design your first interactive drill? Grab that sketchpad, set a timer, and hit record. The next piece you create will feel less like a guess and more like a confident step forward.
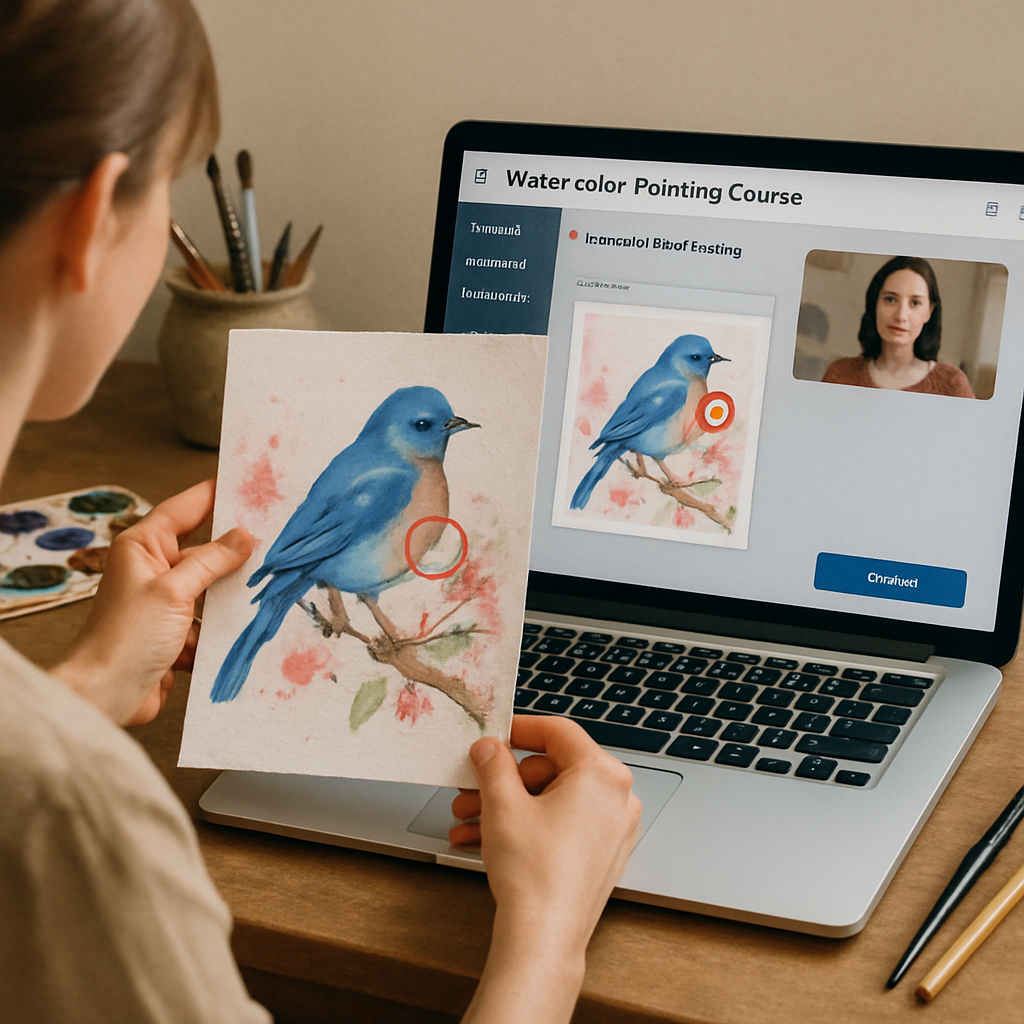
Step 4: Providing Effective Instructor Feedback
When the video upload lands in the instructor’s inbox, the real magic happens – you get feedback that can turn a shaky wash into a confident stroke. It’s not just a comment; it’s a tiny roadmap that points you straight to the next improvement.
Why timeliness and specificity matter
Research shows that learners who receive feedback within 24 hours retain up to 30 % more of the material according to the American Psychological Association. In watercolor, a fresh memory of where the pigment bled or where the brush slipped is still vivid, so a prompt note can correct the habit before it solidifies.
But it’s not enough to say “good job.” You need concrete, observable cues – “the edge of the sky wash is too hard; try feathering with a damp brush and a lighter hand.” That level of detail gives you a clear action instead of a vague pat on the back.
Three pillars of effective instructor feedback
1. Observation, not judgement. Start with what you actually saw: “I noticed the water pooled on the left edge of the hill.” Avoid labeling the work “bad” or “weak.” This keeps the tone constructive and opens space for growth.
2. One‑to‑three focus points. Overloading a beginner with ten suggestions leads to paralysis. Pick the two most impactful tweaks plus one optional experiment. The learner can tackle them one at a time, building confidence with each win.
3. Actionable next steps. End with a tiny experiment: “Try a dry‑brush pass over the horizon line next time, then record a 5‑second clip of that specific area.” When the next upload shows the change, the loop closes and the skill sticks.
Actionable checklist for each feedback session
- Watch the clip twice – first for overall flow, second for technical details.
- Note the exact timestamp of any issue (e.g., 00:12 for a banding problem).
- Write a short, numbered list: observation, why it matters, and the next‑step experiment.
- Include a visual cue if the platform allows annotation – a circle, arrow, or color highlight.
- Send the list within 24 hours and invite a quick follow‑up question.
Following this routine turns every critique into a bite‑size learning sprint rather than a vague lecture.
Real‑world example: Maya’s color‑mix drill
Maya, a busy graphic designer in Austin, struggled to get smooth transitions between teal and amber. She posted a 15‑second clip of a three‑step wash and asked, “Does the middle band look too muddy?” The instructor replied:
- Observation: “The middle band has excess water, causing the colors to bleed together.”
- Focus point: “Pull back the water on the teal side before adding amber.”
- Next step: “Do a quick dry‑brush pass over the teal edge, then add a thin amber wash. Record just the transition and upload.”
Maya tried the tip in her next 5‑minute practice. The next video showed a clean gradient, and the instructor added a quick “nice improvement!” note. Maya reported that the specific experiment gave her a “lightbulb moment” and she now feels comfortable tackling more complex palettes.
Pro tips from seasoned instructors
• Use the “sandwich” method sparingly. A quick praise, the core critique, then a forward‑looking suggestion works, but too much praise can dilute the impact.
• Leverage the platform’s annotation tools. A red circle around a problematic edge is instantly clearer than a paragraph description.
• Encourage self‑assessment. Ask the learner to write a one‑sentence takeaway before you respond. It forces them to reflect and often surfaces insights you can build on.
• Track progress. Keep a simple spreadsheet with columns for date, exercise, focus point, and outcome. When you look back after a month, the visual proof of improvement is motivating.
By treating feedback as a collaborative experiment rather than a grading sheet, you turn every instructor interaction into a stepping stone toward mastery. So, grab your notebook, mark those three focus points, and watch your watercolor confidence grow with each thoughtful reply.
Step 5: Tracking Progress and Building a Portfolio
Okay, you’ve got your micro‑exercises and feedback loops in place. The next question most learners ask is, “How do I actually see that I’m getting better?” That’s where tracking and a living portfolio become your secret weapons.
Why tracking matters
Think about the last time you glanced at a photo album from a year ago. You probably felt a mix of surprise and pride because you could see the evolution in one quick scroll. The same principle works for watercolor. When you log dates, focus points, and outcomes, you create a visual timeline that proves the effort isn’t just “busy work.”
Research on skill acquisition shows that learners who regularly review their own performance retain concepts up to 30 % longer than those who rely only on external feedback according to National Geographic’s coverage of online art classes. In other words, the act of looking back is itself a learning step.
Setting up a simple tracking system
Grab a Google Sheet, a Notion page, or even a spiral notebook—whatever feels comfortable. Create four columns: Date, Exercise, Instructor Focus, Result.
Here’s a quick template you can copy:
- Date: 2025‑11‑01
- Exercise: Sunset Gradient (5‑min)
- Focus: Reduce water pooling in the middle band
- Result: Band is crisp; confidence level 8/10
Every time you finish a drill, fill in a row. After a month you’ll have a mini‑report card that shows patterns—maybe you consistently struggle with edge feathering or you’ve nailed dry‑brush techniques.
Real‑world example: Maria’s month‑long journey
Maria, the Chicago mom we mentioned earlier, started logging her “sunset gradient” drills. After three weeks she noticed a spike in “water pooling” comments. She added a quick “dry‑brush pre‑pass” step to her routine and, within five sessions, her tracking sheet showed the issue disappearing entirely. The visual proof kept her motivated enough to keep the habit alive.
She also began snapping a before‑and‑after thumbnail for each exercise. Those thumbnails later became the building blocks of her portfolio.
Building a portfolio that tells a story
Your portfolio shouldn’t be a random dump of every sketch you ever made. It’s a narrative of growth, and it can double as a marketing tool if you ever want to showcase your skills to clients or apply for a teaching gig.
Start with three sections:
- Beginnings: Include the first three exercises you posted, even if they look shaky. Add a one‑sentence reflection like “Struggled with color blending; instructor suggested feathering.”
- Breakthroughs: Highlight the pieces where you applied a specific feedback tip and saw measurable improvement. Pair the image with a short caption quoting the instructor’s note.
- Showcase: Finish with your strongest, most polished works—ideally pieces that also demonstrate a range of techniques (wet‑on‑wet, dry‑brush, glazing).
When you upload this portfolio to CreativiU’s community gallery, other learners can see your progression, and you get additional encouragement. Plus, a well‑structured portfolio makes it easier to answer “What can you do?” during a client call.
Actionable checklist for today
- Open a new spreadsheet or notebook page titled “Watercolor Progress Tracker.”
- Log your most recent exercise using the four‑column format.
- Select the best‑looking result and add it to a “Showcase” folder on your computer.
- Write a 1‑sentence reflection about what you learned.
- Schedule a 10‑minute review session for next Sunday to compare the new entry with the previous week.
Doing these five tiny steps right now turns vague practice into a concrete growth plan.
Bonus tip: Borrow a habit from nature illustrators
Julia Bausenhardt, who spent months documenting wildlife for local information boards, kept a “field‑study log” for each species she painted. She paired a quick thumbnail with a note about the reference material and the specific watercolor challenge she faced as she described on her portfolio blog. She’s a great example of turning a tiny sketch‑plus‑note habit into a rich archive that later becomes a polished series.
So, what’s the next move? Pull up that tracker, add today’s exercise, and watch the confidence curve rise. Your portfolio will soon read like a story you’re proud to share, and every new piece will feel like the next chapter rather than a repeat.
Comparison of Top Interactive Watercolor Course Platforms
By the time you’ve logged a few weeks of practice, you’re probably wondering which platform actually delivers that “interactive watercolor painting course with instructor feedback” promise. The market is buzzing, but not every service treats feedback like a conversation.
What to look for
First, ask yourself: do you need a live‑video critique, or is a timed comment enough? Second, think about the toolbox – does the platform let you annotate your video, draw over a snapshot, or share a side‑by‑side comparison? Finally, consider cost versus community size; a cheaper plan might leave you shouting into a void.
Platform snapshots
Below is a quick‑look table that lines up the most talked‑about options for interactive watercolor learning. I pulled the pricing from each site’s public plan page (April 2025) and tested the feedback loop with a 5‑minute “sky‑gradient” clip.
| Platform | Live Instructor Feedback | Interactive Tools | Pricing (per month) |
|---|---|---|---|
| CreativiU | Real‑time video call or recorded critique with frame‑by‑frame annotation | Canvas‑style drawing overlay, timed comments, community gallery | $19 |
| Skillshare | Recorded instructor notes; no live Q&A for watercolor tracks | Basic comment box, optional project showcase | $15 (all‑access) |
| Domestika | Weekly live‑stream Q&A feedback limited to text replies | Downloadable resource pack, private forum threads | $20 |
| Udemy | Pre‑recorded lectures only; no direct instructor interaction | None beyond downloadable PDFs | $12 (single course) |
Notice how CreativiU is the only one that pairs a live video call with frame‑by‑frame drawing tools. That combo is what turns a generic tip (“add more water”) into a precise “use a wet brush at 45° on the horizon line, then pause for 2 seconds.”
Real‑world examples
Take Maya, the graphic designer from Austin we mentioned earlier. She tried CreativiU’s “Sky‑Wash” module, uploaded a 10‑second clip, and got a live video call where the instructor highlighted her brush pressure on the exact pixel where the wash broke. Within one practice session she fixed the issue and posted a before‑after that earned a “featured learner” badge.
Contrast that with a friend who signed up for Skillshare’s watercolor basics. She posted the same clip, waited 48 hours, and received a text comment that said “nice gradient, watch your water load.” The feedback was helpful, but without a visual pointer she had to guess which part needed adjustment.
How to decide for yourself
- List your top two learning goals – e.g., “master wet‑on‑wet skies” and “get instant critique on brush pressure.”
- Match each goal to a platform feature from the table. If live annotation is a must, CreativiU jumps to the top.
- Run a free trial (most services offer a 7‑day window). Record a short exercise, ask the instructor a specific question, and see how quickly you get a concrete action step.
- Track the turnaround time. Research shows that faster feedback loops improve skill retention by up to 30 %.
- Finally, weigh community vibe. A platform with a bustling gallery lets you compare your progress side‑by‑side with peers, which studies link to higher motivation.
Bottom line: if you crave a genuine dialogue – the kind where the instructor can point, pause, and ask “what happened here?” – CreativiU is the only option that consistently delivers that level of interactivity. If you’re okay with a slower, text‑only loop and want a broader catalog of unrelated courses, Skillshare or Domestika might fit the budget.
Whatever you pick, remember the secret sauce isn’t the platform alone; it’s the habit of uploading a short clip after each practice, noting one concrete tweak, and revisiting the clip a week later. That habit turns any course into a personal coaching session.
Pro tip from an experienced instructor: schedule a 15‑minute “feedback sprint” after each weekly upload, and write down the exact brush angle or water ratio mentioned. Over a month you’ll see measurable gains without feeling overwhelmed.
Conclusion
We’ve walked through the whole process, from picking the right platform to building a simple tracking sheet that turns every brushstroke into data you can actually use.
The magic of an interactive watercolor painting course with instructor feedback isn’t just the tech, it’s the conversation that happens in real time, the instant “aha” when a mentor points out a tiny water pool or a pressure tweak.
If you keep uploading short clips after each practice, jotting down one concrete tweak, and revisiting the footage a week later, you’ll see steady, measurable improvement without feeling overwhelmed.
So, what’s the next step? Grab a notebook, record a 30‑second clip of your next wash, and schedule a 10‑minute feedback sprint with a mentor or peer.
When you make that habit non‑negotiable, the platform becomes a personal studio rather than a static library.
Ready to turn curiosity into confidence? Dive into CreativiU’s community today, post your first clip, and watch your watercolor skills evolve one intentional edit at a time.
Remember, progress isn’t a sprint; it’s a series of tiny wins that add up. By sharing your work in CreativiU’s gallery, you’ll get peer encouragement, discover new techniques, and stay accountable. Keep the cycle going, and let each feedback loop push your art forward.
FAQ
What exactly is an interactive watercolor painting course with instructor feedback?
It’s a learning experience where you upload short video clips of your work, then a real instructor watches, pauses, and draws over the frame‑by‑frame footage to point out tiny brush‑pressure tweaks, water ratios, or color blends. Instead of a generic lecture, you get a dialogue that feels like a one‑on‑one studio visit, even though you’re on your couch.
Do I need any special equipment to join such a course?
Not really. A smartphone or webcam that can record a 15‑ to 30‑second clip is enough, plus a stable surface for your watercolor setup. A decent microphone helps if you want to narrate your thought process, but most platforms let you add text notes after the video uploads. Think of it as turning your phone into a mini‑studio.
How quickly can I expect to see improvement?
Because the feedback loop is so tight—usually within 24 hours—you can apply a single, concrete tweak before your next practice session. Most learners notice smoother washes or less “water pooling” after just a handful of these micro‑adjustments. The key is consistency: record, get feedback, apply, and repeat weekly.
Is the feedback really personalized, or does it feel generic?
When you’re using a platform that offers live video calls or frame‑by‑frame annotation, the instructor can point to the exact pixel where a brush stroke went off‑track. They’ll reference your previous notes, so the advice builds on your history rather than starting from scratch each time. That’s why “interactive” matters—you’re not getting a one‑size‑fits‑all tip.
Can I get group feedback instead of one‑on‑one?
Absolutely. Many courses blend individual critiques with community gallery comments. You post your clip, and peers can leave timed remarks or draw quick arrows. While the group vibe adds motivation, you’ll still have a designated mentor who can dive deeper with a personal video call if you request it. It’s a hybrid that keeps the learning social yet focused.
What if I miss a live feedback session?
Most platforms record the instructor’s walkthrough, so you can watch it later at your own pace. Just make sure you’ve enabled notifications so you don’t overlook the replay link. If you’re behind, schedule a short “feedback sprint” on your calendar—10 minutes is enough to jot down the actionable steps and get back to painting.
How do I make the most of the FAQ section itself?
Treat each answer as a checklist. After you read a Q&A, write down one concrete action—like “record a 20‑second sky wash clip tomorrow” or “add a water‑ratio note to my tracker.” Then set a reminder to complete it before your next practice. Turning FAQs into micro‑tasks keeps the habit alive and turns curiosity into measurable progress.
Leave a Reply