Designing and creating something to wear is incredibly satisfying.
It gives you freedom to make a well-fitting piece that works well with your other clothes. And is custom tailored to you, in your favorite colors and patterns.
Blouses are such versatile items that can be combined with all sorts of other things, including jeans, skirts, shorts, and leggings.
And if like me, you love the fun, challenge and reward of a DIY project, learning how to sew a blouse from scratch may well be on your to-do list.
In this post I’ll share some tips and tricks that I’ve found really helpful from my research.

What you will need to sew a blouse
What you’ll need depends in part on the type of blouse you want to make. But the basic things you’ll need include:
- a sewing machine
- tape measure
- ruler
- scissors
- paper for the pattern
- pins and needles
- threads
- a marker and tailor’s chalk
- an iron
- fabric
Also ensure you have good lighting and adequate work space.
Searching for the perfect fabric

When you’re choosing the fabric for your blouse, there are some key things to consider:
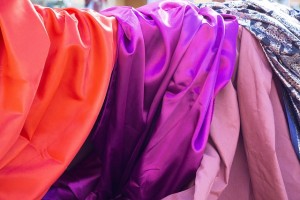
Besides the color, it’s important to think about the weightiness of the fabric for the look you want to create. Do you want a floaty, light blouse, or a heavier one?
In the fabric store, handle the fabrics to check they are the right weight for your project.
Measuring and fitting

As women it can be difficult to find well-fitting clothes for our body’s specific measurements. We are all unique and using standardized clothing patterns can cause problems.
If you follow a tutorial, it will usually come with instructions for the specific areas you need to measure, like the bust area. And this will help you make a fitted garment.
If you choose to work with patterns of a set size, you’ll probably need to make some adjustments. Here’s a very helpful post: The Beginner’s Guide: Full Bust Adjustment.
Taking your own measurements can be tricky. It does take time, but it gets easier with practice. When you’re beginning, try adding a little extra in the measurements so you have a bit more margin for error. This gives you room to fix any mistakes.
How to take your own measurements is a really helpful video which will guide you through the process.
Designing your blouse
It’s a good idea to start with a basic blouse style. But as your sewing abilities improve, you’ll be able to adapt the design creatively for further blouses. You might find inspiration in your wardrobe, and could try creating a top to complement something you love but rarely wear.
A blouse has all sorts of elements that you can personalize and adapt. You can vary:
- Sleeve length
- Cuff type
- Neckline
- Collar
- Pockets
- Buttons
- Zipper
Here are some of the easier necklines for beginners to make:
- Jewel: a high, round neckline
- V-neck: cut in the shape of a “V” in the front or the back of your blouse
- U-neck: cut in the shape of a “U” that has the same width as the base of the neck
- Square: square or angular neckline in the front of your blouse
- Florentine: very wide angular or square neckline (almost from shoulder to shoulder)
- Boat: wide horizontal neckline, high and located in front and back
Another aspect to consider is that different seaming styles create different finishes. French seams complement lightweight fabric, and you’ll see that other seams produce a different look. Have a look online and choose which one suits your blouse.
Tracing the pattern

There are a lot of ways to find a pattern including these two…
- Pinterest is a total treasure trove. Just type into the Pinterest search bar what you’re looking for and the search will yield hundreds of varied results.
- This fantastic post: How to draft a basic blouse pattern from a blouse, will guide you through the process of creating a basic blouse pattern from one you already have.
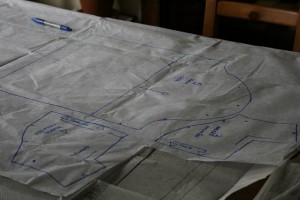
To trace a pattern, you will need special paper. There are different types, and their durability varies. Swedish tracing paper is often recommended because it will withstand being folded and unfolded, ironed, and sewn together.
Choose a clean and clutter free work surface. Make sure your hands are also clean and dry before you start tracing and cutting out.
Once you’ve cut out the pattern, follow the instructions for tracing onto the fabric.
Remember you will work with the inside of the fabric at this stage. Use pins, markers, and tailor’s chalk to help you. Always identify the different pattern pieces using a marker, so you know which part is which.
And now you are ready to cut out the fabric.
Sewing together
Once you have prepared the fabric pieces, the next step is like putting a puzzle together. If you have marked your pattern pieces well, you’ll know exactly which piece is which, and you can simply follow the instructions to put it all together.
Please share any photos of the blouses you make in the comments below and let us know how you found the process. We can all learn so much from each other.