Get this week’s free machine needle threader and MasterClass bundle for the ultimate shortcut to always be proud of your quilts Click here to learn more now
Sewing instructor Melissa Lasseter shares tips and tricks for installing separating zippers in your sewing projects in under 10 minutes!
When you are designing a new sewing project, whether it be a garment, an accessory, or a decorative piece, one of the most important (and often overlooked) things to consider is how it will open or close, or how you will get in and out of it.
Zippers take amateur sewing projects up a whole level into functional, wearable, or even sellable pieces. When you know how to sew in a zipper, you can even alter or repair older garments or pillows that may just need a little TLC.
There are several zipper types to choose from, but for the purposes of this article we are focusing on separating zippers because they are versatile and great for beginners looking to achieve precision in their sewing.
This method requires using a zipper foot and a seam ripper. A seam ripper used intentionally, to save time, you say? Why, of course!

Here’s how to sew a separating zipper into a sewing project:
- Step 1: Lay the zipper on your project and mark the length of the zipper on the fabric. Set the zipper aside.
- Step 2: Using a basting stitch, sew up the seam that you want to zip open – yes, sew it closed! It will be easy to remove later with a seam ripper. A 1/2″ seam allowance will work best for zipper installation.
- Step 3: Finger-press the newly sewn seam open and place the zipper right side facing down on top of the seam. Pin it in place so that the seam and the zipper are lined up.
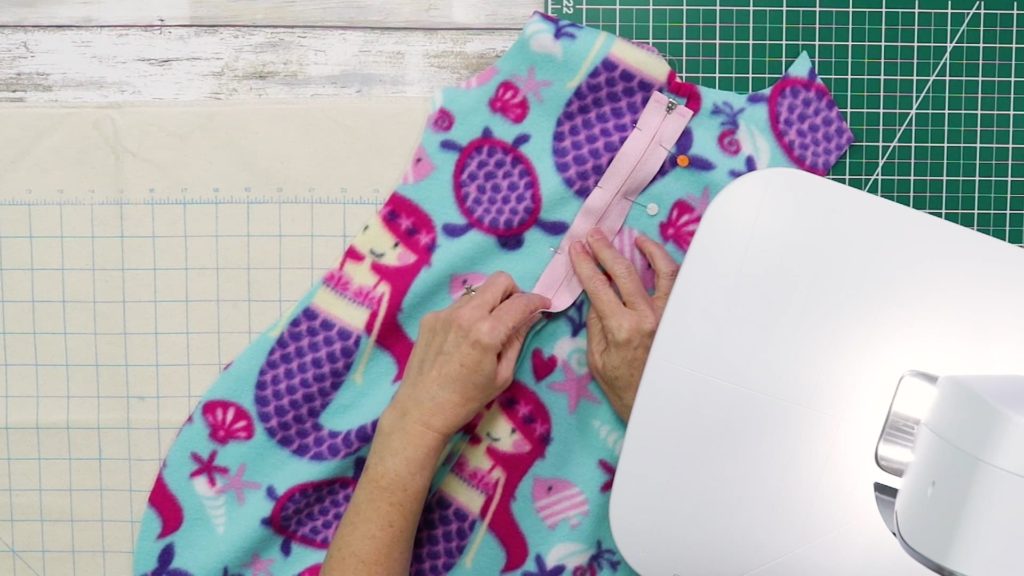
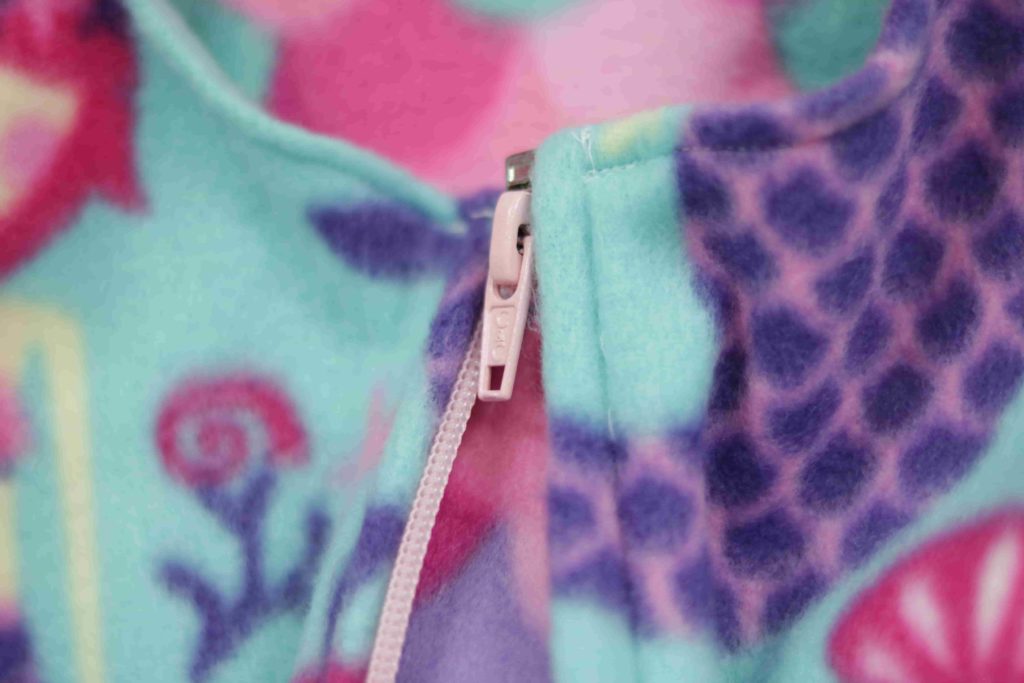
- Step 4: Removing your pins as you go, steadily stitch along the entire half of the zipper. When you get to the zipper pull, open the zipper to get the pull out of the way of the needle to get a tighter stitch. Stitch until 1/2″ past the zipper stop. Close the zipper.
- Step 5: Lining up the bottom of the zipper tape, stitch and backstitch across the two halves of the zipper. Working around the zipper stop on the second half, run a few stitches. Open the zipper to get the pull out of the way, sew a couple inches, and close the zipper again.
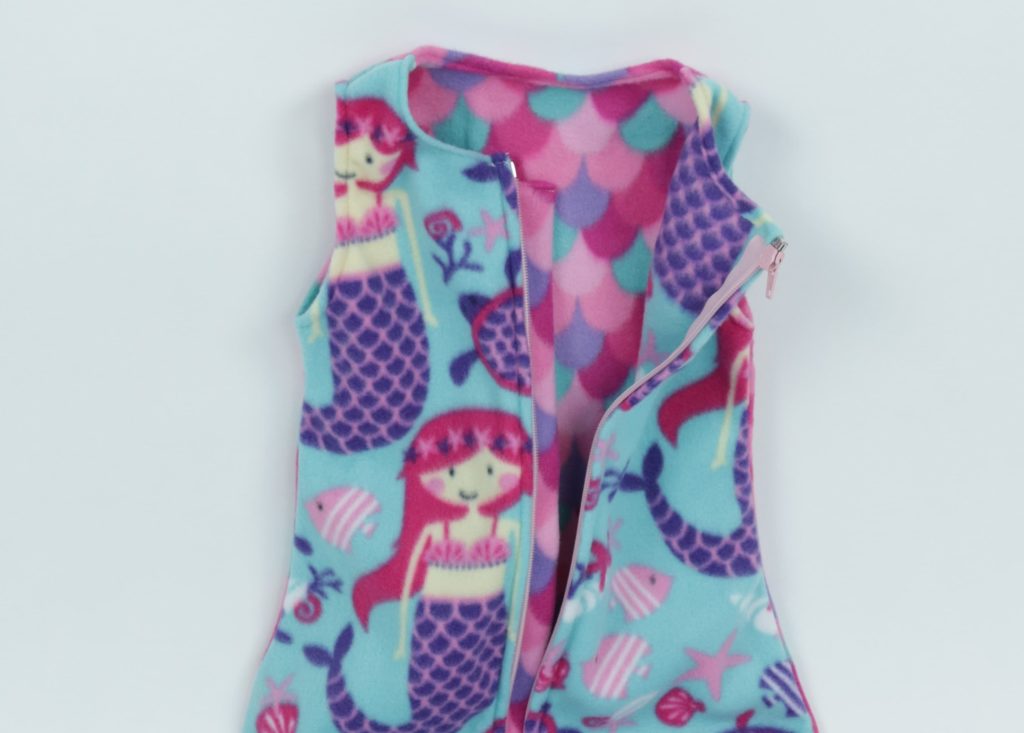
- Step 6: Stitch along the second half of the zipper, being careful to work around the zipper tab at the end. Cut your thread, remove your project and flip it right side out.
- Step 7: Using your seam ripper, remove the basting stitches all along the seam that’s on top of the zipper.
That’s all there is to it! Now go make friends with your seam ripper because it’s going to be a sign of productivity instead of regret from now on.
Add zippers to your thoughtfully-designed garments, cool thrift shop finds, homemade pillows, funky farmer’s market purses, etc.
Do you have any other zipper tips for seamstresses-in-the-making? Leave your comment below!
Get this week’s free machine needle threader and MasterClass bundle for the ultimate shortcut to always be proud of your quilts Click here to learn more now
Awesome tips!! Thanks for sharing!
Makes it look so easy.
Thank you. You make it look so easy. I will save it for the next time i put a zipper in. Her patience letting the machine do the work slowly for a more professional job is great. No need to hurry this task.
Love the video! Sure makes it easy to put in a zipper.
I am Not good with zippers!! I followed your video step by step on some pillowsI did really well )that’s a first) but the end I need to practice on. Thank you
Love this! It was very informative. I’ll definitely try this method.
Quite a good tutorial but I think she was mixing the top and the bottom of the zipper throughout.
Thank you this has great tips.
Very interesting. Learned a lot
Great Video you made it look so easy Thanks
Loved this episode. wished I had seen it 42 years ago when I sewed for my children. You are a great instructor to follow , and I will recommend your site to my students..
Thank you
Linda Benton
Little Quilt Shoppe
I feel like she put the separating zipper in upside down.. The purpose of having it separate is so that both ends are free to open away from the other side, and she stitched across the top of the zipper. so it still only opens on one end. I was expecting to see it installed in a jacket or a purse.
This video was very informative. Thank you
This is amazing ! I made garments with zips back in the day and and they always called for seaming the garment and installing the zip after the garment was almost complete , and I hated putting them in . This is easy peasy
Thank You , I always have issues with zippers that helped !!!
I found this install of zipper very interesting and fast. She was informative back stitching serveral times toward the bottom. I also found using the seam ripper upside down as to not catch your fabric. Had never heard that before
Love it and learn another way in putting in a zipper.. great video and also will be looking at some other ones too. Thanks for the invite
This video is very informative. I think it will help me to do my zippers easier n the future.
Thank you.
Rather than snip every basting stitch with your seam ripper, a basting stitch will pull out easily if a couple of stitches are snipped and then pull the whole row of basting stitches in one or two pulls. Then you don’t have scraggly pieces of thread sticking through the fabric from your basting stitches being snipped one stitch at a time!!
Enjoyed and helpful
Thanks for this lesson! I will definitely try it when I install my next zipper. This makes it look so easy.
Well that is different. I have been sewing garments for over 50 years but have never sewn it from the back side. If it works, that is a good thing!
Well you learn something new everyday. Thanks for those instructions.
Zippers always seem intimidating to me, thanks for the visual lesson!
This video was very helpful. Instructional without a lot of unnecessary information.
Nice video! Must give it a try!
Thank you Linda, we truly appreciate your support!
Thank you Shirley, that means a lot coming from you and your quite impressive experience!
Thanks… I did learn a faster way, than what I was doing , putting zippers in😄 I enjoyed yr teaching …
Great tthank you for your lovely advice Rita
Cool & so neat to… i will use this method now.. thank you.
Iv never done it like that it looks so neat will try that thank you . Kathleen
That was a good instruction on how to put in a zipper. I have used that method before. Please keep your fingers a little bit away from the needle so very easy to get hurt.
Showed how easy it is to put a zipper in. I loved the video. Will put it in my file to keep it for when we need it.
Thanks for the tips. I have tried putting a zipper in using your tips and it went in beautifully! Thank you, no more avoiding zippers.
It looks more easier than the way I use to put zippers in.
That’s one to keep for future reference thank you
I like your ideas, although I couldn’t hear the audio too well. That looks kind of easy for sewing zippers. Thank you.
This is a great tutorial.
It is step by step.
Nothing left out.
So helpful to remind us to consider zippers when creating designs.
This takes the Scarry out of zippers!
I would love to see a second tutorial on which zipper style choice and why.
It would give more great advice.
Enjoyed and helpful
Thank you
Thank you for this video, it not only looks easy, it is easy with your tips! Thanks again.
I have a friend, a professional costumer, who taught me to do zippers this way! They’re so easy! I did NOT know about the ball end of the seam ripper. I learned something new!
Thank you about the installing a zipper I really never had anyone to show me so did my best to avoid the zipper and use buttons as much as I could so now I know a better way oh helping thank you and now I will go do one
Wow that’s a first in how to install a zipper an easy way.
I’ve always sewn it from the front side this is really interesting
Thank you
WHERE DO THE CLIPS GET SHIPPED FROM??
I understand what you are doing , but is your seaming together before the front is sewn to back.. I wish there was the steps on how you got to putting in zipper . I see a lot but I hate zippers so I do jam snaps .
Who would have thought?