Making a handmade quilt can be an incredibly rewarding project, so we’re going to give you some tips on how to hand quilt better today!
It’s a relaxing pastime, a treasure in the making, and a piece of art all rolled into one.
It is no mean feat, but one that is certainly a worthwhile undertaking.
In my previous post how to choose the best sewing machine for quilting I looked at quilting using a machine.
And in this post I will look at quilting by hand.
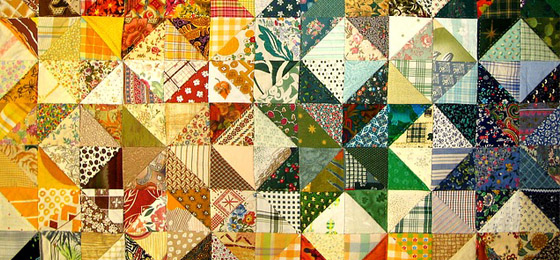
There is a lot of debate among quilters about whether or not to use a quilting hoop. Many prefer the freedom that hoopless hand quilting offers, and they use only hoops when working on specific shapes.
I’m going to focus on this hoopless technique.
Prepare your work area to ensure good lighting, a comfortable room temperature, adequate work space, and support for your back. Don’t forget to take breaks, go for a walk, and stretch.
What you need to hand quilt without a hoop
Some of the tools and supplies you need to hand quilt include:
- Thimble: choose a thimble that you’re comfortable using. There are various types made of different materials––metal, leather, and porcelain––try out a few before buying one.
- A yard of muslin (for practicing)
- Quilting fabric. See this post from ‘The Thimblelady’ Quilting Fabric and Quilting Material for suggested materials.
- 24” square of batting/wadding/filling (or appropriate size for your project). For beginners: choose a batting that’s easy to sew – for example, a lighter polyester type.
- Quilting and basting needles. These come in different sizes, and the larger the number, the smaller the needle will be.
- Needle threader
- Threads for quilting: ‘The Thimblelady’ has great advice about threads, and explains how the best ones have these three characteristics: they are thin, slippery, and stiff. See her post Best Hand Quilting Threads.
- A good pair of scissors
- Embroidery basting
- Mechanical pencil or washable marker. For dark fabrics, you can use tailor’s chalk (used to mark fabrics when making blouses, dresses, etc.).
- Ruler
Hand quilting stitches for beginners
When you’re learning how to quilt by hand, it’s important to get to know, and practice the basic stitches:
- Quilter’s knot: wrap your thread three times around the threaded needle and pull these 3 loops of thread down until you get a knot at the end of the thread.
- Running stitch: starts on the right side of the fabric (front) and pulls the thread to the wrong side of the fabric (back). Repeat over and over until you complete the line. Be consistent, keeping the same stitch size and distance between the stitches.
- Tunneling stitch: hold the needle almost parallel to the fabric to keep the stitches even.
- Rocking stitch: creates a smooth line by using the needle in a rocking motion.
How to create a hand sewn quilt
- Thread your needle, and cut the thread at about 18-24” of length.
- Make a quilter’s knot on the end in the following way: make 3 loops around the needle, and holding these loops slide them down to the bottom. You’ll get a knot with a little tail. Snip the tail off, leaving the knot at the end of the thread.
- Start with the back of the fabric facing you, and the front resting on a table
- Place the wadding or filling layer on top
- And finally, place the top layer of fabric on top, with the right side up, facing you.
You should have a type of fabric sandwich.
For some patterns, you will need to trace them onto your quilt before you start the basting. You can mark your quilting design using a pencil or washable marker.
There are many patterns to choose from. If you’re a beginner, it’s definitely recommended to start with an easier one, like stars, hearts, leaves, or flowers.
I like this video here from Sharon Schamber all about Hoopless Hand Quilting which I think you will find helpful.
Using the video as a guide you can see that Sharon begins by basting the design over the quilt. The stitches need to be pretty close together––leave approximately a 2-finger width between them. And use a double stitch for the basting.
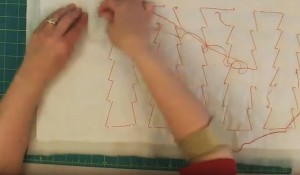
From SharonSchamberNet YouTube Channel
Now with a ruler and pencil (or washable marker), she traces double lines in between, these become the guidelines.
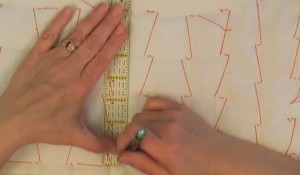
From SharonSchamberNet YouTube Channel
She starts stitching at the line after first hiding the knot. To do this, she pulls the knot into the center, right between the two layers of fabric, and rocks the needle up and down (running stitch).
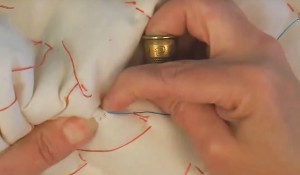
From SharonSchamberNet YouTube Channel
She hand sews along the lines she has previously drawn with a pencil. The needle passes through all the layers. Remember the back is used for closing stitches.
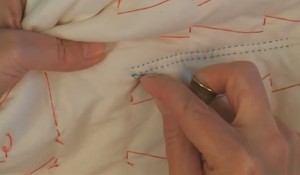
From SharonSchamberNet YouTube Channel
After hand stitching these two lines, she stitches the leaves.
And once the leaves are stitched, it looks like this:
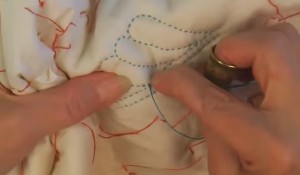
From SharonSchamberNet YouTube Channel
To finish:
- She takes the thread to the back, forms a loop, and passes the needle through the loop.
- She presses her finger over the knot so that she can feel it being formed close to the fabric.
- And then to get a neat result, she inserts the needle back down into the batting and runs it along, and back up.
- She pulls the thread again, ensuring the knot is underneath the fabric.
Practice
This is definitely a technique to practice a lot! And you can do so on old t-shirts and any other pieces of fabric you’ve got lying around at home.
When you feel confident, have a go at creating your own special hand sewn quilt.
We’d love to see your quilts, both machine and hand sewn. Send in your photos to the comments box below so we can all see. And let us know how you found the experience, and what tips you discovered that helped you.