Get this week’s FREE tool to help you manage delicate Quilt projects and learn the skills to take your craft to the next level Click here to learn more now
Quilting aficionado Johanna Felberbaum shares 7 essential tips for beginners getting started in free motion quilting, while meandering on her original heart quilt pattern for placemats and table runners!
There is something so expressive and gratifying about Free Motion Quilting. It likely has to do with the fact that each quilt finished with FMQ is one-of-a-kind, entirely unique, and a work of art.
Despite what you may have heard, you don’t need any extra equipment or even any special skills to approach this technique. But there are a few tricks you can use to make it a little easier.
Getting Started in Free Motion Quilting
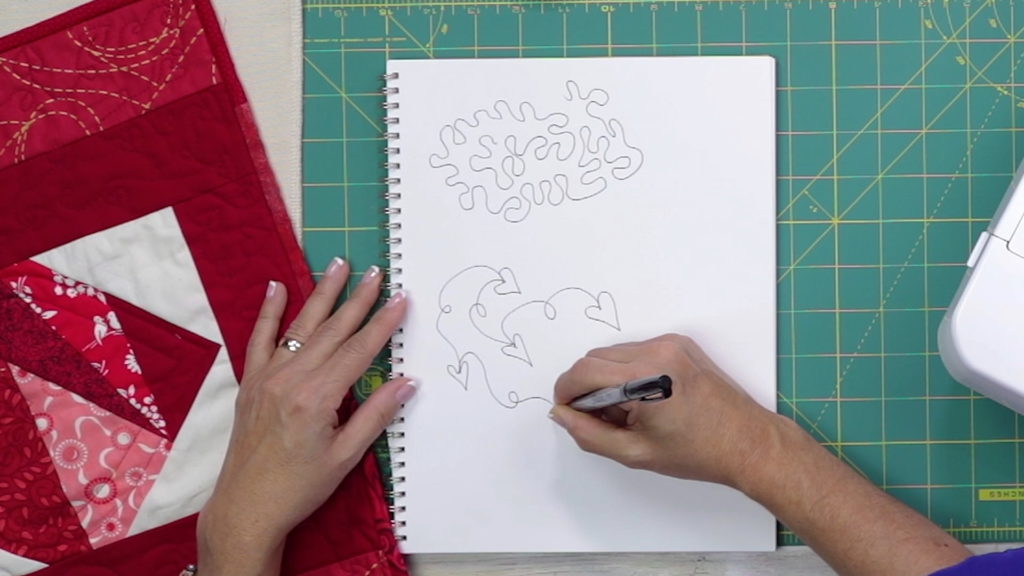
- Tip #1: Warm up! You can use your finger on fabric or draw with a pen and paper. Either way it will help you get a head start on finding your “sweet spot” at the sewing machine. Muscle memory is key to consistent, evenly spaced free motion quilting design.

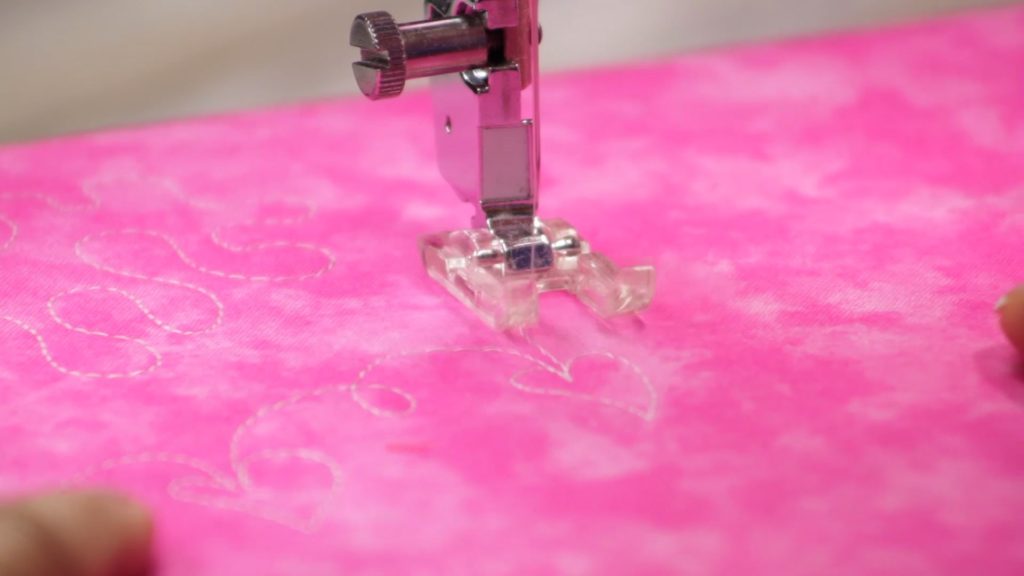
- Tip #2: Drop the feed dogs. Usually a very helpful tool when you’re sewing, the feed dogs will do quite the opposite during free motion and hinder your designs. Liberate your fabric for sweet freedom!!
- Tip #3: Use gloves. While it may seem unnecessary at first, a good pair of sewing gloves can make all the difference in the long run, as they increase your grip and prevent muscle fatigue.
- Tip #4: Meander. One of the most popular free motion designs, meandering is just what it sounds like- a curvy, winding path that keeps your fabric sandwich intact! It’s easy to space this design out evenly without a lot of forethought, as long as you find your rhythm.

- Tip #5: Use loops to fill in empty space. This will really help when you’re trying out new shapes and motifs that may vary in scale or size, and you need something small to balance out the area you’re covering.
- Tip #6: Find your groove. You’ll know you’ve found your rhythm when the stitch length, machine speed, and rate at which you move your hands are all harmoniously working together. When you do, take notes! Write down the settings you were using for next time.

- Tip #7: Practice! Replicate quilting designs you love online or make your own. Experiment by sewing the doodles you’ve drawn on paper onto scrap fabric. Most importantly, remember to warm up with scrap fabric before quilting your project.
While you don’t necessarily need a free motion or darning foot, it is a useful tool if you have it. Once you’re comfortable with free motion, you can basically draw anything you can imagine – with thread!
Do you have any other pointers for quilters that are new to FMQ? Share them in the comments section!
Get this week’s FREE tool to help you manage delicate Quilt projects and learn the skills to take your craft to the next level Click here to learn more now
Great tips! Practicing on scrap and doodling make sense but I didn’t think about sewing gloves!
Awesome . So helpful. Can’t wait to try free motion quilting. Thank you very much.
Got a couple of good tips from the video. One is to practice before you do it on a quilt. I have never been shown how to quilt making hearts.
Very cool. I have not tried the actually quilting before . thank you
Excellent video. Good tips before actually quilting your quilt. Also showed that other pressure feet can be used if you do not have the darning or embroidery foot.
I love the video
I love French
E motion I have
A refurbished Viking 18/8 it was done by a Nolting dealer I now love and and dont ever want a computer on my machine. Thank you for the information.
Great
I love free motion quilting I have been doing it for 10 years and never get tired of it. It’s relaximg
I like the idea of making my own design..I was wondering how I was going to do
follow anither pattern. Thanks for this video. I am an
New Bee and concerned
About messing up on the. quilting.
Thank you! For the seven tips Taking notes and starting out on paper are two things that I never thought of I appreciate all the help I can get.:). I have watched all sorts of videos and your suggestions helped me alot. Thanks again am going to sit down at my machine with a pen and paper wish me luck Sharon.
Great tips. I would add a template of a couple of patterns and one of “meandering” pattern that a new FMQ’er could print out and trace or copy and practice following the patterns with their sewing machine. Simple in hand printouts go a long way in satisfaction if the viewer. They feel like they have been given something besides the knowledge in the video, a bonus if you will. Hope this helps. Thank you for giving me the opportunity to assist in development.
My tie is until you get good at free motion quilting do now have a large quilt that your working with. Improve with smaller quilts before you graduate to larger one as they are much harder to handle and you can end up distorting your pattern .
Love the video great tips.
Thank you! Best instructions I’ve watched yet! I finally feel brave enough to try freestyle quilting
Great tips.
Can you make a t-shirt quilt like this.
Going to try looks kinda easy hope my machine can do that
Will try good info
I loved these tips and feel like I can with confidence I can use them in my free motion quilting! Thanks
Interesting. I have done two long armed quilts and am looking into free arm stitching.
Thank you 😊
Love the hearts and travel!
Very basic but works for long armers like me and sit down quilters like my sister.
Found it strange you did t have the foot for the project
But it worked!
I enjoyed the video . I hope to see more
relax those shoulders, take frequent breaks, andput music on you love !
I found this video really helpful as I think I was suffering analysis paralysis in regard to free motion quilting. Thank you for sharing your tips.
Your explanation’s are FABULOUS!
I have always been too intimidated by quilting on my own. But with your steps I’m thinking perhaps I CAN DO THIS! Thank you!
Love free motion quilting. Want to learn more.
Great tip Kathryn! Thank you for sharing.
Totally agree Darla! The full course at http://www.CreativiU.com does include a template for the block itself, as well as patterns for the Hearts Aflutter table runner and placemats, but I love the idea of templates for the quilting designs. Thanks for the tip!
Good luck Sharon! As long as you enjoy what you’re doing, I’m sure it will turn out WONDERFUL! Thanks for your support.
I enjoyed the video and tips. I am definitely going to practice and try this.
You make it look so easy. I’m just starting and I was amazed at how difficult it was the first few times I tried it. With your tips and suggestions I really feel like I can master this. I’m only making small quilts at the moment so I surely can get this. I’m excited to try it. Thanks.
I want to try this. You make it look easy. I do understand, as with everything, the key word is ‘practice’.
It was an excellent film. I especially liked the hearts. I was amazed to see the regular foot. I think you could see better with a darning foot. To each her own.!J
love the tips i always have problems moving my quilt or whatever I’m quilting looks so easy watching your video
I really enjoyed this video. Never thought of getting my muscles warmed up but it sounds like a great idea. Thought I had to have a different sewing machine that I could not afford and now I know I can do it on the one I have. I’m not sure I really understand the templates and I have bought a lot of them. Thank you. Would like to learn more.
This makes free motion quilting look so easy! I think these tips are very helpful, especially taking notes in anotebook to remember the settings and speed you like best. I love the idea of practicing a pattern on paper before sewing it.
I’m going to my sewing room to try this out, very impressive. Great video, easy to understand.
Thank you for these tips, they are very helpful. Especially that one has to practice!
Have a great day.
Thank you I will defenateley try this
This video is great and so helpful as it explains everything so well but, as already mentioned, why was the walking foot not used?
I think it is the fear of not being perfect the first time which holds me back.
Thanks again
I think a darning or embroidery foot was not used in order to show you CAN quilt without a specialty foot. (FYI – A walking foot would only work for straight line quilting. The traction of the foot will resist any directional movement other than forward.) There are books of quilting templates at fabric/quilt stores. Make copies the size of your quilt block of the designs you like, if your quilt has 12 blocks make 12 copies. Trace each design with a pencil a few times. Next, with no thread in your machine, trace the designs on your machine. You will be perforating the paper so trace each design only once. When you feel comfortable, pin your template to a quilt block, or trace the design with a water or heat removing pencil or pen, thread your machine and stitch your design. See – all that worry wasn’t necessary. You CAN do it!