Ready to become a master of crochet? Get this hook and one year of classes bundle free today here
 Chunky knits and extreme crochet are popular because they make us feel so cozy.
In this guide, you will learn how to arm crochet a rug using two strands of bulky weight yarn together and to work with the no-hooks technique of arm crochet to create a fast, fabulous rug for your home.
The bulky yarn and large stitches of these crochet projects create items that are comfortably plush and squishy.
The large format also allows us to see the amazing detail in even the most basic crochet stitches, showcasing the best features of the craft in a way that adds an artistic sensibility to any room in the house.
Materials Required
6 total skeins of Premier Yarns Mega Tweed Super Bulky Yarn (88 yds each)
• Color A: Stormy Blue Tweed
• Color B: Apricot Tweed
• Color C: Blue Tweed
Note: Only one skein of Color C is necessary. However, because you are working with two strands each, it is recommended for convenience that you work from two skeins. A cost-saving alternative is to purchase one skein and manually wind it into two same-size balls.
Basics of Arm Crochet
Arm crochet is a type of crochet that is done without using any hooks. As the name implies, you will be using your arm in the place of a hook.
That’s the most important thing to remember: your arm is the hook. All of the stitches and techniques are the same in arm crochet, but they take a little bit of getting used to the first time that you try to make them with just your hands.
Here are the basic steps for beginning an arm crochet project:
(Note: These instructions are for right-handed crochet. Reverse them if you are left-handed.)
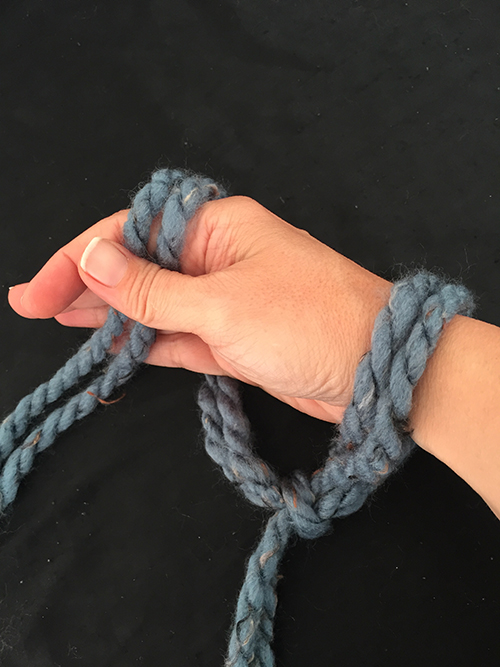
1. Create a slip knot. Pull the knot open until it is approximately the size of your fist.

2. Holding the slip knot with your left hand, reach through the slip knot with your right hand. Instead of inserting your hook into the slip knot, you are inserting your whole hand, which functions like the hook.

3. Use your left hand to yarn over onto your right hand.
4. Pull this working yarn all the way through the slip knot. Pull it through until it is about the size of your fist, as equal in size as possible to the slip knot.
5. Continue repeating steps three and four. This is how you will crochet a chain to begin your project.
Tip: The toughest part of arm crochet is getting an even chain. It helps to hold the base of each chain with your left hand while pulling the loop in your right hand up to the same size as the previous loop.
For added stability, lay the chain down on a table, press down on the base with your left hand while pulling the working yarn through with your right hand.
After you have completed your crochet chain, you will continue with the rest of the rows of your crochet project. How you complete each row will depend upon the stitches that you use in your crochet project.
The basic idea will be to complete the stitch as normal, using your arm in place of the hook. So where you would “yarn over” the hook, you will “yarn over” your non-dominant arm instead. In this project, we will be using single crochet. Let’s take a look at how we will do that:
6. Insert your right hand into the next stitch.
7. Yarn over your right hand.
8. Pull this through the loop by bringing your hand back out. There should now be two loops on your right hand.
9. Yarn over again.
10. Pull this through both loops on the stitch. This completes a single crochet stitch.
Note: Take the time to practice your starting chain and first row. These are the most difficult parts of the project, because your body has to get used to acting as the hook. With practice, it becomes easy, and subsequent rows are significantly easier.
Arm Crochet Rug Pattern
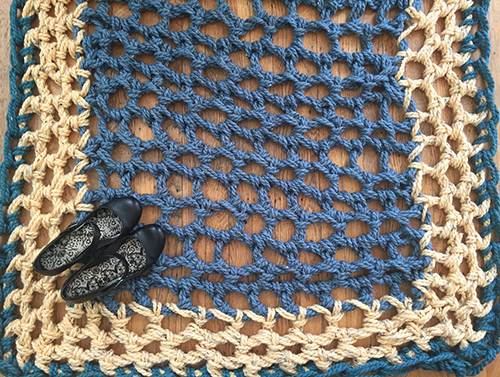
 Using the basics from the arm crochet lesson, we are going to crochet a plush openwork rug.
Using two strands of Color A together, chain 11.
Row 1: Single crochet in second chain from hook and each stitch across.
Row 2: Turn, chain 1. Single crochet in each stitch across.
Row 3 – 11: Repeat Row 2.
NOTE: You can end the project here and you will have a cute, cozy rug the size of a small welcome mat!
Fasten off Color A. Join Color B (two strands together).
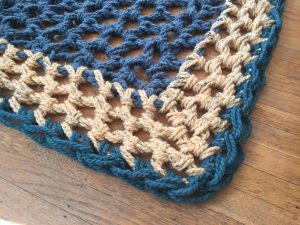
Round 1: Chain 1. Single crochet in each stitch across. When you get to the end of the row, make a second single crochet in the last stitch. This will be your corner. Continue working around the entire rug, making one single crochet stitch in each stitch except for the corners where you will make two single crochet. When you get to the end of the round, slip stitch to the first chain to close the round.
Rounds 2 – 3: Repeat Round 1.
Fasten off Color B. Join Color C (two strands together).
Repeat Round 1 using Color C.
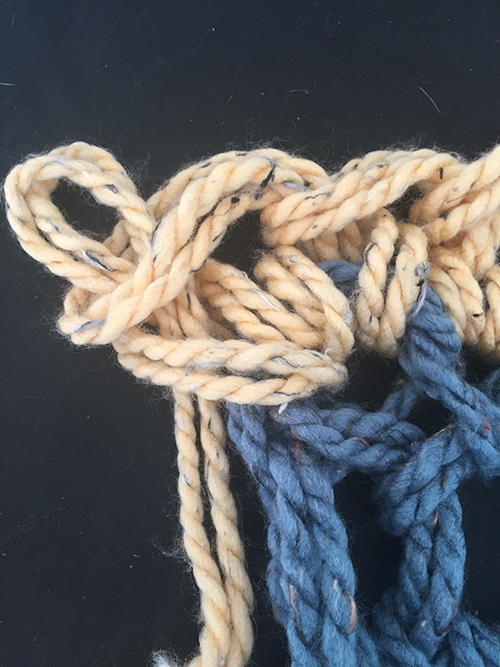
Fasten off. Weave in all ends.
Finger Crochet Alternative
You now know how to arm crochet a rug. If you are having difficulty working this project in arm crochet, give finger crochet a try instead. Finger crochet is worked the same way except that you use a single finger in place of the hook, rather than using your whole arm.
It can be an easier technique to manage if you are working without crochet hooks for the first time. Note that the stitches will be much denser since each chain / sc will be the diameter of your finger, rather than your arm. Finger crochet will create a much smaller rug so if you do that you may wish to double the number of stitches throughout the project.
Ready to become a master of crochet? Get this hook and one year of classes bundle free today here
Please include a picture of the finished project.
Very fun, I am going to try this!????
This was great thank you!!
I’m very interested in learning arm crochet. Thank you for helping us learn
I loved the idea of arm crocheting and finger crocheting. I have to rely on family to get me yarn butt am excited to try both. Thanks Joanm
I definitely want to try to arm crochet.