Want fresh yarn for your next project FREE in exchange for your feedback? Learn more here
Crochet Designer Lorene Eppolite demonstrates the magic circle crochet trick to get started working in the round.
A magic circle AKA magic ring AKA magic loop is for the true crocheter, not the just-do-what-you-can-to-get-by crocheter.
Yes, you can work in the round without it, but why would you want to? It’s the difference between a hobby crafter and a legit crochet artist.
Crochet in the round is most often used for hats, trivets, coasters, doilies, place mats, baskets, pillows, and mandalas.
The obvious alternative is to start with a chain, and then join the round. The problem with that start is that it is set in stone, and will leave a hole in the middle of the project forever.
What’s so magical about it?
Once you learn the magic circle, you’ll see how it gives you the refined finish you always wanted to see on your projects in the round! You can adjust the size of the center to your liking, even up until the end of the project.
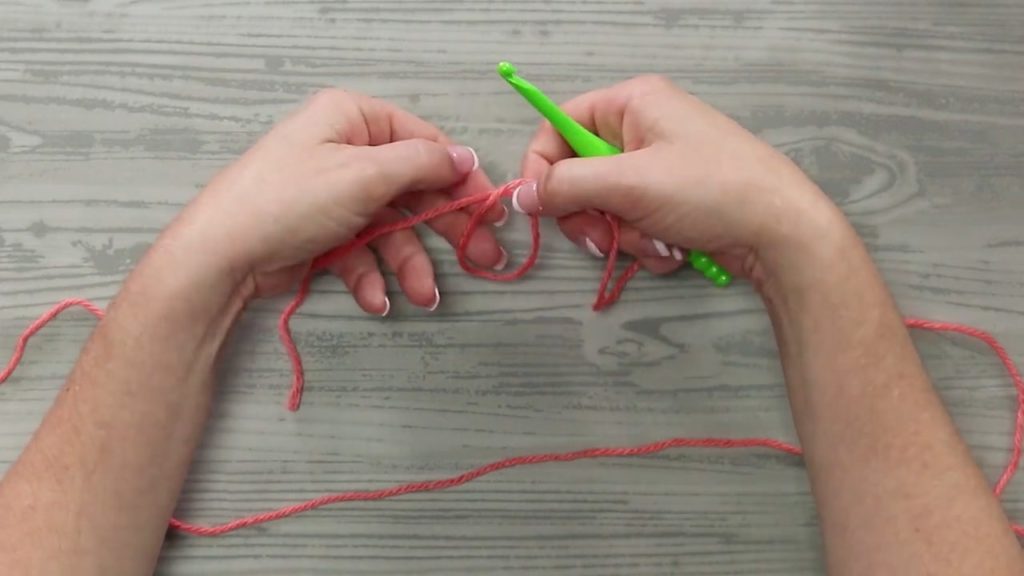
First off, do not start with a slip knot. While it is the start of the chain of many a crochet pattern, it’s not the way to start the magic circle.
How to crochet the magic circle:
To begin, hold the tail end of the yarn in your left hand, and wrap the yarn around a few fingers, forming an X. Holding the intersection of the X, put your hook into the circle and pull up a loop with the yarn.
Chain 1, and you won’t have to hold the intersection together anymore. To make it a little easier to hold it all together, pull the tail to tighten up the circle.
If you’re working in double crochet, you’ll chain 3. Working into the circle, complete all your stitches in the first round.
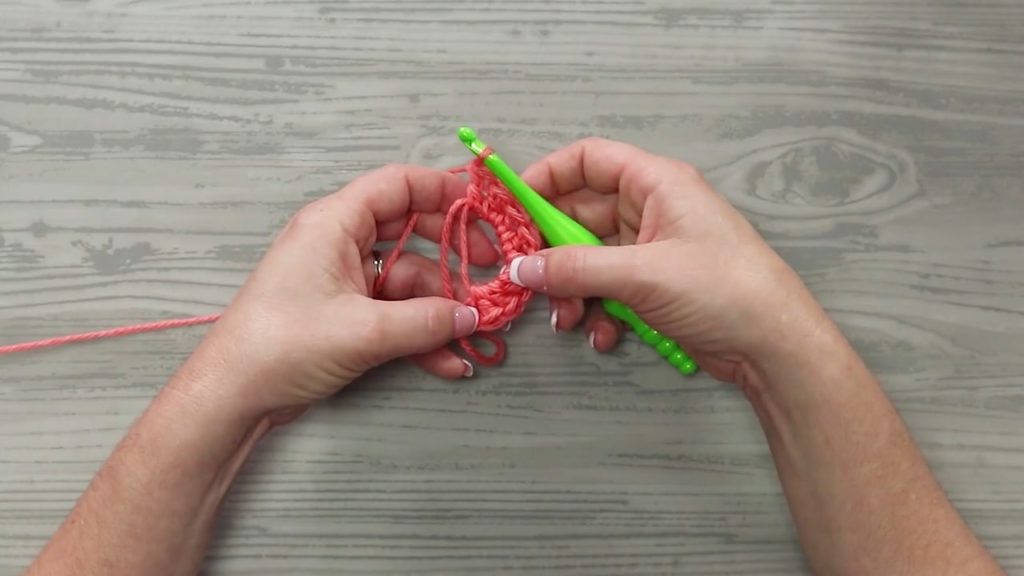
Then you can pull the tail and close up the ring. This is the key to getting a tight center circle, no more gaping holes in your finished projects!
Finally, stitch into the top of the chain to join and complete the round. Continue your rounds as usual.
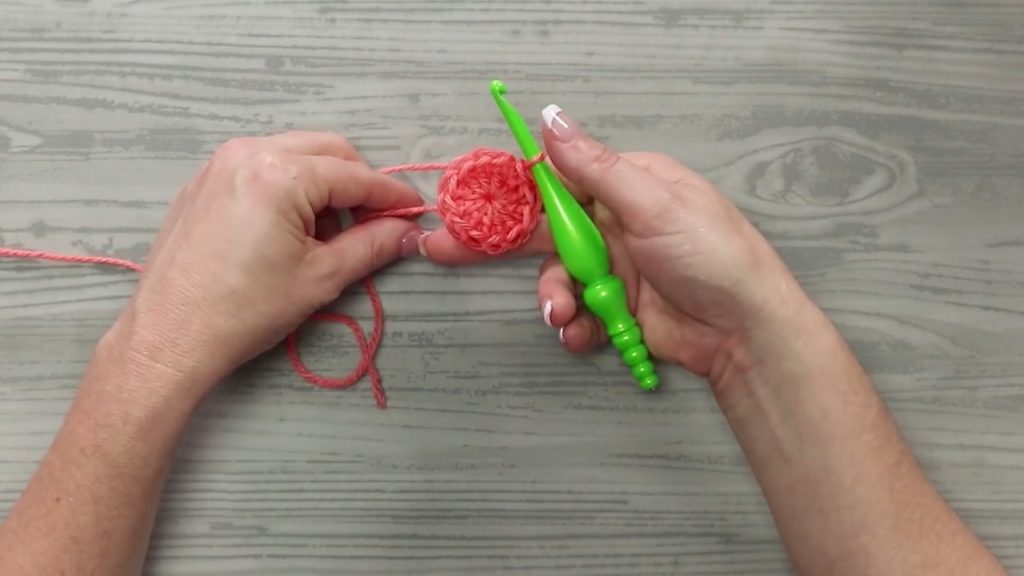
At the end of the project, remember to weave the tail from the start into the back of your work, usually through that first round. A knot is optional before weaving in your ends.
The magic circle crochet technique will take your crochet from amateur to professional for all your projects in the round. What’s your favorite thing to crochet in the round? Let us know in the comments section!
Want fresh yarn for your next project FREE in exchange for your feedback? Learn more here
How can I save this?
Thanks for showing us how.
You made that very easy. I have been trying that for quite awhile and could not find a simple way to do it.
Wonderful!
Thank you for the video. I never knew you could do this. I saw it written in a pattern and now I know .
How can I save this blog for later , Thanks for showing the tutorial!
I have been using this for a couple of years. I love it.
Love the way you teach.
I use a magic circle on everything that I make round ,hats doilies, a dish cloth even a granny square sometimes it is just easier Marianna Fair. thecrochetchickenat gmail.com
That’s wonderful it’s going to to help me alot I do alot of small hats for 18inch dolls and slippers for them so this is super great and well save me alot if time. Thank you so very very much.
Where do I get the Magic Crochet set?
Generally I go to Michael’s the hobby store.
Ty loved how well I could understand your instructions cause you spoke so well and showed it so well .
Love doing the magic circle
Thank you. At last I can do it!!!
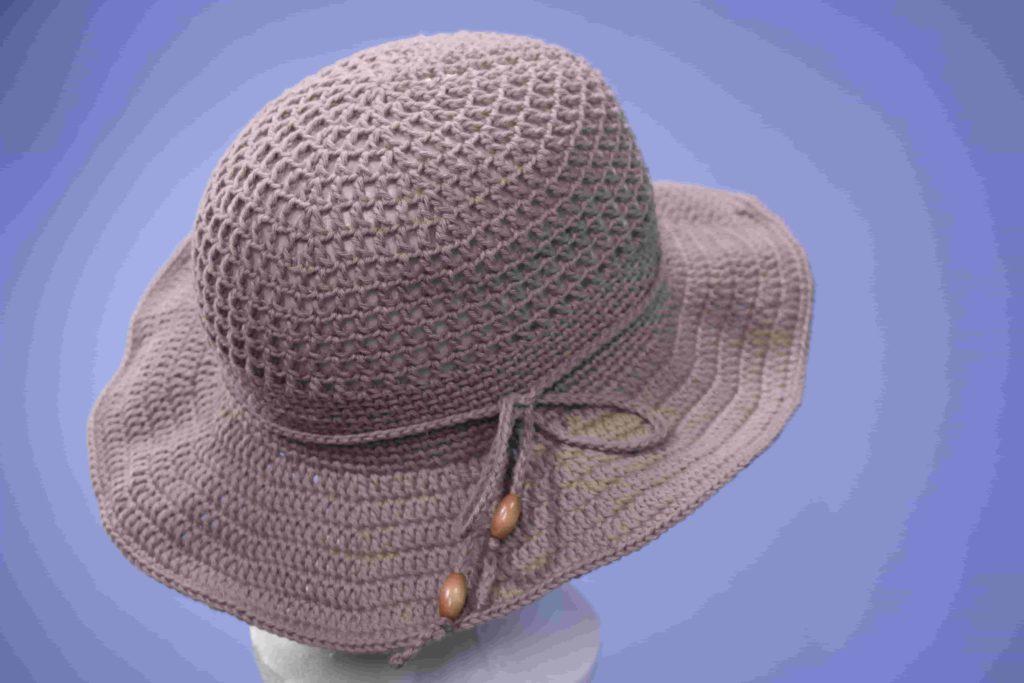
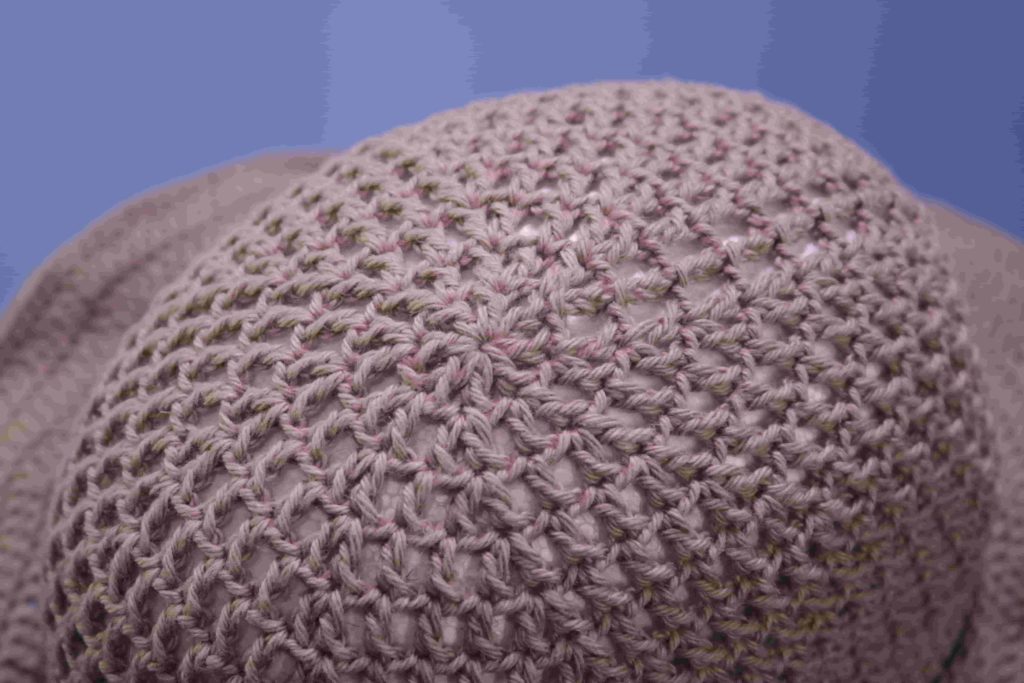
Is there a pattern for that cute hat shown in the lesson?
I’ve been making children & baby size hats so this technique is perfect in this situation. That very FIRST stitch is tricky! It just doesn’t feel right in your hand but…once the first stitch is done , the rest is a piece buggy get easier with practice.
What kind of HOOKS are you using in the video ?? They remind me of those beautiful wooden ones I can never afford.
I would love to have the pattern for that hat. And yes thank you for making the magic circle easier. I can’t wait to start a new project with a center circle now. I know I will not be frustrated anymore. 😊😘❤️
I have wanted this hat pattern for a good while now.
Can I get a copy of the hat pattern?
To save it you click on the three dots in the top right corner. From there you can go one of three ways: Click to send it to someone via messenger; click “copy link” to paste it somewhere; click “open in chrome” to save it in your google bookmarks.
I wish I could get a seam in my hats that ran that straight!!! Perfect. Is there a tutorial for that anywhere????
I would love to have that hat pattern, as well, but I would need a tutorial guide like this page’s presentation, to help me understand, how to properly make it.
All my hats end up, me just making up the parts I don’t understand and pieced TOGETHER the rest, to shape it into a hat.
Could someone create this Pattern, the hat image used, in this presentation, into an accompanying video plus the step-by-step written instructions, for this floppy brimmed hat.
I love it, but I want, to make it for myself.
There is love in receiving something like this as a gift, but there is power, in learning the craft, then making it for yourself, and others.
I would rather have the Power than just a gift.
It is like the Wiseman say’s, if you teach them how, to grow food then you feed them and the World, but if you give the people food then they haven’t the ability to sustain life, and when the gift is depleted, they will wither and die.
So, please give use the key, to Wisdom and knowledge how, to make this hat – like how this presentation did – with learning how, to make the magic loop ring/circle, to start a project, in the round.
This presentation is clear and precise, in how, to properly make the magic circle Stitch.
Thank you for sharing this easy professional starting stitch, for working, in the round.
This is GREAT! I’ve often wondered how I could get rid of that hole on the top of hats.
I love the magic circle and the strength of the center.
To save this info, share it with yourself so you can find it later. Thats how I saved it.
I’ve been using the magic circle for premie hats and donate locally. I have issues with my hands and fingers and this method doesn’t tire or cramp them up as quickly. Ty.
Easy
The magic circle is absolutely the best way to go when working in the round, unless you want to end up with a hole in your project. I use it in almost all of my amigurumi projects, hats, hair scrunchies, flowers, my list goes on. Yes, it is kind of awkward at first. But once you get the hang of it, you’ll love how much nicer you projects come out.
I see people are asking about the hat pattern. I suggest looking on YouTube. I’ve seen several videos on there for hats very similar to the one shown.
I love to make doilies like the ones made so often back on the old days! The magic circle’s a great start to a doily!
I love this tutorial about the magic circle so easy to follow. I’ll be making doilies, hats and things.
Thank you for making this so easy