Want a shortcut to master cake decorating, learn to always feel proud of your cakes and keep clients coming back for more? Learn more here
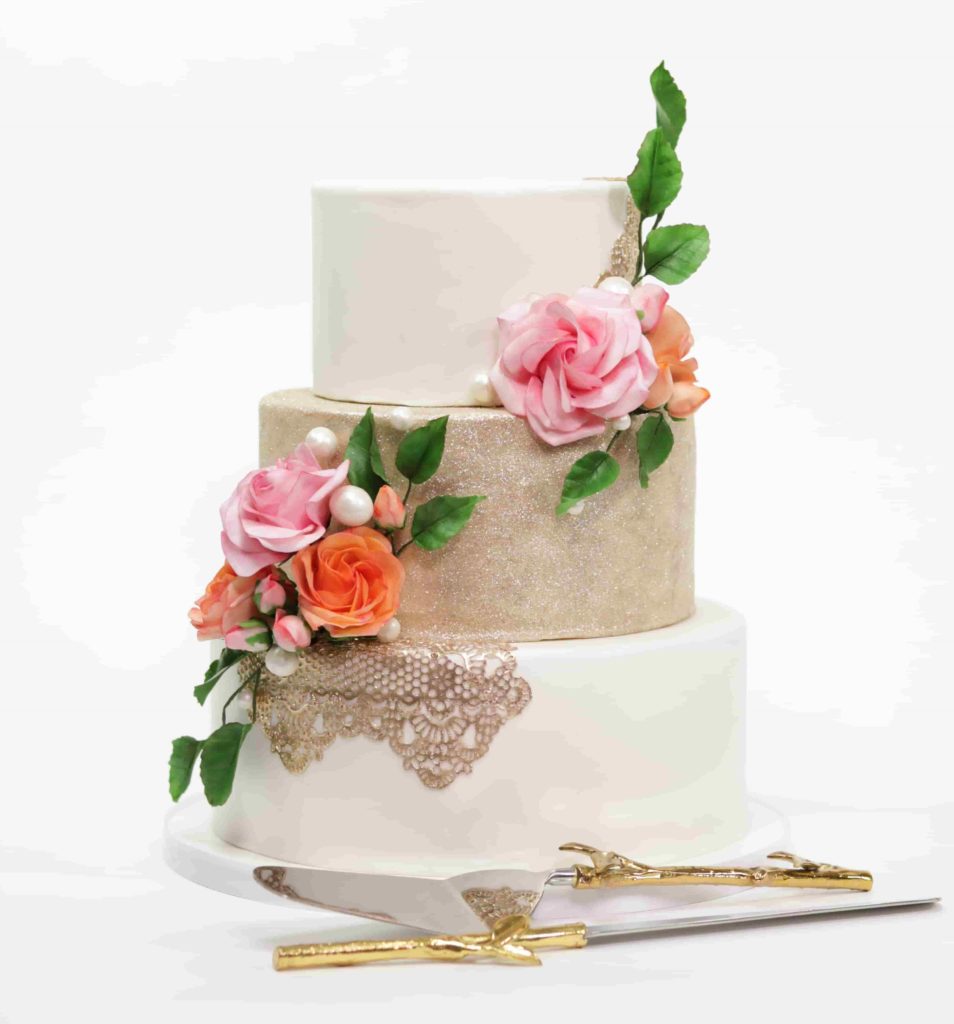
Cake artist Sarah Lu shares her secret to making gumpaste sugar flowers that look so realistic, you’ll think they are actual roses!
Definitely in the top 3 most-requested techniques used on custom-ordered cakes is sugar flowers.
Here, we are focusing on sugar roses but these rules apply to all fondant flora (technically we use gumpaste for sugar flowers, which can be made from fondant by adding CMC or tylose powder).
What’s so special about sugar flowers?
Mastering this method can set a cake artist apart from the masses, and gives them the opportunity to price their cakes much higher than the standard custom cake.
Making these delicate decorations definitely requires patience, and a few tools: a petal set cutter, a firm foam pad and a balling tool, which may be a multipurpose rolling pin. Floral wire is necessary and floral tape is optional.
A little homemade gumpaste goes a looong way; egg whites make a great edible glue; plus, edible luster dust and a small brush will really makes them pop!

To make perfectly realistic sugar flowers in 7 simple steps:
- Step 1: Place your pre-cut petal set on the foam pad.
- Step 2: Using the balling tool, thin the top half of each petal as much as possible. Stretch the petals individually in a way that creates corners, more triangular than round.
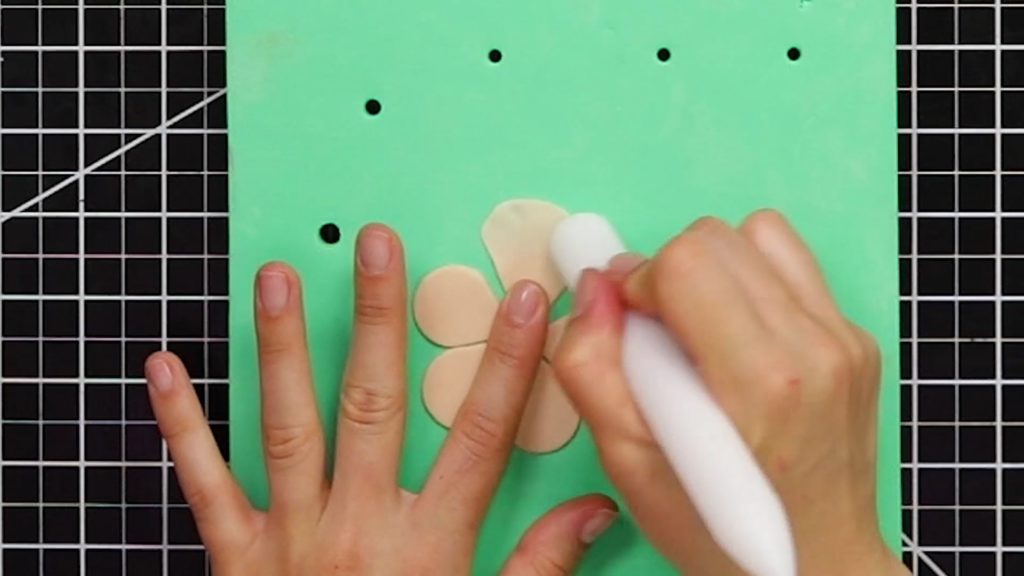
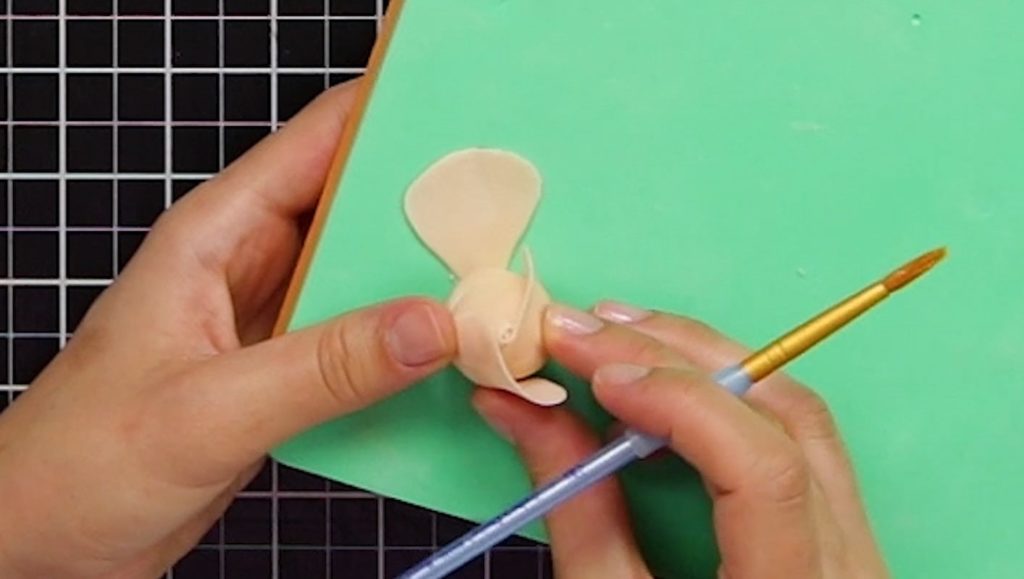
- Step 3: Taking a teardrop-shaped fondant core on floral wire in one hand, and brush with egg whites in the other, paint the center of the petal set, the sides of each petal, and the tops of only two of the petals, opposite each other.
- Step 4: Pull the first petal that has been fully coated in egg whites, and fully adhere it to the core. Then, take the opposite petal and cover the other half of the core.
- Step 5: Next you have the option of curling the edges of the remaining petals diagonally on one side for a more open layer of petals. For the first petal set you don’t need to do this, but in each additional petal layer you definitely want to do this.
- Step 6: Adhere the remaining petals to the first two on the core, leaving room on one side of each petal to insert the next petal, like an open door.
- Step 7: Once you have covered the core with the first petal set, repeat the process for each additional layer of petals, to your style and liking.
Tricks of the trade
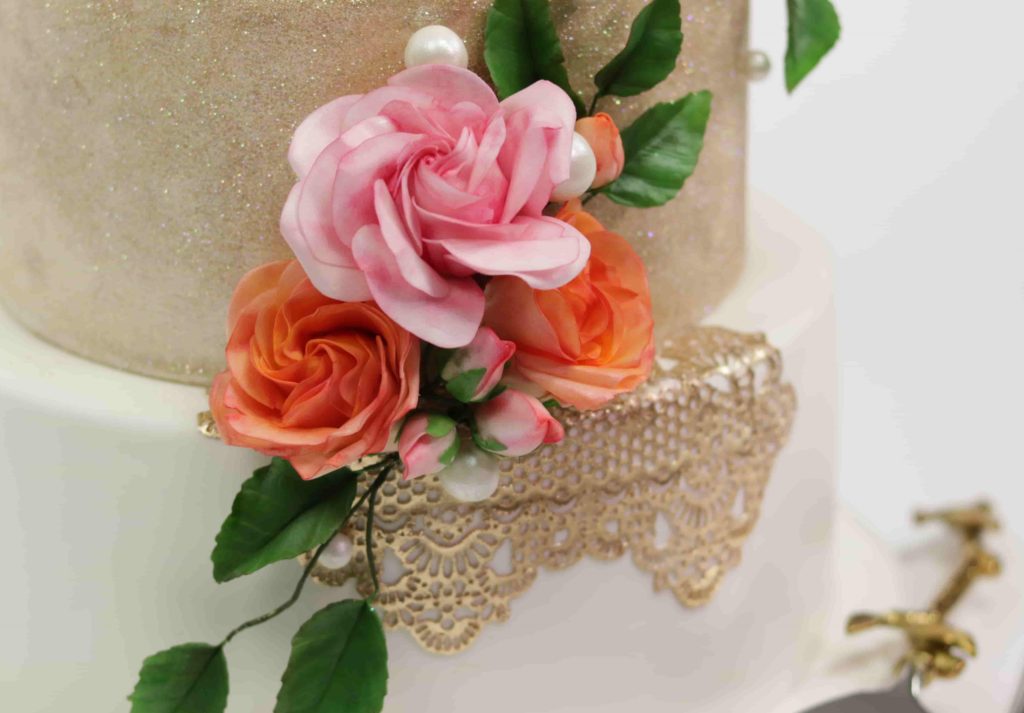
The key to this technique is to get the gumpaste to a thickness that is almost transparent by stretching the petals individually. Fear not! If it breaks, you can just press it back together and you may even get a more natural-looking rose that way.
The light that passes through the petals, and the resulting shadows and textures of the rose as a whole, will work together to make the flowers look totally realistic.
Tighter layers with less curled edges will produce a half-bloomed rose, while looser layers with more curled edges will give a more fully bloomed look.
Yes, flaws are good! They will add to the character and uniqueness of each rose, as we see in nature.
Once you have sculpted the flowers, check out CreativiU’s lesson on dusting them for depth and an even more realistic quality.
What’s your sugar flower style? Share tips and tricks in the comments section!
Want a shortcut to master cake decorating, learn to always feel proud of your cakes and keep clients coming back for more? Learn more here
Very detailed instructions that I believe I could follow and accomplish a present a beautiful cake for this year’s derby party I am going to!
I can’t wait to make a cake with my first beautiful flowers!
I really like the way she showed to do the rose bud. Most just show it all flat.
I love your tutorials . There very helpful. I could never figure the flowers out. I admit that I haven’t kept up with technology . I am behind.
Very neatly done.
Great video! Just need to practice more and soon I will be as good as her. Thanks for the tutorial.
I want fo try this. It looks fairly easy.
The roses are incredible ! I am new so it is wonderful to see it done , please tell me if that center white piece is
sugar as well. Can it be eaten? Thank you .
This is helpful, as i am just getting started with fondant. So to see how this is done and how easy it is to work with., I am excited to give it a try. Thank you
Hi Elaine, yes the core is made of fondant, rolled into a tear drop shape. It is edible, but the floral wire is not!
I have been doing flowers for awhile now, but even I can learn from someone else really enjoyed watching and will give your way ago next time
Thank you jayne
I really enjoy your little tutorials on cake decorating. I am in search of a cake pan in the shape of an older car. Like 1953 Mercury or Ford with no success. Do carry cake pans in shape of cars or can you explain to me how to make one with using a knife to carve one.
Looking forward to hearing from you soon and hopefully with alittle good news.
Mary Hopper
I’m really looking forward to making homemade gumpaste.
Love your tutorial; it answered a couple of unspoken questions I’ve always had about making roses!
Thanks for this, I’ll try using it out
Can’t wait to start making flowers
Cant wait to show off my skills with my first time doing life like flowers on a cake..
I’m so excited, I’ve wanted to learn how to make gumpaste flowers for so long and now watching the video I really feel like I could accomplish it. Thank you so much for all of your videos that are easy to understand!
I love it, but I really need more practiceeww w
Ready to practice, practice makes perfect