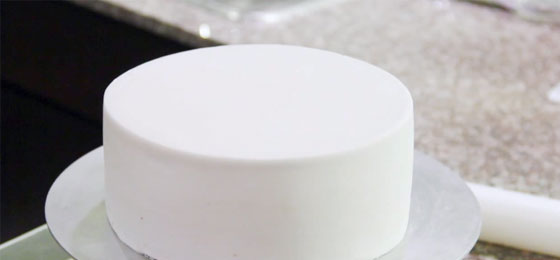
Flawless finishes… sharp fondant edges…
That super professional presentation for cake decoration…
We all want to achieve them but they can seem so elusive.
This post will explore some expert tips and tricks which are most definitely helpful when working with fondant icing to achieve that perfect finish.
Screenshot from Sierra taylor YouTube Channel ©2014
Experiment and Have Fun
First off…
Have fun experimenting with different techniques and trial runs before you need to have perfected the skill for that special cake. Remove the pressure and enjoy learning what works best for you.
Secondly:
Remember to have the equipment and supplies you need organized ahead of time. You will have a lot more fun if you are not off running to the store half-way through the process!
Preparing the Cake
Preparation of the cake before applying fondant icing is key to your success.
Here are two ways that are popular and deliciously effective. They will both provide you with a smooth, solid base for the fondant to stick to:
- ‘Ganaching’ the Cake
The first way you can prepare your cake is to:
- Cover it with ganache
- Smooth the ganache
- Refrigerate for a while to help the ganache set well
2. Second Method: The ‘Upside Down’
If you want to create a layered cake and prefer using buttercream icing under the fondant this method will work beautifully:
- Place a piece of baking paper on your turntable stand
- Smooth a layer of buttercream over the baking paper where the cake will go
- Place the base cake layer over the buttercream. (This will actually become the top layer of the cake when you flip it over)
- Start adding the layers of cake, adding filling between the layers
- When you finish, pop the cake in the fridge for 10 minutes
- Then add the crumb coating and put it back in the fridge for another 10 minutes
- Next add the buttercream icing to the sides and top. Smooth the sides well, but don’t worry too much about the top because it will end up being the bottom of your cake!
- When iced, place a cake board on the top of your cake using a little buttercream to attach it
- Put the cake in the fridge for about 20 minutes
- Take the cake out of the fridge and carefully flip your cake over
- Gently remove the baking paper and you will have a perfect buttercream iced cake with sharp edges
Now for the Fondant…
First of all…
Use a good quality fondant. To achieve a professional finish with sharp edges to your fondant, you need to work with a quality product.
Work on a surface where the fondant won’t stick, or alternatively add some powdered sugar to the surface to prevent it from sticking.
Knead it well until soft. If you are adding color to it, knead until the color is evenly distributed.
To apply the fondant to the cake:
- Roll out the fondant so it is very thin. And gently flip it over the cake*
- Gently apply it to the sides using your hands
- Smooth the sides with fondant smoothers
- Trim the excess at the bottom
- Using a bigger cake board covered with baking paper, flip the cake upside down, once again
*Super useful tip:
Roll the fondant out over a piece of acetate. You can then use the acetate to lift the fondant and carefully flip it onto the top of the cake.
Bonus useful tip:
Have a pin handy!
When you start rolling out the fondant with the rolling pin, if you see any air bubbles forming, you can simply use the pin to pop the bubble and smooth it over gently.
Flexi Smoothers are fantastic for smoothing and creating sharp edges. (You can also use acetate or washed, clean plastic folders if you don’t have a set. I love to improvise!)
You can use regular smoothers towards the end to complete your perfect finish.
Sharp Fondant Edges
- Without removing the cake board on the top, keep smoothing the sides of the cake down to the bottom… that will make the sharp edges
- Once you’re happy with the result, flip the cake upside down one final time and remove the bigger cake board to reveal…
Those prized sharp fondant edges!
If you want to make them even better, use the Flexi Smoothers until you get the result you’re looking for.
Practice and Fun
As always… don’t get discouraged if it’s not perfect when you first start out decorating your cakes.
Practice, experiment and enjoy the journey…. You’ll get there.
I hope you find these tips super helpful.
Let me know in the comments if you have any questions and how you get on.
Enjoy x

Thanks so much for this tutorial.i will try it.