Test and keep free a magical tool for dealing with the most delicate cakes Click here to learn more now
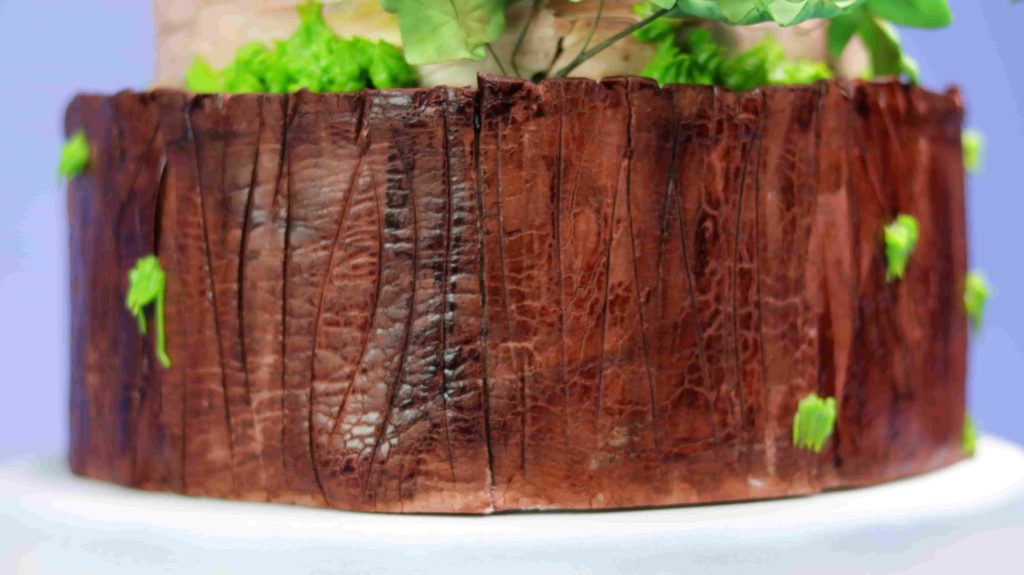
Cake design artist Paola Levy teaches her fondant technique for making edible tree bark that can be used for a tree stump cake, log cake, rustic wedding cake, or tons of other projects!
For nature lovers, the rustic wedding theme is all the rage. Edible bark, log cakes, and sugar flowers are the decorator’s delight for these events.
Here’s a super simple method for making a tree stump cake that won’t take all day and will spark any cake artist’s creativity:
- Choose your fondant – Store bought or homemade will work just fine. For the perfect fondant recipe, check out Paola’s course on DIY Fondant (And for limited time get a free cake leveler). The color of the fondant you use depends on the type of tree you’re going for. Oak could be medium brown, birch might be a light beige. (Use a few drops of darker and lighter brown gel color for variations in the bark. For best results, start with a lighter base color. Then enhance it later with edible paint or an airbrush color.)
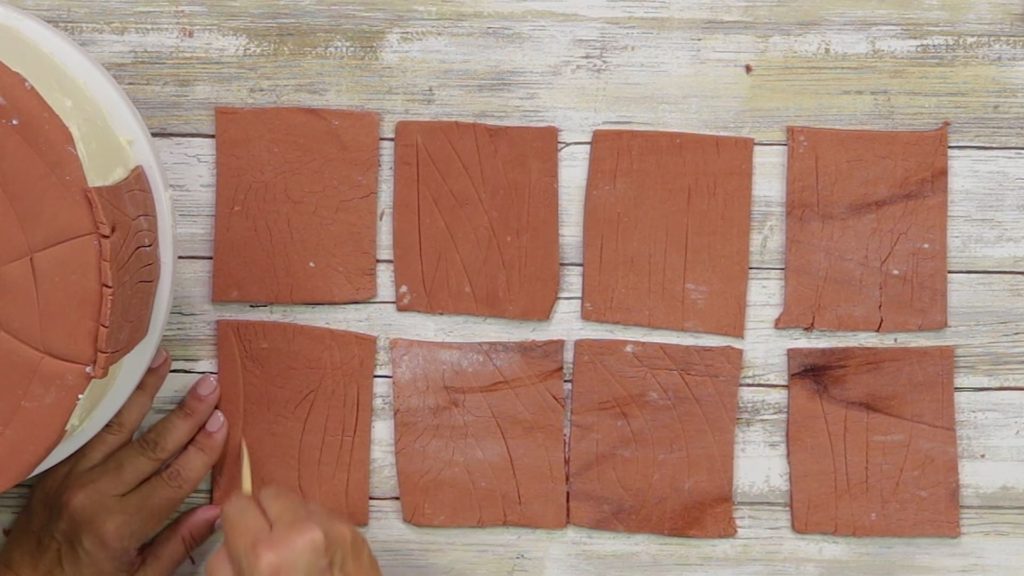
- Roll the fondant at least ¼” thick for 3” wide wood planks. Don’t overwork it and lose those “natural” variations.
- Let it rest! Take a breather and let the fondant sit uncovered for about 30 minutes, in order to form a skin. Letting it sit too long will cause it to be too stiff to create indentations for a natural wood look.
- Roll it again – After the resting period, roll the fondant again, just enough to form cracks in the skin to create a wood-like texture.
- Create grooves – Use a pointed (but not sharp!) modeling tool to accentuate grooves in the skin and carve out indentations in a random style, like in tree bark.
- Don’t forget the edges – Indent the edges in alignment with the grooves for a realistic, finished look.
- Paint it – Airbrush makes everything better! Just a light mist will work perfectly to keep the color variations visible. Another option is to hand paint the fondant with edible paint. (Make sure to do this step last, after assembling the cake and decorations.)

Keep in mind:
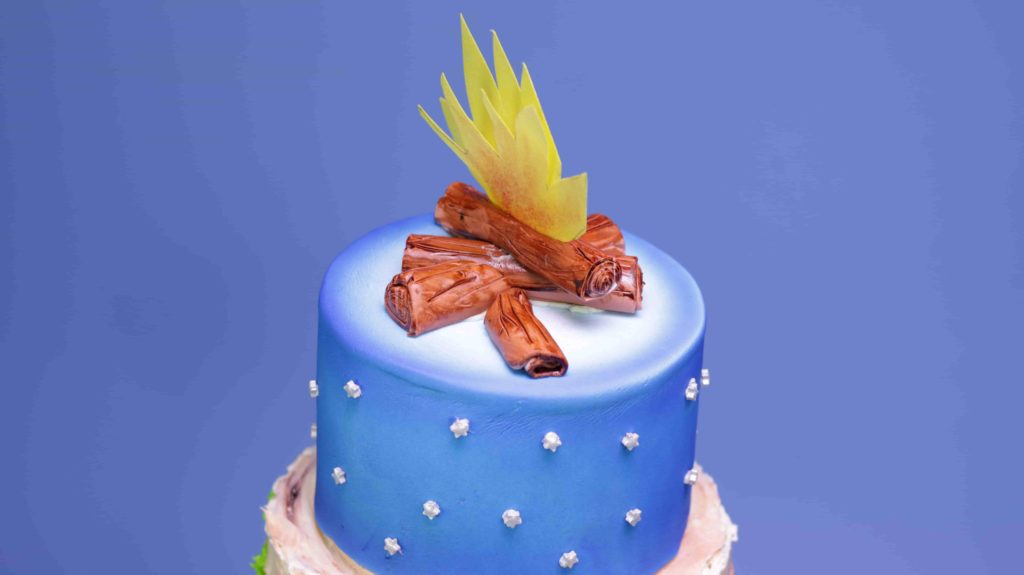
Cut the fondant into small rectangles for vertical “planks” before creating the grooves, or keep it one long rectangle for a log cake. You can even roll up the planks to make little logs for a campfire cake topper.

The wood look is a very forgiving texture, as any breaks or cracks can be disguised as natural features.

Buttercream makes the perfect glue to adhere the fondant bark to any cake, whether it be the bottom tier of a fabulous naked cake, or standing alone as a tree stump with a whimsical topper.
What beautiful projects will you make with this super fun and simple technique? Let us know in the comments section!
Test and keep free a magical tool for dealing with the most delicate cakes Click here to learn more now
Love it
These are really doable ideas. Thank you for telling us joe to get the best effects.
Awesome