Cake design duo Aaron & Kara create stunning edible art with this bas-relief seashell cake perfect for the ultimate beach wedding.
Get this week’s FREE tool for flawless buttercream cake edges Click here to learn more now
A modern twist on the classic art of bas-relief sculpture is this gorgeous natural-looking seashell cake. The best part is it’s a very acceptable excuse to get to the beach. Today.
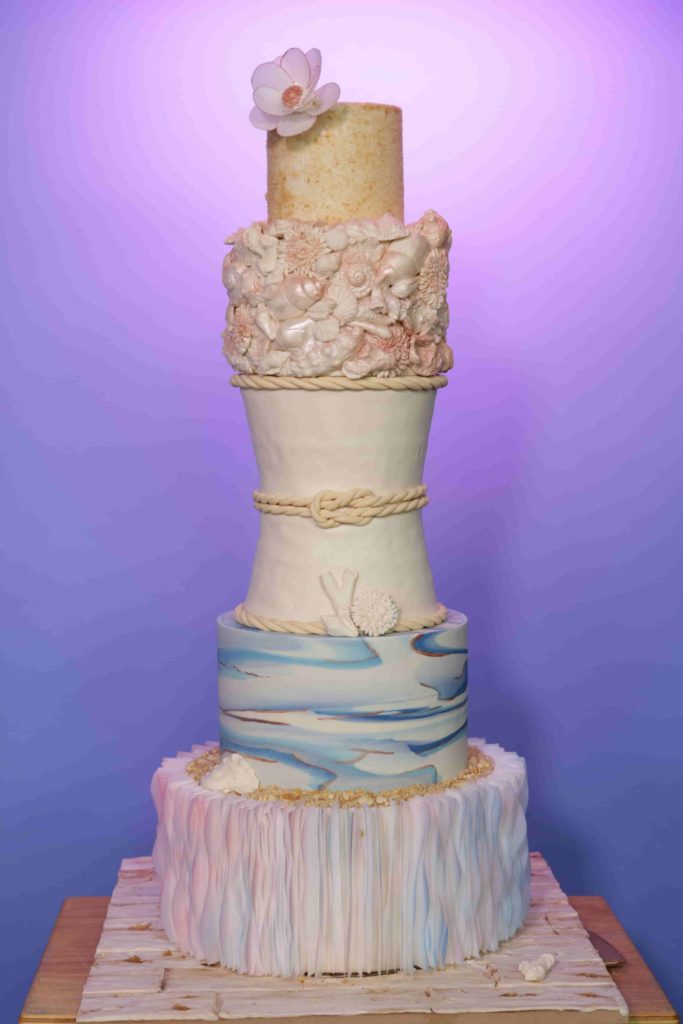
Make this cake as a stand-alone or as one tier in a beautiful beach wedding cake. Use this technique to create edible art inspired by bas-relief sculpture in any theme!
All you need to get started is a box of food-safe mold putty, some gumpaste, and your blank canvas – a cake, of course.
Here’s how to make your version of the most beautiful seashell cake ever created:
- Step #1: Go to beach. Gather seashells. Soak up inspiration. Step one – check!
- Step #2: Clean and make molds of your seashells. To clean the seashells, soak them in water with bleach; then wash them with soap and water. Mix the mold putty as directed, in equal parts, just enough for one shell at a time. Wrap the putty around the half of the shell that you want to see on your cake.
You need to work fast because the putty solidifies fast, in about 3 minutes. For ease of use, gently press the mold onto the surface of your counter top in order to give it a flat bottom. Wait at least 20 minutes for the molds to cure.

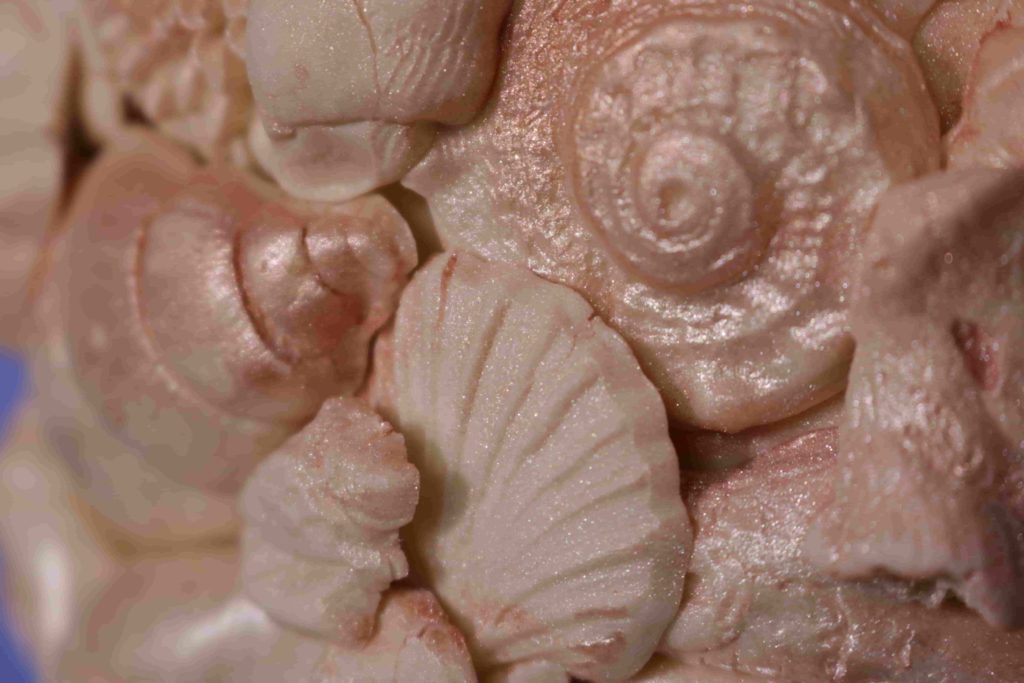
- Step #3: Use the molds to create edible seashells. Remove the shells from the molds and clean them with soap and water, or just press some gumpaste into the mold to remove any debris. Press a ball of gumpaste (fondant plus tylose) into one of the molds for a natural-looking edible seashell!
Remove the shell by delicately peeling away the edges of the mold from the gumpaste. The more careful you are, the more natural detail you will leave untouched!
- Step #4: Cover a cake in fondant. While you’re waiting for your gumpaste shells to set, make your cake and drape (or panel) it in fondant. For the illustrious upside down method, check out Aaron & Kara’s course Cake Design Decisions Made Easy.
- Step #5: “Glue” your gorgeously realistic shells to your cake as desired. For edible glue, you can use a mixture of water and tylose, corn syrup, egg whites, or piping gel. If you’re going with piping gel, let it sit out for a bit to firm up. If you’re going with egg whites, check with your health authority for food safety standards.
There are several options here:
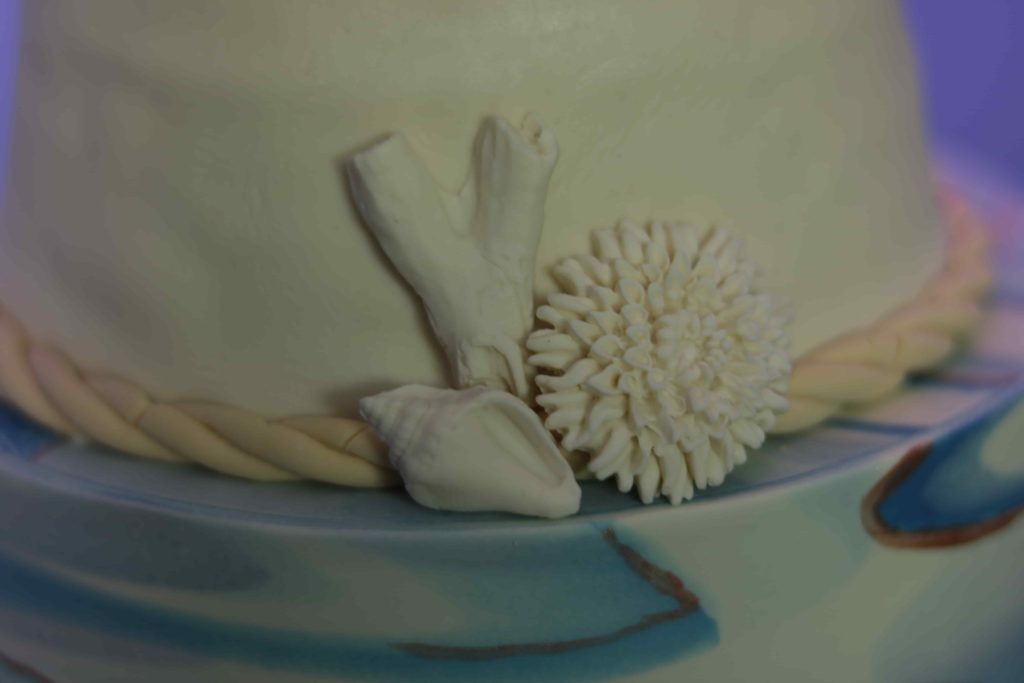
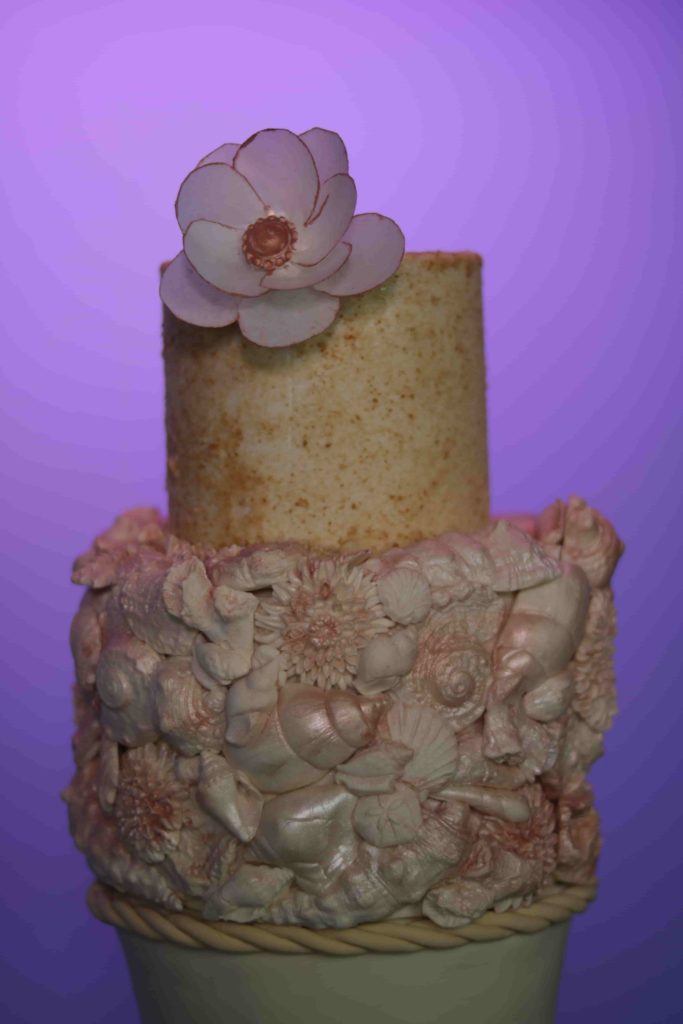
Completely cover the cake for that “encrusted” look, design a “spray” of shells in a diagonal on one side of the cake, or just create a few clusters of shells as an accent to your summertime beach-themed cake.

From here, it’s up to you – keep it classic white like a true stone sculpture, or.. let your creativity soar!
You can airbrush it, paint it gold with a mixture of luster dust and alcohol, or dust it sparingly like Aaron & Kara did. Whichever you choose, it will be an eye-catching cake fit for a special occasion.
Pro tips for an edible masterpiece:
- If you’re making several tiers, remember to score the area around the top of the cake you’re encrusting in order to leave room for the top tier.
- Use a scalpel to scrape away the extra gumpaste when you first remove your edible shells from their molds.
- Handle the shells delicately because the gumpaste will still be pretty soft.
- Random placement of the shells is key for a natural look – like they just crawled out of the ocean onto your spectacular cake.
- When layering the shells, apply the big ones first, then fill in the spaces with smaller ones.
Once you get the hang of the mold putty, feel free to experiment with other shapes and objects to create amazingly realistic edible pieces to take your cakes to the next level!
Have you tried the bas-relief technique in your cake decorating? Tell us in the comments section.
Get this week’s FREE tool for flawless buttercream cake edges Click here to learn more now
It look pretty cool. I’m going to try this week. Thanks
Beautiful cake!
Awesome!
Creative techniques. Thank you.
Beautiful, thank you both for sharing, loved the look and pearly shine on the cake
Amazing!
Love this!
Beautiful cakes. I wish I could get that good!
Wow!!!!!😍
The cake is beautiful, but it has way to much stuff going on, I like it to be a less, but 1spot that catches the eye! Would love to see just half of the icing on it!
I looks simply beautiful ❗❗
Where can I get the silicone putty or whatever it’s called⁉️⁉️I’m in S.C.❗❗
Amazing
where do you get the glitter color gel
Can I still get the the beach wedding basket?? If so what do I do to get &keep it?
How do I get the stuff to make the shells from??
Love it