FREE 13" Angled Stainless Steel Spatula and FREE Course Special Offer
Discover the Simple Tactics for Getting a Flawless Fondant and Perfect Buttercream Finish While Decorating Your First Master Cake Like a Food Network Winner
As thank you gift for being part of the CreativiU community and/or participating on our Giveaways
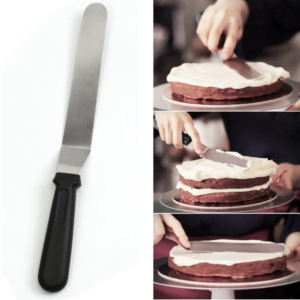
Angled Icing Spatula $0 $10
Large 13 inch angled blade keeps your fingers out of icing while creating a smooth surface when icing larger cakes or spreading filling between layers. Icing desserts, adding filling between cake layers and even filling a decorating bag is easier with an angled spatula. Ergonomic handle designed to be more comfortable in your hand, making it easier to use and grip when you're icing treats and cakes.
This course normally retails for $48 and the Spatula for $10 but we bought them both for you. We just ask that you cover your shipping/handling (just $4.95 US or $12.00 international anywhere in the world). Your information is secure and will not be shared.
BY ENROLLING NOW YOU GET:
- The ability to decorate you first cake like a professional
- Free 13" Inch Stainless Steel Angled Spatula
- Free Access to Decorating Your First MasterCake.
- Access to the instructor. Ask questions and get personalized answers.
Set your fears aside and finally decorate your very first master cake like a professional. Learn essential and powerful techniques like working with fondant and buttercream.
Hi i'm Beth Townsend, and I want to ask you this: Don't know where or how to get started with cake decorating? I know how it feels, not believing you have what it takes or the fear of rejection. But I want you to get that out of your system!
In this course, you are going to learn absolutely everything you need to know to achieve that feeling of success you get when you finally decorate your first pro looking cake, even if you are not artistic at all.
You'll be able to walk out of that kitchen feeling like Leonardo DiCaprio after he won his first Oscar. I remember how it felt after my first successful cake, but it only happened after a long time. Why? because I didn't have an instructor.
I lived way to far from the closest classes and there weren't any courses online. The good news is, it doesn't have to be like that for you. In this course you'll learn essential techniques like avoiding lopsided cakes, working and molding fondant, creating decorative items and properly using buttercream.
Lesson Plan
You'll start the class by learning how to get your cakes ready to be decorated. This includes knowing how to level the cakes to avoid lopsided cakes, Fill them to make them stable and we will go over the tools needed for this project.
In this lesson we will go over how to prepare delicious ganache to cover your cake tiers, make them strong, steady and get them ready for the fondant.
This lesson is all about creating the little, beautiful elements that will give life to your cake. We will go over how to use spaghettis and paint them gold, creating gum-paste flowers, little pearls and making symmetrical swags.
At this point, you will learn how to work with your very first piece of fondant. How to work it and mold it to make it smooth and where to get it from. You will learn how to cover your cake tiers with fondant without any lumps or humps, how to cut it and how much of it to use. You will also learn to troubleshoot common errors and how to fix them like removing air bubbles to have a perfect tier of fondant. You will also learn how to color your fondant, add texture to it and how to fix over-mixed colores. Using foam separators and why they matter.
You will learn how to stack your cake tiers together with clever techniques for making them stable and strong. Once the tiers are stacked, you will learn how to decorate flowerettes with buttercream. How to use buttercream and the importance of having the right consistency of your frosting. And how this method is great for you as a beginner because it helps you hide mini-mistakes.
Starting at the top, you will learn how to use the mini flowers we created. I will also show you how to create nice looking pearls. We will go over the importance of dry time and why make extra for mistakes. On the second texturized tier you will learn how to add symmetrical stripes. You will learn how to use the golden spaghettis and how to decorate your foam with gold luster.
To finish of your first cake, I will show you how to add ribbons and real flowers to the design to make it really clean a nice looking. You will also learn how to add glitter to it and optionally, how to use an airbrush to give your cake a nice, shine and clean look.
About Your Instructor
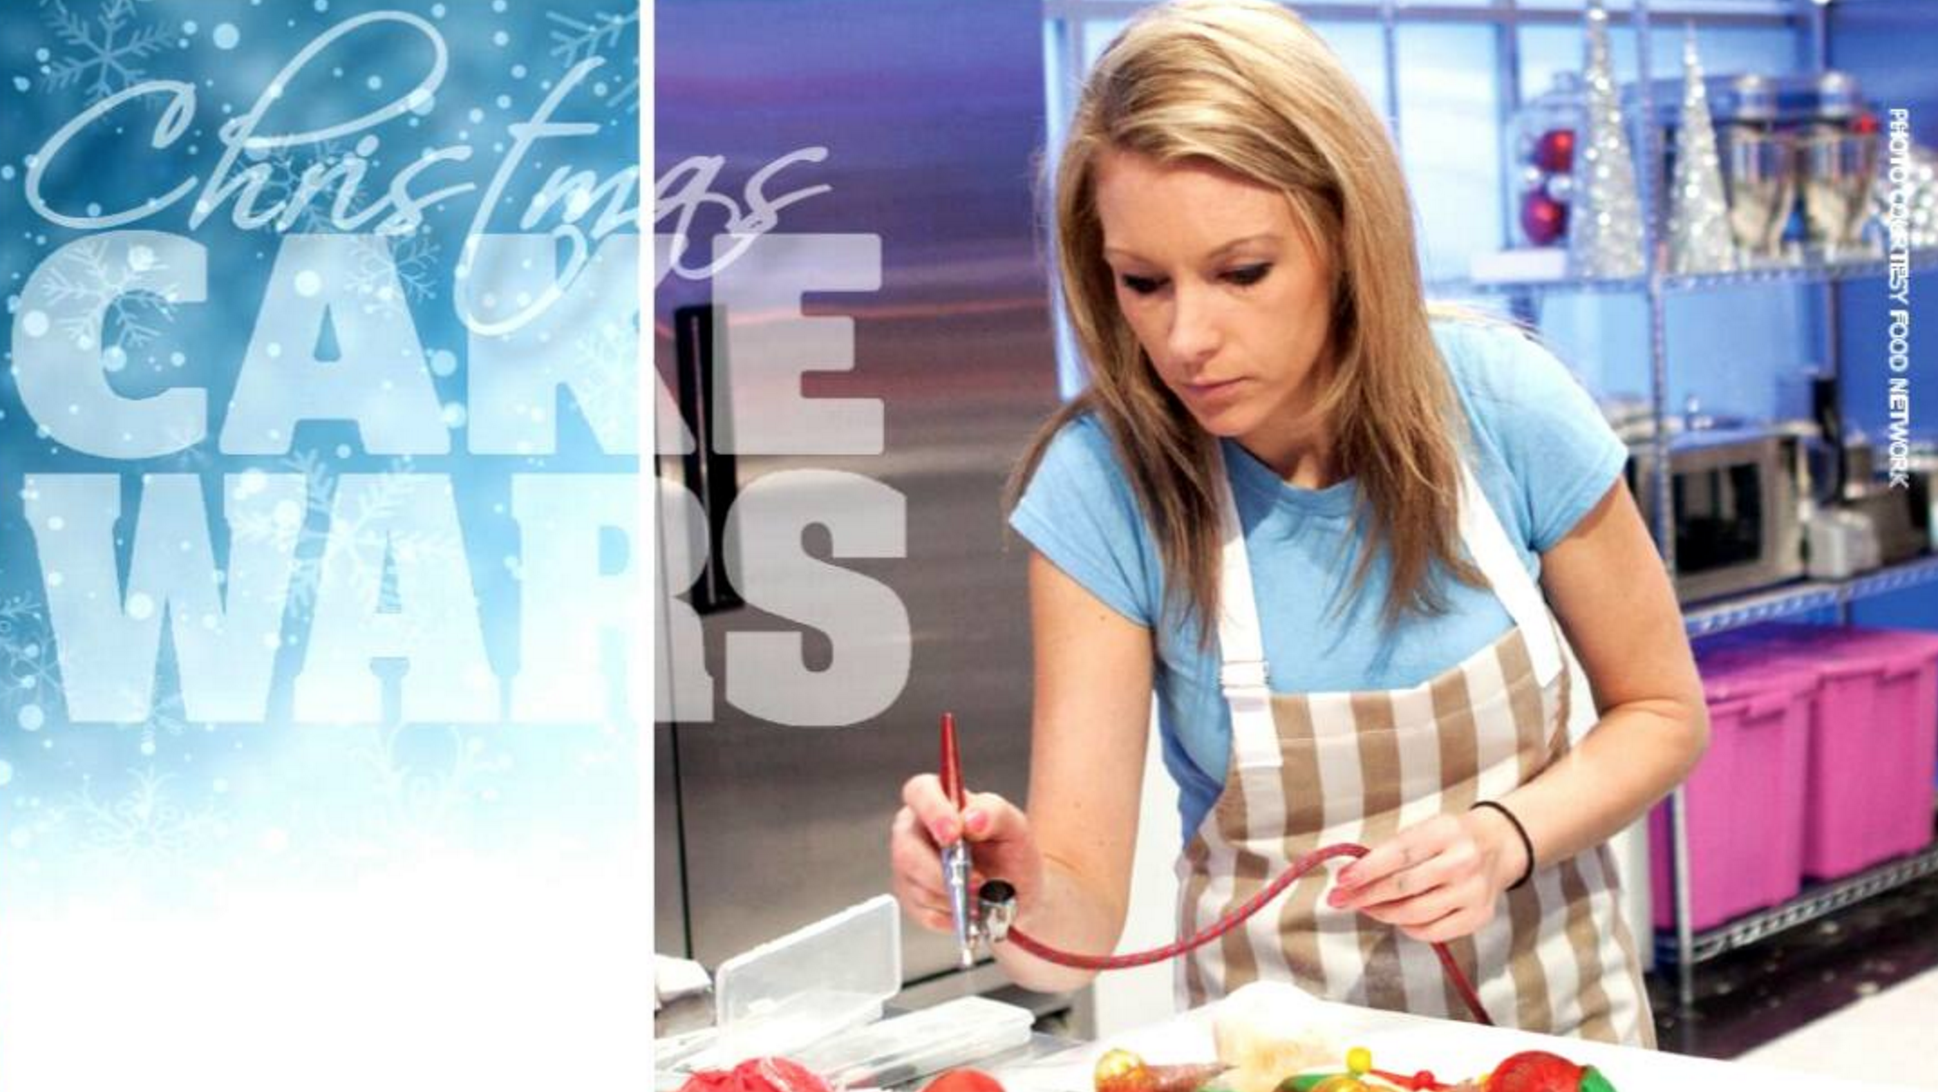
Beth Townsend
I have been decorating cakes for the past 7 years. My biggest regret is not having looked for an instructor. It was through a lot of trial and error that I shaped the skills that landed me on The Food Network's Cake Wars (and won). I'm a mother of 4 and full time cake decorator.
FAQs
-
Q.When does the class start?
A.Whenever you want! The course is available inside your account and it never expires. You can watch and ask questions from wherever you want.
-
Q.How long will I have access for?
A.Forever! You have unlimited access to this course.
-
Q.Will I be able to ask questions?
A.Yes! you will be able to interact with me and your fellow students and get personalized answers to your questions inside our virtual “class room”
What They Say
In this course Beth gave me the courage to actually start and finish my first decorated cake. And the best part was that i didn't have to go through any trial and error.
Larissa., Creativiu Student
Class Materials
2 10' round cakes
2 6' round cakes
1 4" round cake
1 (1.5 inch tall) 8" around foam cake separator
2 6" wax cake boards
1 8" wax cake board
1 10" wax cake board
1 3/4 " thick cake board to rest final cake on
Contact paper
Hot glue gun and sticks
Ribbon of your choice
Scissors
Icing spatula
Real roses or sugar flowers pre-made
Thick buttercream
Pizza cutter
Circle cutter
Piping bags
Tips standard #2 and #4
Tip to pipe roses: large star
Food coloring gel: pink and purple
White Satin Ice rolled fondant
Gold luster dust
Airbrush machine and gun (optional)
Vodka, rum or lemon extract
Gentle brush for brushing off excess powdered sugar
Spaghetti noodles
Large and small rolling pins
Support straws or cake dowels
Pencil sharpener
1/4 Thick 12' long wooden dowel 4- 12 oz. bags of semi sweet chocolate chips
1 3/4 cups of heavy whipping cream
As seen in...