Today, we will demonstrate an easy way to make a snowball quilt block, step by step.
Snowball Quilt Blocks derived from Amish quilting history, appearing as circles from a distance. In order to create unique visuals, one can alter the colors and patterns used in the blocks.
The Snowball quilt block can look deceivingly complex, but it is easy to make, since you begin by taking one large square and four smaller squares. Then you simply have to stitch them together. After cutting and pressing, you can have the block finished in no time! This shortcut method helps you save time and energy when you make a snowball quilt. as you will see below.
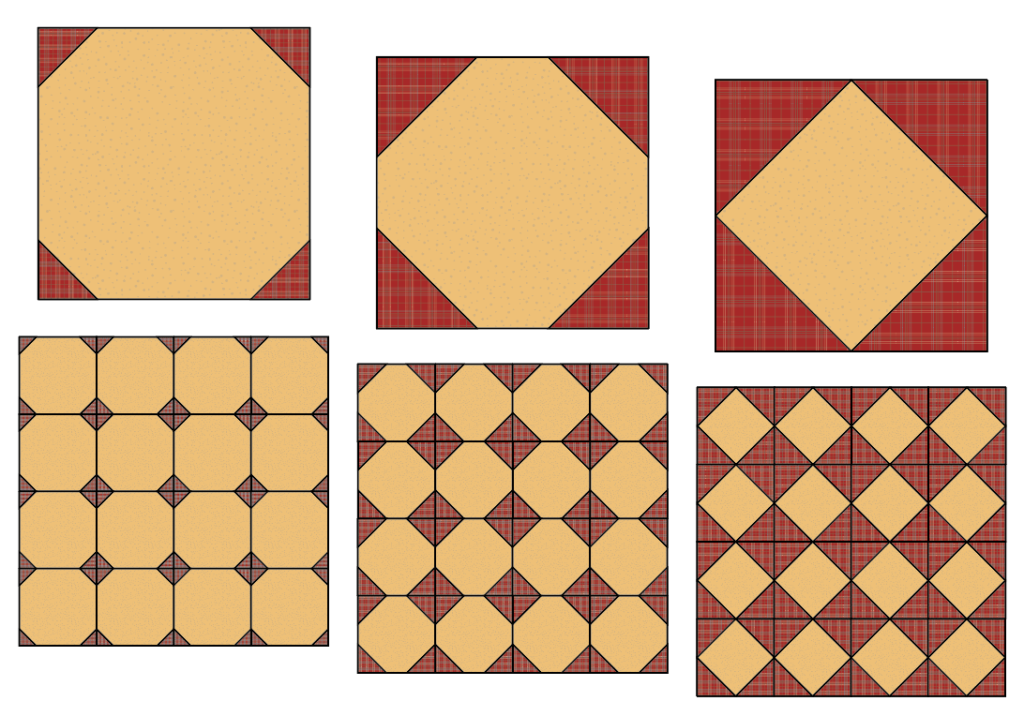
The snowball block, found in its traditional piecing method, is constructed with the help of half-square triangles on the corners forming a beautiful octagon shape that is framed by the triangles.
As you can see, the shape differs enormously just by changing the size of the four corner squares.

Let’s Start our Snowball Quilt Block
Cut 1 big square of the main fabric and 4 smaller squares of the secondary fabric, any size you want.

Draw a diagonal line on the back of each of the smaller squares.

Facing right sides together, line up each smaller square with the corners of the larger square.
Sew them along the diagonal line you drew. Repeat for all four corners.

Cut off the corners of each small square leaving ¼” seam allowance.

Open the 4 corners and press the seams of each one towards the darker fabric.

Use your ruler to trim the edges of any uneven corners to make them even and perfect.

Congratulations! You have just completed a Snowball Quilt block. The possibilities with this easy quilt block are endless, it offers so many design and size alternatives that you will be able to express your creatvity in many ways.
You may want to watch this mini tutorial on How To Make Snowball Corners in Quilting, a story in YouTube by @MelissaShields
Leave a Reply