Ever wondered how the pros get that buttery, layered watercolor look without ever touching paper? In this guide we’ll break down the exact digital tools, brush tricks, and workflow hacks that turn a flat screen into a vibrant studio. Perfect for artists ready to level up their skills.
Whether you’re a traditional painter moving to digital or a seasoned digital artist wanting to mimic watercolor’s unique flow, this step-by-step approach will help. We’ll cover choosing software, learning layers, using underpainting, mask layers, limited-brush strategies, and engaging with a community. By the end, you’ll have a repeatable process for creating stunning digital watercolor art.
Let’s start with the foundation: your toolkit.
Step 1: Choose the Right Software and Brush Toolkit
First things first: pick your software. The top options for professionals are Adobe Photoshop, Procreate (iPad), and Clip Studio Paint. Each has strengths for digital watercolor. According to Wikipedia’s overview of digital painting, software choice heavily influences your workflow and final result.
For adigital watercolor painting class for professionals, you need software that supports layers, blend modes, and custom brushes. Procreate is intuitive with a huge brush library. Clip Studio Paint excels with its watercolor brushes and paper texture simulation. Photoshop offers endless customization but has a steeper learning curve.
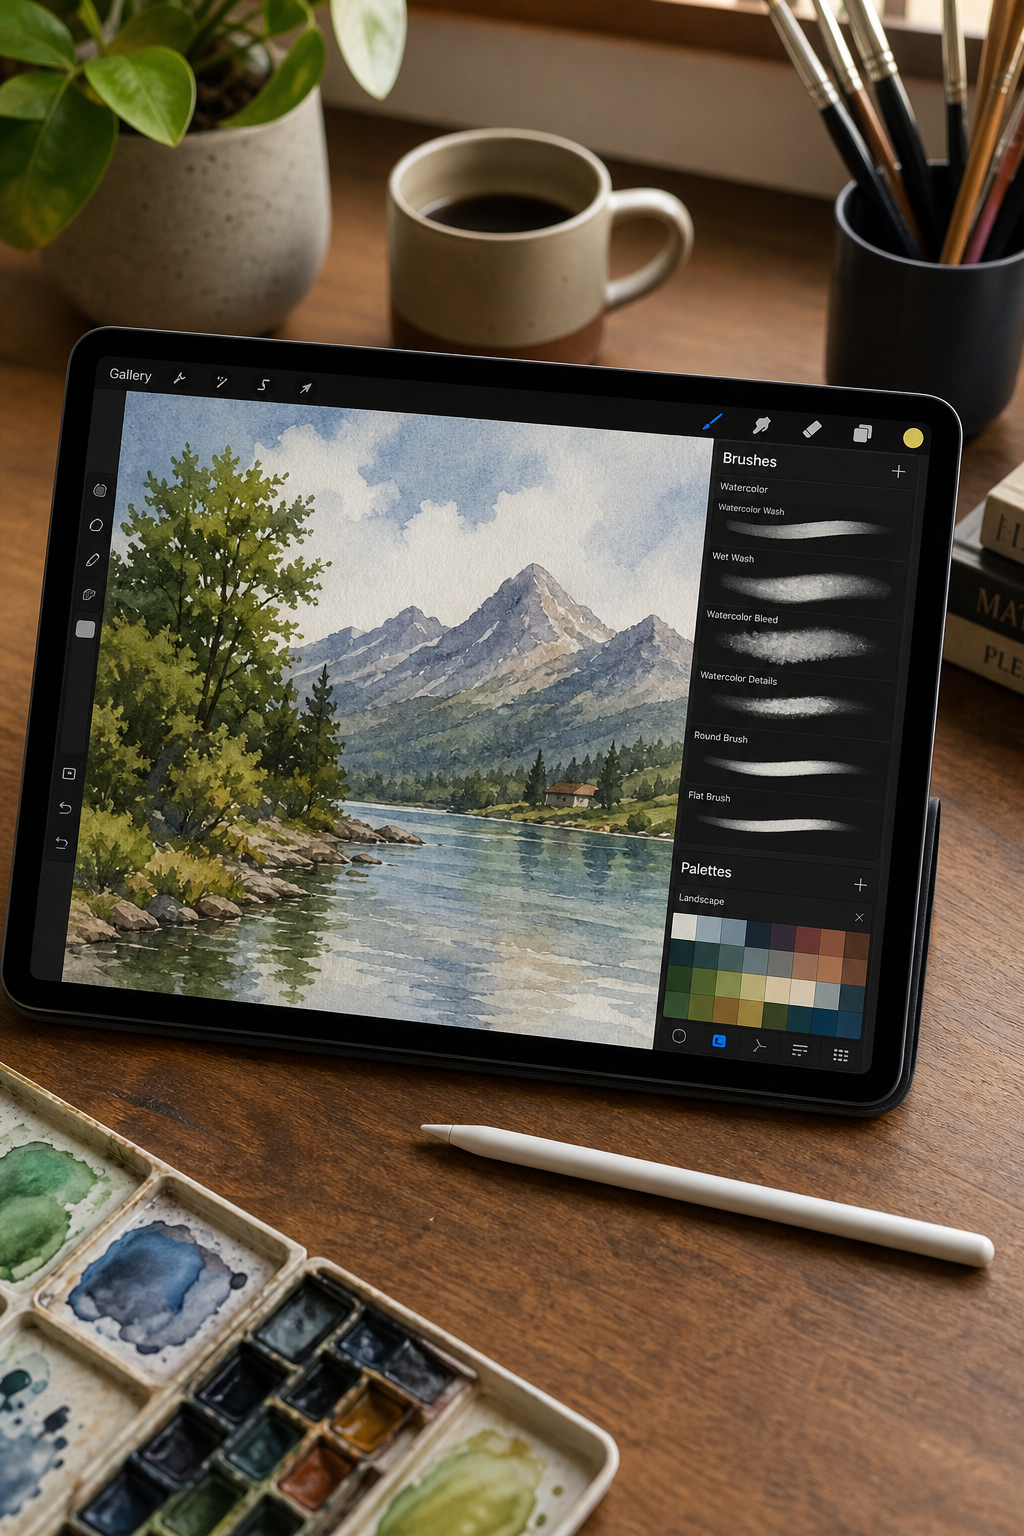
Now, brushes. Don’t get overwhelmed. You only need a few: a flat wash brush, a round detail brush, and a textured blender. Many pros stick to 2-3 brushes. For example, Clip Studio Paint’s default “Rough Wash” and “Texture Blend” brushes can produce beautiful watercolor effects with no downloading.
| Software | Key Features | Cost | Best For |
|---|---|---|---|
| Procreate | Intuitive, Apple Pencil support, large brush library | $9.99 one-time | iPad users, beginners |
| Clip Studio Paint | Watercolor brushes, paper textures, animation | $49.99/year or one-time | Manga, illustration, watercolor effects |
| Photoshop | Infinite customization, blend modes, industry standard | $20.99/month | Versatility, professional studios |
Bottom line:Choose software that matches your workflow, then master a minimal brush set to build a solid foundation.
Step 2: Master Layering and Value Building
Watercolor is all about transparency and building up values from light to dark. In digital, layers give you that same control. Start with a light sketch layer, then create a new layer for each wash. Keep your layers organized by naming them (e.g., “Sky wash”, “Shadow layer 1”).
As one YouTube creator explained, “Adding extra layers is a great way to add form and depth. You can slowly build up values instead of trying to get it dark enough on your first pass.” But the benefit diminishes after three layers, so plan your darkest areas early.
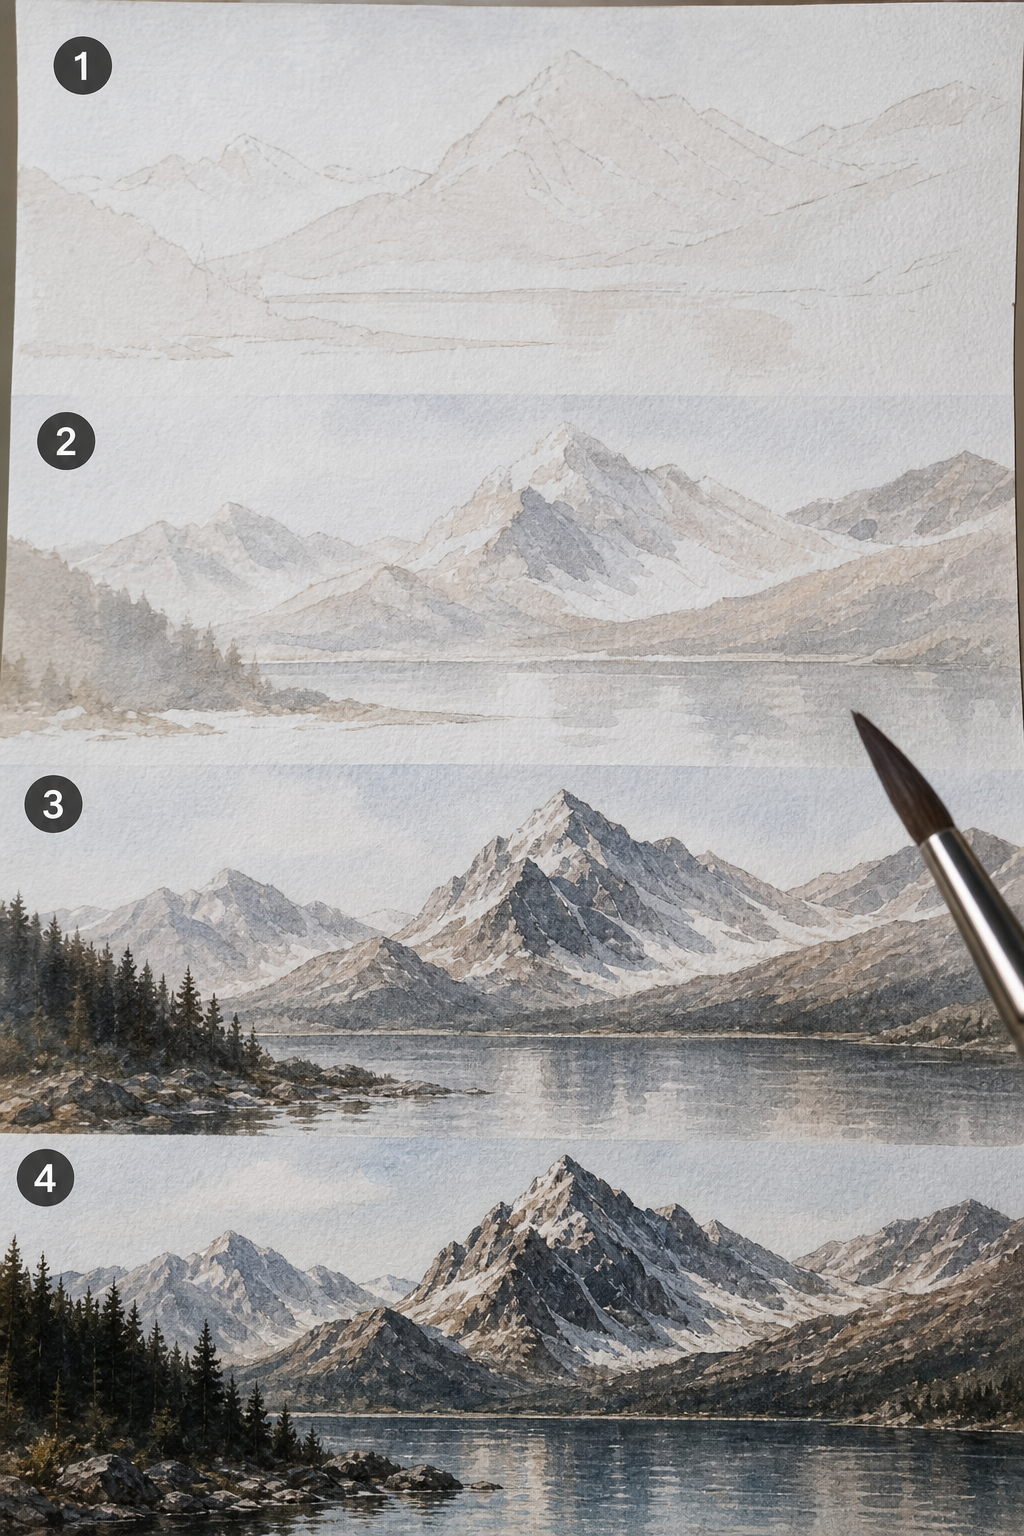
To train your eye, do value studies. Convert a reference photo to grayscale and paint it using only one color at different opacities. This exercise, often part of a digital watercolor painting class for professionals, sharpens your sense of light and shadow.
Bottom line:Consistent layering with increasing opacity creates the illusion of watercolor depth without muddy colors.
Step 3: Apply Underpainting with Complementary Colors
Underpainting is a classic watercolor technique that adds richness. The idea: paint a thin wash of a complementary color where your shadows will go, let it dry, then apply the main color on top. For example, if you’re painting a yellow flower, underpaint with purple (yellow’s complement). The transparency lets the purple show through, creating natural, vibrant shadows.
A YouTube artist demonstrated this perfectly: “If you mix purple with yellow you get a beautiful neutral. I paint this in where all shadows will be, dry it completely, then lay yellow on top. Because watercolor is transparent, you see through and build a beautiful shadow color.”
In your digital software, create a new layer set to Multiply or Normal (low opacity) for the underpainting. Use a soft brush with low flow. Let it dry (or toggle layer visibility) before adding the main color on a new layer above.
Bottom line:Underpainting with complementary colors adds depth and vibrancy that flat color layers cannot match.
Step 4: Use Mask Layers and Gradients for Smooth Transitions
Mask layers are a digital superpower. They let you hide or reveal parts of a layer without erasing. For smooth transitions like a sky gradient, use a layer mask with a soft brush. Paint black on the mask to hide areas, white to reveal. This allows gradual blending between colors.
from Clip Studio official tips, “By masking the layer and adding another color, you can create smooth, beautiful gradients. Unlike earlier, it’s okay to blend more messily here, it still turns out nicely.”
To create a gradient: paint your base color on one layer, add a mask, then use a gradient tool or soft brush to blend a second color on the mask. This technique is essential in anydigital watercolor painting class for professionalsfor achieving atmospheric effects.
Bottom line:Master masks and gradients to achieve the delicate washes that define watercolor’s character.
Step 5: Adopt Limited-Brush Strategies for Efficiency
Using only 2-3 brushes forces you to be creative and efficient. Professional artists often rely on a large wash brush, a detail brush, and a blender. The key is knowing when to use each.
From a YouTube tutorial on Clip Studio Paint: “I only use three brushes when I color. There’s no need for special downloads. These brushes come with the program in their default settings.” The brushes: Rough Wash (for base colors), Texture Blend (for softening), and Flat Brush (for sharp edges and shadows).
Try this exercise: For your next painting, limit yourself to one brush for the entire piece. Adjust opacity and flow instead of switching brushes. It trains you to think in terms of strokes, not tools. This minimalist approach is a hallmark of adigital watercolor painting class for professionals.
Bottom line:A small brush set reduces decision fatigue and helps you focus on composition and color.
Step 6: Incorporate Traditional Watercolor Principles Digitally
Even though you’re working digitally, traditional watercolor principles apply. Think about paper texture, water control, and the way pigment settles. In digital, you can simulate paper texture by adding a texture layer set to Multiply at low opacity (10-20%). Clip Studio Paint and Photoshop have built-in textures.
Water control translates to opacity and flow settings. For a wet-on-wet effect, use a large brush with high flow and low opacity. Let the colors bleed by applying them while the digital “paper” is still wet (i.e., on a layer with the “preserve transparency” off). For wet-on-dry, wait for the layer to dry (in real time) or toggle visibility.
As one expert on YouTube advised: “Don’t use white to lighten and do not use black to darken. Add water (lower opacity) to lighten, and layer more pigment to darken.” This preserves transparency, the soul of watercolor.
Bottom line:Emulate traditional watercolor rules, transparency, wet-on-wet, paper texture, to make your digital art feel authentic.
Step 7: Engage with Community, Critique, and Mentorship
No artist grows in a vacuum. Joining a community can accelerate your learning. Platforms like CreativiU offer interactive courses where you can share your work and get instructor feedback. According to research, community access is a key differentiator, 50% of courses surveyed lack it. A built-in peer network can be a make-or-break factor for professional development.
For a digital watercolor painting class for professionals, look for courses that include live critique sessions, portfolio reviews, and forums. You can also join online groups on Discord or Facebook dedicated to digital watercolor. Share your work, ask specific questions, and give feedback to others.
CreativiU’s community access is a strong selling point. As one artist said, “Getting real-time feedback on your digital watercolor pieces helps you spot issues you’d miss alone.” Combine that with structured lessons, and you have a powerful growth environment.
Bottom line:Active participation in a creative community multiplies your learning speed and keeps you motivated.
Frequently Asked Questions
What is a digital watercolor painting class for professionals?
A digital watercolor painting class for professionals is an online course designed for artists who already have some experience and want to master digital watercolor techniques. It covers advanced topics like layering, value building, underpainting, and brush customization. Most classes are on-demand and include video lessons, project files, and sometimes community access or instructor feedback.
Do I need expensive software to take a professional digital watercolor class?
No, but you need software that supports layers and blending. Many professional classes use Procreate (iPad, $9.99) or Clip Studio Paint (around $50/year). Photoshop is also common but more expensive. Some classes even use free software like Krita or GIMP, though they may lack some watercolor-specific brushes.
Can I earn a certification from a digital watercolor painting class for professionals?
Certification is rare in art courses. Most professional classes focus on skill development and portfolio building rather than formal certification. If certification is important, ask the course provider before enrolling. Some platforms offer certificates of completion, but industry credibility comes from your portfolio, not a certificate.
How long does it take to complete a professional digital watercolor class?
It varies. Most on-demand courses are self-paced with 10-30 hours of content. Some can be finished in a weekend if you binge-watch, but true mastery takes practice over weeks. Look for classes that offer lifetime access so you can revisit lessons as you grow.
What are the best brushes for digital watercolor?
The best brushes mimic real watercolor: a wash brush for broad strokes, a detail brush for fine lines, and a textured blender for transitioning. Default brushes in Clip Studio Paint or Procreate often work perfectly. Avoid buying expensive brush packs until you’ve mastered the defaults.
How do I get feedback on my digital watercolor work?
Enroll in a class that includes instructor feedback, like CreativiU’s interactive courses. Alternatively, join online art communities (Reddit, Discord, Facebook groups) and post your work with specific questions. Peer critique can be very helpful, but look for constructive feedback from experienced artists.
Can I combine digital watercolor with traditional techniques?
Absolutely. Many professionals scan traditional watercolor washes and finish them digitally. You can also print digital art and add physical watercolor on top. Hybrid workflows give you the best of both worlds: the spontaneity of real watercolor and the precision of digital.
Is a digital watercolor painting class for professionals worth the investment?
If you’re serious about improving quickly and learning efficient workflows, yes. A structured class saves you from trial-and-error and teaches you industry best practices. Look for classes with community access, instructor feedback, and a curriculum that covers the techniques you want to master.
Conclusion
You now have a step-by-step roadmap to learning digital watercolor painting. Start by choosing the right software and a minimal brush set. Practice layering and value building to create depth. Use underpainting with complementary colors to add richness. Master mask layers and gradients for smooth transitions. Embrace limited-brush strategies to boost efficiency. Always ground your digital work in traditional watercolor principles. And finally, engage with a community, like CreativiU, to accelerate your growth.
Adigital watercolor painting class for professionalscan fast-track your skills, but the real progress comes from consistent practice. Set aside time each day to paint, even if it’s just 15 minutes. Experiment with the techniques here: try a value study, underpaint a simple shape, or blend two colors using a mask. Share your results and ask for feedback.
Remember, the best watercolor, digital or traditional, has a sense of flow and spontaneity. Don’t over-polish. Let the paint do its magic. Now go create something beautiful.
Leave a Reply