Let me be completely honest: the idea of crocheting a granny square sounds simple, but the first few stitches can feel a little fiddly. You worry about corners, about edges that wobble, about keeping tension steady. It’s totally normal to feel a tangle of excitement and doubt at the same time. You’re not alone—lots of crafters hit that moment. And that’s why we break it down, step by step.
Think of a granny square as a tiny canvas you build round by round. The trick isn’t speed but consistency—same tension, same hook, same turning cadence. In our experience at CreativiU, calm starts make the best squares. Start here, and you’ll thank yourself later.
If you’re new here, start with this beginner-friendly resource: How to Crochet a Granny Square Step by Step: Easy Beginner Tutorial. It lays out the core moves with clear photos and simple terminology, so you know exactly what to expect before you pick up your hook for the first round.
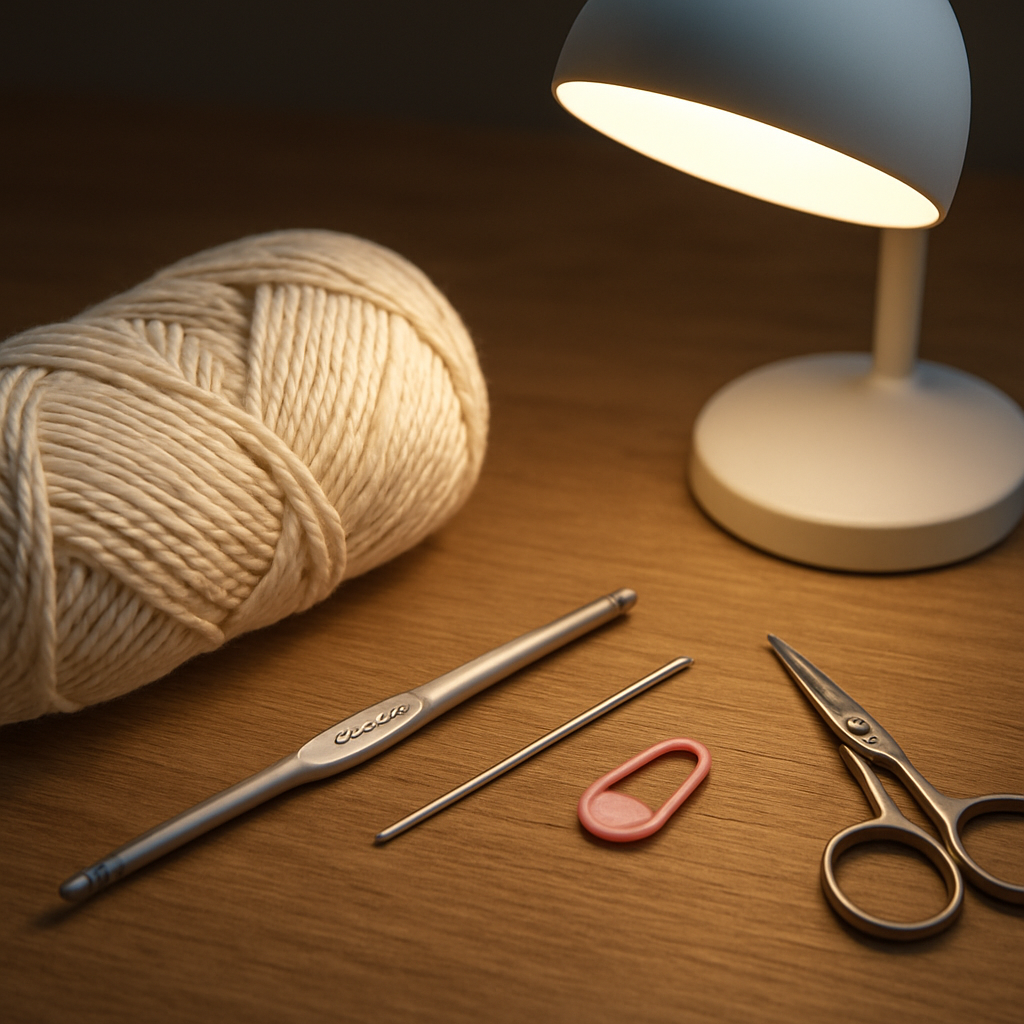
Now, let’s talk gear. You’ll want a comfortable crochet hook, a light-to-medium yarn weight, and a stitch marker. Keep your workspace bright and untangled. A small project bag helps you carry your square from couch to coffee shop without losing your place.
Starting choices matter. You can begin with a magic ring or with a small slip-knot chain to anchor the center. The ring method is cleaner for tightening the center, while the chain method can feel faster once you’ve got the hang of it. Try both on scrap yarn to see what suits you.
A basic granny square starts with a center and builds outward in rounds. In round one you’ll create a little ring of stitches, then add groups of stitches in corners to form that classic square shape. Round after round adds more stitches and increases the cube-like lattice that gives granny squares their distinctive look.
Stitch counts are your best friend here. A common setup is 3 double crochets, chain 1, 3 doubles in each corner. Keep the same number for every corner as you grow, and your square stays perfectly flat. If a side starts pulling, pause and recheck your tension before you move on.
Slowing down at the edges helps a ton. Don’t force the final stitches to pull in; instead, let the corners sit flat and correct as you go. If you’re finishing a square, a gentle snip and weave of ends will hide the joins nicely. Small habits now save you grief later.
So this is just the start. In our courses and community, you’ll find more patterns, tips, and feedback to help you turn granny squares into blankets, tote bags, or decorative patches. If you’re chasing structure and support, CreativiU makes it easier to learn with on-demand, hands-on classes.
TL;DR
Learn how to crochet a granny square step by step, from picking hook and yarn to mastering corner clusters that keep squares flat.
We break down each round, share tension tips, and show how CreativiU’s on‑demand courses boost confidence, so you finish squares ready for blankets, bags, or quick‑craft projects.
Step 1: Gather Your Materials
Alright, before you even think about that first magic ring, let’s make sure you’ve got everything you need right at hand. It’s amazing how often a missing stitch marker or a tangled skein can turn a calm crochet session into a mini‑panic.
First up, the hook. For most beginners a medium‑weight (size G/6 mm) crochet hook does the trick. It’s comfortable on the fingers and gives you enough control to keep tension even. If you have arthritis or just prefer a softer grip, consider an ergonomic hook with a rubber handle – it’ll save your hands in the long run.
Next, yarn. A light‑to‑medium weight yarn (often labeled as worsted or DK) in a smooth, not too fluffy texture works best for granny squares. Cotton blends are great because they’re easy to wash and hold their shape, which matters when you eventually stitch multiple squares together.
Now, the little things that make a huge difference: a stitch marker, a pair of sharp scissors, and a yarn needle for weaving in ends. Trust me, you’ll thank yourself when you’re halfway through and can quickly mark the start of each round.
Do you have a tidy workspace? A well‑lit table, a cup for your yarn, and a small bag to keep your tools organized can turn a chaotic corner into a creative haven. If you’re juggling kids or a pet while you crochet, a portable project bag can keep everything together when you move from the couch to the kitchen.
Here’s a quick checklist you can print out or keep on your phone:
- Crochet hook (size G/6 mm)
- Light‑to‑medium yarn (cotton or cotton blend)
- Stitch marker
- Scissors
- Yarn needle
- Workspace with good lighting
- Project bag (optional but handy)
Got your list? Great. One more thing many beginners overlook: the tension. Grab a scrap piece of your chosen yarn and make a few practice double crochets. If the stitches feel too tight, try a slightly larger hook; if they’re too loose, drop down a size. This little test saves you from a warped square later on.
And because we love a little visual aid, here’s a short video that walks you through setting up your materials and doing that quick tension test. It’s perfect for those who learn best by watching.
Once you’ve got everything sorted, take a moment to enjoy the process. It’s kind of like prepping a kitchen before you start cooking – the better the prep, the smoother the dish.
Imagine you’re about to start a new granny square for a blanket you’ll sell at a local craft fair. Having your materials ready means you can focus on perfecting that first round instead of scrambling for a missing hook.
Finally, a friendly reminder: if you ever feel stuck or need inspiration, communities like CreativiU’s forum are full of crafters sharing their own material setups and tips. You’re never truly alone in this.
Step 2: Make the Foundation Chain
So you’ve picked your project, laid out your desk, and you’re itching to start. The foundation chain is the doorway—get it right and the rest of your granny square lays flat and neat.
First, decide how you’ll begin. A lot of crafters love a magic ring to center the square. It creates a tight, nearly invisible center. Others prefer starting with a slim slip-knot chain to anchor the middle. Both work; the key is consistency—keep your foundation chain even in tension as you move into the first round.
Let’s walk through the steps, one clear path at a time.
Option A: magic ring start. Make a loop with your yarn end, leave a small tail for weaving later, then chain 2 to count as the first double crochet. Wrap the yarn over your hook and work 12 double crochets into the ring. You’ll close the ring with a slip stitch into the top of the first double crochet. Take a breath—center is where you’ll anchor your first cluster in the corners later.
Option B: chain start. Chain 4, then slip stitch into the first chain to form a small center circle. This creates a neat opening and is a steadier anchor if you worry about tightening the hole. From there, you’ll work your 12 double crochets around the center in rounds, just like the magic ring method.
Whichever path you pick, your first round will look like three double crochets, chain one, three double crochets in each corner. You’re creating that familiar soft box that will grow evenly as you add rounds. Don’t rush the tension now—consistent pressure makes flat, square edges later on. If you notice a wobble, pause and tug gently on the yarn tail to even it out before moving on.
Now, for a little pro-tip: use a stitch marker to keep track of your starting chain or first stitch in each round. It saves you from losing your place when you turn and begin the next row. And a handy tip for color planning—one color at a time in the center, then switch for corners as you grow. It helps you see where the color changes will land as the square expands.
If you’re more of a learning-by-watching person, a quick demo can help you lock in the feel of this step. Here’s a quick video you can reference for visual guidance—watch it before you dive in to reinforce what your hands will be doing: watch this quick demo.
Remember: this isn’t a race. It’s about getting a foundation you can trust. CreativiU’s on-demand courses are designed to give you that steady practice, plus community feedback so you don’t feel stuck if a stitch goes wonky. Think of this as your instruction manual you can revisit whenever you need a refresher.
So, what’s next after you lay the chain and complete the center? You’ll transition into the first real rounds, repeating your corner clusters in a way that keeps the square perfectly flat. You’re building muscle memory—this is where confidence starts to grow.
Feeling stuck? Try a quick 15-minute focused practice plan: count your foundation chains, mark your starting point, and crochet at a steady tempo rather than racing the stitches. If you want more guided practice, our platform offers structured lessons that align with this step and help you keep momentum without overwhelm. another concise walkthrough.
Step 3: Crochet the First Round
Okay, you’ve laid the foundation. The first real round is where your square begins to take shape. It’s not mystery—it’s rhythm, tension, and a little patience.
You’ll choose your center method, magic ring or chain start. Either works, as long as you keep your tension even from the very first stitch.
Option A: Magic Ring Start
Make a loop with the yarn end, leaving a short tail to weave in later. Chain 2 to count as the first double crochet, then work 12 double crochets into the ring. Slip stitch into the top of the first double crochet to close the ring. Centered and tight, this minimizes gaps as you grow.
Round 1 uses three double crochets, chain one, three doubles in each corner. You’ll complete four corners around the ring, which sets you up for the flat sides in later rounds.
Option B: Chain Start
Chain 4, then slip stitch into the first chain to form a small center circle. This gives you a neat anchor if you’re worried about a big hole in the middle.
From there, work 12 double crochets around the center in rounds, just like the ring method. The first round still follows 3 dc, ch1, 3 dc in each corner, creating the same square footprint.
Whichever path you pick, you’re stitching the same idea. Round 1 is the base; in plain terms, you’re laying out four little petals that will become the sides of your square.
Does this really keep the middle tight and the sides even? It comes down to keeping equal tension as you work each stitch and not rushing the turns.
As you move into Round 2 and beyond, you’ll repeat corner clusters in every round, increasing evenly to keep the square flat. Don’t rush the turn—it’s all about even tension and accurate stitch counts.
Two practical tips: mark your starting stitch with a stitch marker; pause if the edge pulls or the corners look wonky.
So, what should you do next? Check your tension, count the stitches in each round, and keep your turning chain consistent. A small pause now saves you from reworking later.
For a quick visual guide, you can see this in action in a quick demo: watch this quick demo. If you want a concise walkthrough as a backup, take a look at another short demo: another concise walkthrough.
With steady practice and the right calm setup, you’ll build the muscle memory you need to crochet flat, uniform rounds. CreativiU’s on-demand courses can support you as you grow from that first round into a confident granny-square routine.
Step 4: Build Subsequent Rounds (Size Options)
Alright, you’ve nailed the first round and you’re feeling that tiny square start to take shape. But now comes the part that actually lets you decide how big your final piece will be – the subsequent rounds. This is where you turn a teeny‑tiny starter into a blanket‑size marvel or a pocket‑sized charm.
First thing’s first: ask yourself what you’re planning to make. Are you dreaming of a cozy lap blanket for your couch? A set of coasters for the coffee table? Or maybe a tote bag that can carry a week’s worth of groceries? Your end goal will dictate how many rounds you need and which size options make sense.
Understanding the math behind each round
Every round after the first adds a predictable number of stitches. The classic granny square pattern adds 12 stitches per round – three stitches in each of the four sides plus the turning chains. So if you start with 12 stitches in round 1, round 2 will have 24, round 3 will have 36, and so on. This linear growth makes it easy to calculate the final dimensions.
Here’s a quick cheat sheet:
| Round | Stitches per side | Typical finished size (inches) |
|---|---|---|
| 1 | 3 | 2 × 2 |
| 3 | 9 | 4 × 4 |
| 5 | 15 | 6 × 6 |
| 7 | 21 | 8 × 8 |
Those numbers assume a medium‑weight DK yarn and a 4 mm hook; if you switch to bulky yarn or a larger hook, each round will add a few more inches. That’s why we always recommend crocheting a test swatch before committing to a full‑size project.
Real‑world example: a lap blanket
Imagine you want a 36‑inch blanket. Using the table above, you’d need roughly 7 rounds with DK yarn. One of our community members, a freelance graphic designer, actually built a 36‑inch square by working to round 7, then seamed four of those squares together. She told us the key was keeping tension consistent – a gentle reminder that even tension beats speed every time.
If you’re after a smaller coaster, you might stop at round 3 (about 4 × 4 inches) and add a decorative border. The great thing about granny squares is you can mix and match sizes in the same project – think of a patchwork bag with 4‑inch and 6‑inch squares alternating for visual interest.
Actionable steps for each new round
1. Count your stitches. Before you start the next round, quickly run your hook along the previous round and count. If you’re off, you’ll notice right away.
2. Mark the start. Slip a stitch marker into the first chain‑one of the new round. This prevents you from losing your place when you turn the work.
3. Work the corner clusters. Each corner still follows the 3 dc, ch 1, 3 dc pattern. Keep the chain‑one tight but not pulled – a loose chain‑one will make the corner look saggy.
4. Check tension. After you finish a side, lay the square flat. If the edge pulls or the side looks wavy, pause, adjust your grip, and maybe do a few practice stitches before continuing.
5. Document your round count. Jot down “Round 5 – 15 st per side” in a notebook. When you come back weeks later, you’ll know exactly where you left off.
Does this feel like a lot? Think of it as a mini‑checklist you run through each time you add a new layer. Over time the steps become second nature.
Choosing a size path that fits your lifestyle
If you’re a busy parent looking for a quick project, aim for 3‑4 rounds. You can finish a set of coasters in an evening and still have yarn left for a future blanket.
Creative entrepreneurs who sell finished goods often build a library of size options: a 4‑round mini‑square for jewelry pouches, a 6‑round medium square for tote‑bag panels, and an 8‑round large square for blankets. Having those three ready‑to‑go sizes lets you respond to customer orders fast.
And for those who crochet as a personal development practice, try a “size‑challenge”: start with a 2‑round square, then double the number of rounds each week. You’ll see tangible progress and a growing stash of fabric to repurpose.
Need a deeper dive into how to scale a granny square into a full‑size blanket? Our Granny Square Blanket guide walks you through the exact round counts for common blanket dimensions, plus tips on colour‑blocking and joining.
While you’re expanding your crochet repertoire, you might also enjoy exploring other creative mediums. A fellow crafter once told us that switching from yarn to pencils helped refresh their design instincts. If that sounds appealing, check out this step‑by‑step drawing guide – it’s a handy companion for any artist who loves hands‑on tutorials.
So, what’s your next move? Pick a target size, count your stitches, set a marker, and start the next round. Before you know it, you’ll have a stack of perfectly proportioned squares ready to become anything you imagine.
Step 5: Finish, Block, and Add a Border
So you’ve got your squares built. The last step in how to crochet a granny square step by step is giving it a confident finish, setting the edges, and then deciding on a border that ties it all together.
Finish the square by weaving in ends. Leave a tail, weave it in with a tapestry needle, and trim neatly. A clean finish keeps frayed ends from catching on clothing or snagging as you stitch.
Weave in the ends and set up a clean edge
Blocking helps the edges lie flat and the squares match up nicely in a blanket. If you’re working with cotton, a light dampening followed by gentle pinning works well. For wool blends, test a small sample first.
Blocking to flatten and square your work
Now the border. A simple round of 3 dc in each stitch, with 3 dc in corners, makes a neat frame. Or switch colour for the border and add a tiny picot in the corners for a touch of detail.
To do it, join with a slip stitch at a corner, then work around the square in your chosen pattern. Keep tension even and don’t rush the turns.
So, what’s your best border option for a patchwork blanket? A consistent border across all squares makes seaming easier and the final blanket look cohesive.
If you’re new here, a quick demo can help cement the feel of the last steps. Try this: 1 round of dc in each edge, 3 dc in corners, colour‑block the body, then a contrasting border. watch this quick demo and another concise walkthrough.
And if you’re making multiple squares for a bigger project, photograph your border on a sample swatch so you can replicate the look across all pieces.
Finally, set your border and let the square dry completely before joining. A dry border holds its shape during assembly, saving you headaches later.
If you’re already planning a stack of squares, this finish and border routine is your repeatable standard. It helps you scale from pouches to blankets with confidence.
That’s the finish line today. Tomorrow you’ll stitch a blanket. Ready for bigger projects.
Yarn choice for borders matters. If you match the body, it blends; pick a contrasting shade to make the border pop at edge.
Tips: count stitches along the edge after border rounds to keep symmetry. If one side grows, pause, even your grip, then continue.
That’s the finish line today. Tomorrow you’ll stitch a blanket. Ready for bigger projects.
watch this quick demo can reinforce the final border technique, while this alternative walkthrough gives another perspective.
Tips & Common Mistakes
Don’t Forget to Count Your Stitches
One of the easiest ways to end up with a lopsided square is skipping a quick stitch count. After you finish a round, run your hook along the edge and tally the stitches. If you’re off by even one stitch, the next round will start to pull or wobble. A simple checklist works wonders: count, mark the first chain‑one, then count again before you turn.
Does this feel like extra work? Think of it as a safety net—like double‑checking a recipe before you bake. The few seconds you spend counting now save you from having to rip out an entire round later.
Watch Your Turning Chains
Turning chains are the secret sauce that keeps corners square. Too tight, and the corner looks puckered; too loose, and the edge sags. The sweet spot is a chain that’s snug enough to hold the shape but still has a little give.
Here’s a quick test: after you slip the chain‑one, give it a gentle pull. If it snaps back immediately, tighten a little on the next turn. If it feels floppy, tighten a tad more. Over time you’ll develop a feel for that perfect tension.
Keep Your Yarn Tension Consistent
Even the best pattern can go haywire if your yarn tension fluctuates. Beginners often grip the yarn tighter on the first few rounds and then relax as they get comfortable, which creates a visible ridge.
Try this: hold the yarn the same way you would hold a pencil. If you notice the yarn slipping, adjust your grip just a hair tighter. A short practice session of crocheting a few rows of plain double crochets before you start the square can lock in a steady rhythm.
Avoid Skipping Corner Clusters
Missing a 3‑dc‑ch‑1‑3‑dc cluster in a corner is a classic rookie mistake. The square will start to drift, and you’ll see a tiny gap that gets bigger each round.
My trick is to place a tiny stitch marker in the first corner of each new round. When you see the marker, you know you’re at a corner and can repeat the exact cluster. It’s a tiny habit that saves a lot of frustration.
Don’t Forget to Block
Blocking is the finishing touch that turns a wobbly piece into a crisp, professional‑looking square. Even a light dampening and pinning for 10‑15 minutes can flatten uneven edges and align the corners.
If you’re working with cotton, a quick spray bottle mist and a few pins on a flat surface does the trick. For wool blends, a gentle steam from an iron (on low) works well—just don’t press directly on the yarn.
Use the Right Hook Size
Hook size matters more than you might think. A hook that’s too small will tighten the fabric and make the square stiff; too large and the square will be floppy.
Check the yarn label for the recommended hook size, then add or subtract half a size based on how tight you like your tension. If you’re not sure, crochet a swatch and measure the gauge: about 4‑5 dc per inch is a good baseline for a classic granny square.
Learn from Real‑World Examples
Take Sarah, a busy mom who wanted a quick project to do while her kids napped. She kept hitting a snag at round 4 because her turning chains were too loose. By tightening each chain‑one just a hair, she turned a lopsided 5‑inch square into a perfectly flat 6‑inch piece that she later sewed into a cozy bag for school lunches.
Or look at Alex, a creative entrepreneur who sells mini‑squares as greeting‑card accents. He discovered that counting stitches before each round cut his production time in half—no more re‑spooling yarn because of a missed stitch.
Quick Action Checklist
- Count stitches at the end of every round.
- Mark the first corner with a stitch marker.
- Test turning chain tension with a gentle pull.
- Maintain consistent yarn grip.
- Block your finished square before joining.
Following these steps will keep your squares flat, even, and ready for any project—whether it’s a lap blanket or a set of coasters.
For a deeper dive into beginner-friendly techniques, check out our step‑by‑step guide for beginners. It walks you through the same pitfalls and shows how to avoid them before you even start stitching.
Conclusion
So you’ve made it through the whole process of how to crochet a granny square step by step, and I hope you’re feeling that mix of pride and excitement that comes after a first successful round.
Remember the moments we highlighted – tightening that turning chain just enough, counting each stitch, and giving the square a gentle block. Those tiny habits are the difference between a wobbling patch and a crisp, ready‑to‑seam piece you can actually use.
What’s next? If you’re a hobbyist, try stitching a set of four squares and join them into a coaster set for your coffee table. If you’re a creative entrepreneur, experiment with colour‑blocking and sell the finished squares as unique gift tags. Parents can turn the activity into a weekend bonding project, letting kids pick colours and watch the square grow.
And don’t forget the power of community. Sharing your progress on CreativiU’s forums not only gives you feedback but also inspires others who are just starting out.
Take a minute now to note the round you’re on, set a marker, and plan your next size. One more round, a quick block, and you’ll have a finished square ready to become anything you imagine today.
FAQ
How do I start a granny square step by step?
Let’s start at the very beginning. You have two reliable center methods: a magic ring or a slim slip-knot chain. Pick one and stick with it for the first four rounds, because mixing centers can make the center wobbly.
For the magic ring, form a loop, leave a tail, chain 2 to count as the first double crochet, then crochet 12 double crochets into the ring. Close with a slip stitch into the top of the first DC.
Round 1 is three DC, CH1, 3 DC in each corner. Use a stitch marker to stay oriented, and check your tension as you turn so the sides stay even.
If you prefer a chain start, chain 4, slip stitch into the first chain to form a small center circle, then work 12 DC around it. The corners follow the same pattern. That consistency pays off.
That consistency pays off.
What is the best way to keep edges flat as you crochet more rounds?
Edges drift when tension isn’t even. To keep them flat, crochet with steady pressure on every stitch and avoid yanking the turning chain.
Pause after each round to lay the square flat, then adjust your grip if you feel the edge pull. A stitch marker at the starting corner helps you stay aligned as you turn.
If you notice a drift, work back one or two stitches, then resume. Tiny corrections now save ripouts later.
How should I handle tension when creating the corner clusters?
Corner clusters are the real test. Keep three dc, ch1, three dc in each corner loose enough to sit but snug enough to hold shape.
Use a stitch marker at the first stitch of every round and count stitches as you go. If you see the corner widening, pause and tighten the turning chain just a bit.
With consistent tension, the square grows evenly and lies flat when you press it gently and measure against a ruler.
How long should I practice before my squares look neat?
Give yourself a short, focused window each day. Start with 15 minutes, counting stitches and practicing your turning chain until it feels automatic.
Repetition builds real muscle memory. You’ll notice the first neat results after a handful of rounds, not after hours of grinding. Patience pays, especially when you’re aiming for even sides.
To stay motivated, log progress with a simple note: round count, tension tips that helped, and any fixes you used. Small wins compound fast.
Can I mix yarn weights, and how will that affect the size and feel?
Yes, you can mix weights, but it’s tricky. The rule of thumb is to stay within the same weight family (like DK with DK) or go up or down with a consistent, tested gauge.
If you vary weight, adjust your hook size and tension, then crochet a small swatch to measure inches per round. For a 4‑inch square, aim roughly 4–5 dc per inch in your chosen fabric.
Where can a beginner find guided practice and support?
CreativiU offers on‑demand courses designed for artists like you. They break the steps into small, doable bites, provide structured practice, and connect you with a friendly community for feedback.
If you want a simple path, start with a beginner sequence, commit to a daily 15‑minute run, and gradually add rounds while reviewing notes and celebrating small wins.
Leave a Reply