Ever stared at a blank piece of fabric and thought, ‘I could totally make a tote bag, but where do I even begin?’
If you’re nodding, you’re not alone. The idea of stitching your own bag feels both exciting and a little intimidating, especially when you’ve never threaded a machine before.
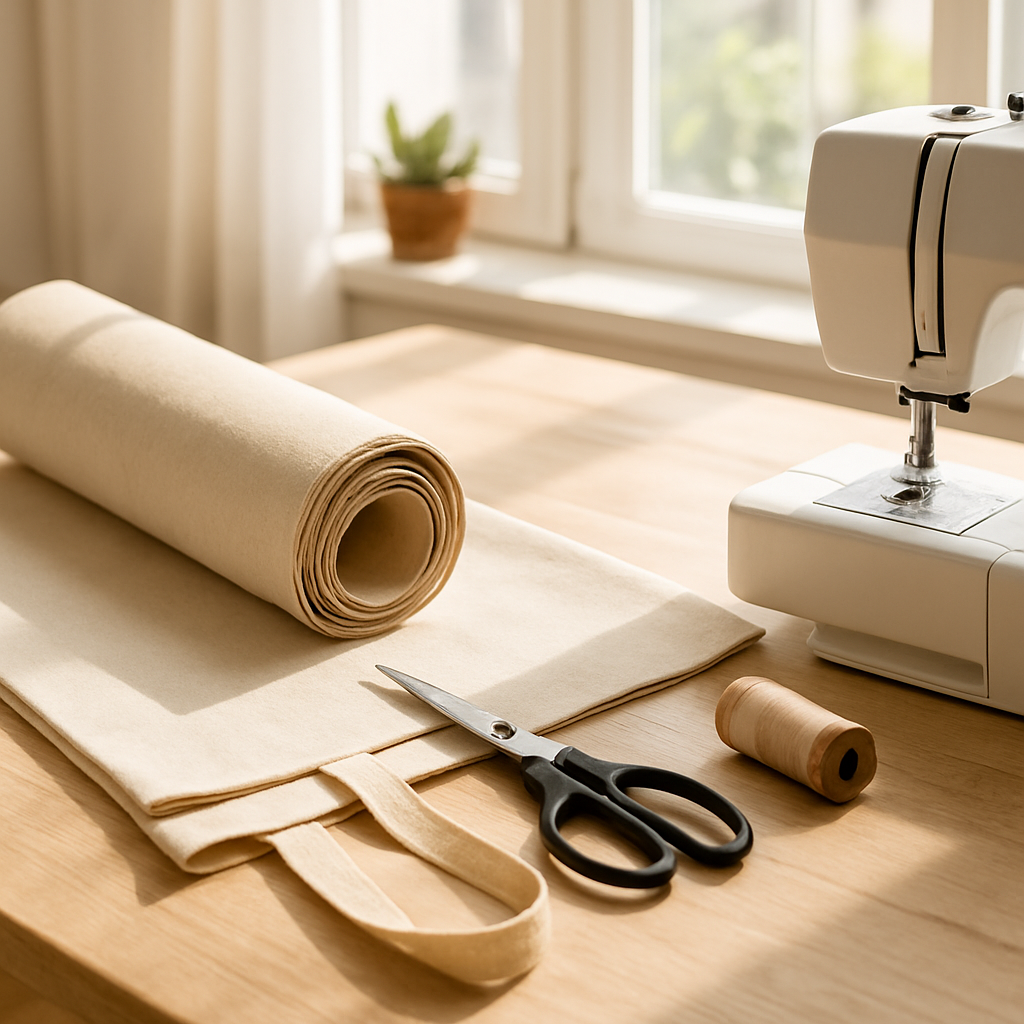
The good news? Sewing a simple tote is one of the friendliest projects for beginners, and you don’t need a fancy sewing machine or a mountain of supplies.
All you really need is a piece of sturdy cotton or canvas, a basic sewing needle, matching thread, and a pair of scissors you trust not to slip.
Think about it this way: a tote is just two rectangles and a couple of strips for handles. No complicated curves, no fancy lining—just straight seams that you can see and feel improving with each stitch.
So, why bother making your own? First, you get a bag that’s exactly the size you need for your groceries, your laptop, or that craft kit you’re proud of. Second, you’ll see instantly how satisfying it is to create something useful from scratch.
And there’s a hidden perk: every time you carry that tote, you’ll remember the little triumph of mastering a new skill. That confidence spills over into other projects, whether it’s a pillowcase, a tote for your kids, or even a small market stall banner.
Now, before we dive into the step‑by‑step guide, let’s clear up a couple of common myths. You don’t have to be an expert seamstress to get a clean seam, and you certainly don’t need to buy expensive patterns—your own measurements work just fine.
Ready to roll up your sleeves? In the next sections we’ll walk through picking the right fabric, setting up your machine, and stitching the bag together so you end up with a tote you can be proud of.
TL;DR
If you’ve ever stared at a blank piece of fabric and wondered how to sew a tote bag for beginners, this guide walks you through every friendly step—from picking the right cotton to stitching sturdy handles—so you can create a custom, useful bag without feeling overwhelmed. By the end, you’ll have a tote that not only fits your groceries or laptop perfectly but also gives you the confidence to tackle bigger projects, turning a simple stitch into a satisfying creative triumph you’ll want to repeat again and again.
Materials Overview
Before the first stitch, let’s talk about the stuff that’ll actually become your tote. Picking the right materials isn’t rocket science, but a few smart choices can mean the difference between a bag that holds up and one that falls apart after a single grocery run.
Fabric: the backbone
For beginners, a sturdy cotton canvas works like a charm. It’s affordable, easy to cut, and it doesn’t stretch when you pull it through the machine. If you crave a bit more color or pattern, look for pre‑washed denim or a medium‑weight linen – just remember to test a scrap first.
What about eco‑friendly options? Organic cotton or recycled polyester blends are great alternatives, and they still give you that crisp seam you want. The key is to choose a fabric that’s at least 8‑10 oz (around 200‑250 gsm) so the handles won’t sag.
Thread: invisible strength
Matching polyester thread is the go‑to for tote projects. It’s strong, won’t break under load, and it weaves nicely with cotton fabrics. If you want a subtle contrast, pick a shade that’s one tone darker or lighter – it’ll show up just enough to look intentional without stealing the show.
Never underestimate the power of a good quality needle. A universal 90/14 or a denim‑specific needle (size 100/16) will glide through canvas without skipping stitches. And a tiny piece of seam‑ripper is your secret weapon when you need to fix a mis‑threaded seam.
Tools & notions you’ll need
Here’s a quick checklist that fits in a kitchen drawer:
- Sharp fabric scissors (or a rotary cutter)
- Measuring tape or ruler
- Fabric chalk or washable marker
- Pins or clips – I prefer clips because they don’t leave holes
- Iron and ironing board – pressing seams as you go saves a lot of frustration
Do you have a sewing machine? If not, a simple handheld needle and a sturdy thread can still get the job done, though it’ll take a bit more patience. Many creators start with a basic mechanical machine; you don’t need all the bells and whistles.
Choosing the right size
Measure the dimensions you need before you cut. A classic tote is about 14‑15 inches wide, 15‑16 inches tall, with a 1‑inch seam allowance. If you plan to carry a laptop, add a couple of extra inches to the depth.
And remember: the handles should be long enough to sit comfortably on your shoulder – roughly 20‑22 inches total, measured from tip to tip.
Where to learn more
If you’re unsure about which fabric feels best in your hands, check out our guide on online sewing classes for beginners. The tutorials walk you through fabric selection, plus a few practice projects that build confidence before you tackle the tote.
Got all that? Great. Grab your scissors, line up your fabric, and let’s move on to setting up the machine. The next step is where the magic really begins.
Before you start, take a moment to organize everything on a clean surface. Lay the fabric flat, pin the pattern pieces together, and keep extra thread spools within arm’s reach. A tidy workspace saves time, reduces mistakes, and lets you focus on the fun part – sewing.
Step 1: Gather Your Materials
Fabric – the heart of the tote
Alright, before the needle even meets the cotton, we need to pull together every little thing that will keep the project from turning into a scavenger hunt.
Grab a piece of medium‑weight cotton or canvas—think grocery‑bag sturdiness without the denim stiffness. A 12‑inch wide bolt gives you enough room for two 14‑inch rectangles and a strip for the handles.
If you’re not sure which fabric feels right, check out our guide on online sewing classes for beginners; the class worksheets walk you through fabric‑selection basics.
Thread – the invisible glue
Next up, thread. Polyester thread in a matching shade is the workhorse, but a subtle contrast can turn the seam line into a tiny design detail you’ll love.
One 500‑meter spool will easily cover the whole tote, so you won’t be stuck mid‑stitch hunting for a new bobbin.
Essential tools
Now, the tools list: sharp fabric scissors, a seam ripper (because we all make mistakes), a measuring tape or ruler, pins or fabric clips, and a basic straight‑stitch machine. If you have a rotary cutter, it’s optional but speeds up cutting straight edges.
Take a moment to give each tool a quick quality check. Run your fingertip along the fabric edge—smooth, not frayed. Pull a bit of thread from the spool; it should unwind without snapping. Test the scissors on a scrap piece; they should glide cleanly.
Quality check & workspace
Does the idea of a checklist feel a bit overwhelming? Let’s break it down.
Arrange everything on a clean surface in the order you’ll need it—fabric first, then thread, then tools. Seeing the whole kit at once eliminates the classic “where’s that needle?” panic.
Quick checklist
Here’s a simple list you can print or jot down:
- Fabric (cut to size)
- Thread (matching + spare)
- Sharp scissors
- Seam ripper
- Measuring tape or ruler
- Pins or fabric clips
- Machine set to straight stitch
- Scrap piece for tension test
Lay the two fabric rectangles right‑sides together, pin the edges, and you’ll already feel the project taking shape. The handles can be cut from the same fabric or a coordinating twill strap; 1.5‑inch width works nicely for comfort.
A quick tip: pre‑wash your fabric before you cut. It prevents shrinkage later and removes any loose dye that could bleed onto the seams.
Lastly, keep a tiny scrap of the same fabric handy. Slip a few stitches on it to dial in tension, stitch length, and needle size. When the test looks clean, you’re ready to start the real bag without surprise thread bunching.
All set? With your materials gathered, checked, and organized, the rest of the tote will flow much smoother. In the next step we’ll talk about setting up your machine and marking the fabric.
Step 2: Cutting the Fabric
Alright, the excitement of a fresh project is in the air, and the next move is the most tactile one: cutting your fabric into the right shapes.
Measure twice, cut once
Grab your measuring tape or ruler and lay the two 14‑inch rectangles side by side, right‑sides together.
Mark the length and width with a fabric chalk or a washable pen—keep the marks light so they disappear after sewing.
Here’s a quick sanity check: the total width of both pieces plus the seam allowance should equal the width of your fabric bolt.
If you’re using a 12‑inch wide bolt, you’ll end up with a little leftover strip that can become a cute pocket later.
Choosing the right cutting tool
Sharp scissors are a must‑have; a dull pair will fray the edge and make the cut uneven.
If you have a rotary cutter, that’s even better for perfectly straight lines, but don’t feel pressured if you only own regular fabric scissors.
Make sure the blade is clean—wipe it with a cloth before you start.
A clean blade glides through cotton or canvas without snagging, and you’ll notice the difference instantly.
Set up your cutting area
Lay a flat, non‑slip surface like a cutting mat or a clean kitchen counter.
Place a scrap piece of the same fabric underneath the area you’ll cut; this prevents the fabric from shifting and gives you a smooth base.
Pin the edges lightly, just enough to hold the layers in place without stretching the material.
You’ll hear a satisfying “snap” when the pins bite into the fabric—trust that feeling.
Cutting the main panels
Start with the largest piece: the bag body.
Align the ruler along the 14‑inch side, hold the scissors at a comfortable angle, and slice in one smooth motion.
Don’t rush; let the scissors do the work.
Repeat for the second rectangle.
When both panels look identical, give them a quick visual check—any tiny discrepancy will show up later when you try to pin them together.
Cutting the handles
Measure a 1.5‑inch wide strip that’s about 22‑inch long (adjust for your preferred handle length).
If you’re using the same fabric, cut it in one continuous piece; if you prefer a contrasting twill strap, cut it from that material instead.
Tip: fold the strip in half lengthwise, press with an iron, then cut a single edge.
When you unfold, you’ll have clean, finished edges on both sides.
Final sanity check
Lay all three pieces on your workspace, right‑sides together, and line up the raw edges.
If everything lines up without gaps, you’re good to go.
If you notice a stray thread or a ragged edge, trim it now—better to fix it before the sewing starts.
And remember, if you ever feel uncertain about seam allowances or fabric handling, our online sewing courses for beginners walk you through each step with video demos and printable guides.
Once the pieces are cleanly cut, you’ll see the tote taking shape in a way that’s both visual and tactile.
The next step will be setting up your machine and marking where the seams go, but for now, celebrate the fact that you’ve turned a flat sheet into three ready‑to‑sew components.
Don’t forget the grain line: the longest thread runs parallel to the edge of the bolt. Cutting your panels with the grain pointing straight up gives the tote strength and helps it hold its shape when you load groceries. If you need to rotate a piece, mark the grain with a tiny arrow so you can line it up later. Also, label each cut with a simple “B” for body or “H” for handle using a fabric pencil; that tiny step saves you a lot of guesswork when you start pinning.
Step 3: Sewing the Main Body
Now that your panels are trimmed, labeled, and lying right‑sides together, it’s time to turn those flat pieces into a tote you can actually carry. If you’re feeling a little jittery, that’s normal—most beginners get a tiny rush the first time the needle starts moving.
Pinning the pieces
Grab a handful of pins (or fabric clips if you hate fiddling with sharp points) and line up the raw edges of the two body rectangles. Make sure the grain arrows you drew earlier are still pointing upward; the fabric wants to stay stiff in that direction.
Slide the pins in about ¼ inch from the edge, spacing them every 2‑3 inches. If you notice any corners that don’t line up perfectly, nudge the fabric a bit before you pin. A quick “tap‑tap” with the pins lets you feel where the layers are snug.
Does this feel like a lot of work? Think of it as setting up a safety net—those pins keep the fabric from shifting while you’re stitching, and they’re easy to pull out once you’re done.
Stitching the side seams
Set your machine to a straight stitch, about 3 mm stitch length. Before you hit start, do a tension test on a scrap piece; you want the stitches to lie flat without puckering.
Begin at the bottom corner, backstitch a few stitches, then guide the fabric slowly. Let the machine do the work—don’t pull the fabric, just let the feed dogs move it forward. When you reach the top edge, stop, backstitch, and release the pins.
Repeat on the other side. You’ll end up with a long tube that looks like a simple envelope—this is the core of your tote.
Finishing the top edge
Turn the tube inside out so the raw edges are now hidden inside the seam. If the top edge feels a little raw, fold it down about ¼ inch, press with an iron, then fold again another ¼ inch to enclose the raw edge. Pin the fold in place.
Now stitch a clean top edge using a 2‑mm stitch length—this tighter stitch adds strength where you’ll be holding the bag. You can also add a decorative top‑stitched line if you’re feeling fancy; just remember to keep the thread color matching or a subtle contrast.
Attaching the handles
Lay one handle strip on each side of the tote, aligning the raw edges with the top edge you just sewn. The handle should sit about an inch below the top edge so it doesn’t dig into your hand.
Pin the handles in place, then sew a double‑stitch around the base of each handle. A double‑stitch (sew forward, then reverse) gives the handles extra durability for those grocery trips.
Give the handles a quick tug—if they feel loose, add another row of stitching. It’s easier to reinforce now than to redo later.
Quick checklist before you celebrate
- All pins removed?
- Seam allowance consistent (about ¼ inch) along every side?
- Top edge neatly folded and stitched?
- Handles double‑stitched and securely attached?
If everything checks out, give your tote a gentle shake. The fabric should move freely without any uneven pulls. You’ve just sewn the main body of a tote that’s ready for a lining, interior pocket, or straight to the market.
Need a little extra confidence on seam techniques? Our sewing for beginners tutorial walks you through tension, stitch length, and pinning tricks in short video bites.
Take a breath, admire the shape you’ve created, and get ready for the final steps: adding a bottom panel and any personal touches you love. You’ve earned this progress—well done!
Step 4: Adding Handles
Alright, you’ve got the bag body all sewn up and it’s starting to look like a tote you could actually carry. Now comes the part that makes it usable – the handles. If you’ve ever wrestled with a flimsy strap that digs into your palm, you know why we’re taking a minute to get this right.
Positioning the handles
First, turn the tote inside out so the raw edges are hidden. Lay the handle strip on one side, aligning its raw edge with the top edge of the bag. You want the top of the handle to sit about an inch below the stitched edge – that little buffer keeps the strap from cutting into your hand when the bag is full.
Flip the bag over, repeat on the other side, and you’ll see two parallel lines where the handles will sit. If you’re using a contrasting twill strap, this is also the moment you get a little style pop.
Pinning without panic
Grab a handful of pins (or fabric clips if you hate the pricks) and place them every 2‑3 inches along the seam line. Don’t over‑pin – just enough to keep the strip from sliding while you stitch. A quick tug on the handle should feel secure, not stretchy.
Not sure if the placement feels right? Give the bag a gentle shake. If the handle wiggles, adjust the pins before you start sewing. It’s a tiny step that saves you from a wobbly strap later.
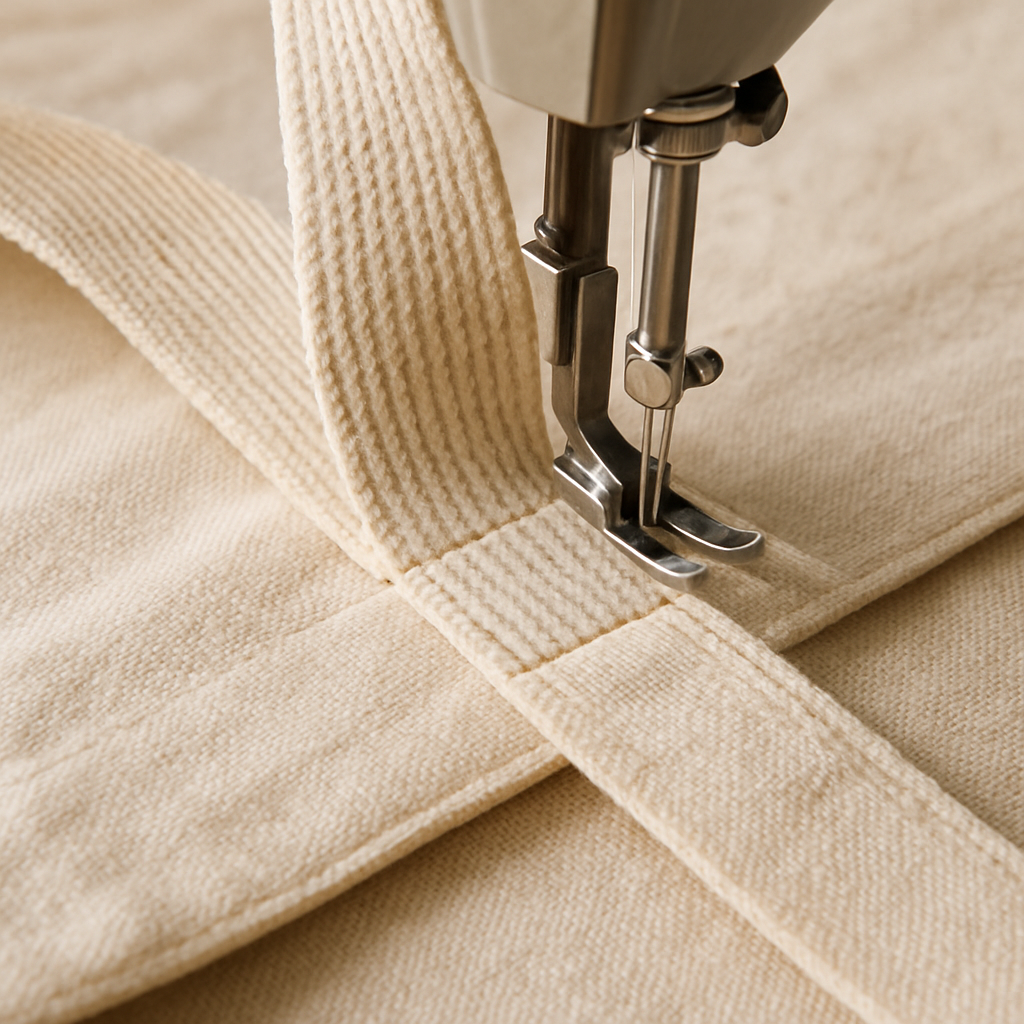
Double‑stitch for durability
Set your machine to a straight stitch, about 3 mm length. Begin a few stitches before the first pin, then sew forward across the handle’s base. When you reach the end, reverse stitch back over the same line. This double‑stitch (forward then reverse) creates a strong anchor that can handle grocery bags, laptops, or that chunky knitting project you love.
Once you’ve sewn one side, backstitch a couple of stitches, trim any excess thread, and repeat on the opposite side. If you notice any gaps, add another row of stitching – it’s easier now than after the bag is fully assembled.
Testing the grip
Give each handle a firm tug. They should feel solid, with no give in the seam. If one feels loose, pause, re‑pin, and add a reinforcing stitch. Trust your fingers – you’ll notice the difference instantly.
Here’s a quick tip: a short piece of scrap fabric stitched over the handle’s base adds a tiny reinforcement patch that looks professional and extends the strap’s life.
Optional finishing touches
If you like a polished look, fold the raw edge of the handle strip under ¼ inch, press with an iron, and stitch a neat top‑stitch along the folded edge. This not only hides raw edges but also adds a subtle decorative line.
Want a bit more inspiration for handling straps? Check out our guide on online sewing classes for beginners – they walk you through handle variations and reinforce techniques.
Now that the handles are securely attached, flip the tote right‑side out one final time. Feel the weight of the fabric, notice the smooth curve of the straps, and imagine the bag filling up with your favorite goodies.
Take a moment to admire your work. The bag is almost ready for the last step – adding a bottom panel or personalizing it with a pocket or patch. But for now, you’ve earned a solid set of handles that will carry your stuff without complaint.
Step 5: Finishing Touches & Customization
Now the tote is basically done, but that final polish is what makes it feel truly yours. Think about the moment you’ll first slip it over your shoulder – you want it to look as good as it works, right?
First, give the seams a quick once‑over. Run your fingers along every stitch line; if anything feels loose, grab a needle and reinforce it with a few back‑stitches. A tight seam means the bag won’t fray when you load up the grocery store run.
Adding a bottom panel for structure
A thin piece of interfacing or a second layer of canvas can turn a floppy sack into a sturdy carrier. Cut a rectangle the same width as the bag and about 2‑3 inches high. Pin it to the inside of the bottom edge, right‑sides together, then sew a neat double‑stitch around the perimeter. This little panel stops the bag from sagging under heavy books.
Pro tip: if you’re using cotton canvas, a ¼‑inch interfacing adds just enough body without making the tote rigid.
Slip‑in pockets or interior organizers
Imagine reaching for your phone and having a dedicated pocket that keeps it from sliding around. Cut a smaller rectangle (about 5×7 inches), fold the top edge down ¼ inch, press, then fold again and stitch a clean edge. Position it a couple of inches below the top seam, pin, and sew a rectangle‑shaped pocket.
Want a secret stash? Sew a hidden zip pocket on the inside of a handle strip – it’s perfect for keys or a spare charger.
Personalizing with patches, embroidery, or fabric paint
Here’s where the tote becomes a canvas for your personality. Iron‑on patches are the fastest route: place them where you like, cover with a thin cloth, and press for 15 seconds. If you enjoy stitching, a simple embroidered monogram adds a boutique feel. Or grab fabric paint and doodle a coffee cup, a favorite quote, or the date you finished the bag.Need inspiration on what to add? Check out how to choose the right online sewing course for ideas on beginner‑friendly embellishments.
Finishing the raw edges
Raw fabric edges can fray over time. A quick trim with pinking shears, followed by a narrow rolled hem (¼ inch), does the trick. If you have a serger, run the raw edge through it for a professional finish.
And don’t forget to press! A hot iron smooths out any puckers from stitching and gives the tote that crisp, showroom look.
Quick checklist before you call it done
- All seams reinforced?
- Bottom panel attached?
- Pocket(s) sewn and positioned?
- Personalized element (patch, embroidery, paint) applied?
- Raw edges trimmed and hemmed?
- Final press completed?
Run through this list, give the bag a proud shake, and you’ll feel that satisfying “I made this” moment.
Now you’ve got a tote that’s not only functional but also reflects your style. Whether you tote groceries, a laptop, or a craft kit, those finishing touches will keep it looking fresh for years.
| Customization Option | Tools Needed | Tips |
|---|---|---|
| Bottom panel for structure | Interfacing, scissors, pins, sewing machine | Cut to bag width, 2‑3″ height; double‑stitch for durability |
| Interior pocket | Fabric, ruler, pins, thread | Place 1–2″ below top seam; fold top edge twice for clean finish |
| Patch or embroidery | Iron‑on patch or embroidery floss, hoop, needle | Position on front or side; press patch for 15‑sec burst |
Conclusion
By now you’ve walked through every stitch, cut, and tiny adjustment that turns a plain piece of canvas into a tote you can actually be proud of.
If you’re still wondering whether you’ve missed a step, just remember the feeling of that first tug on the handles – that little moment tells you the bag is ready for real‑world use.
The beauty of this project is that each decision – from choosing 12‑oz cotton canvas to adding a simple interior pocket – adds personality without overwhelming a beginner.
So, what’s the next move? Snap a photo of your finished tote, share it with the CreativiU community, and let the feedback spark your next idea.
Need a little extra guidance or want to dive into more beginner‑friendly projects? Check out How to Get Started with Online Sewing Classes for Beginners for step‑by‑step video lessons and printable patterns.
Remember, the skills you just practiced – measuring, pressing, reinforcing seams – are the foundation for everything from a simple pillowcase to a full‑scale market stall banner.
Keep your tool kit close, stay curious, and every new stitch will feel less like a challenge and more like a conversation with the fabric.
And when you’re ready, try scaling up the pattern – a larger canvas, extra pockets, or a zip closure – and you’ll see how quickly confidence turns into mastery.
FAQ
What basic tools do I need to start how to sew a tote bag for beginners?
At the very start you only need a few basics: a sharp pair of fabric scissors or a rotary cutter, a metal ruler or measuring tape, pins or clips, and a seam ripper for those inevitable oops moments. Your sewing machine should be set up with a universal #14‑#16 needle and polyester thread – the combo that slides through canvas without breaking. A pressing iron and a clean work surface round out the kit, and you’re ready to go.
How do I choose the right fabric for my first tote?
Fabric feels like the personality of your tote, so pick something that matches the load you expect. For a grocery‑run bag, 12‑14 oz cotton canvas gives you sturdiness without starving your machine, while a midsized denim adds a rugged look if you don’t mind a bit more weight. If you’re making a light‑use beach tote, plain muslin or a linen blend works fine and drapes nicely. Always pre‑wash the fabric so any shrinkage happens before you cut, and test a seam on a scrap to confirm it holds up.
Can I use a regular sewing machine, or do I need a heavy‑duty one?
You don’t need a commercial‑grade heavy‑duty machine for your first tote – a standard home sewing machine handles 12‑oz canvas just fine as long as you use the right needle and tension. Switch to a universal #14 or #16 needle, set the stitch length a little longer (around 2.5 mm), and you’ll avoid skipped stitches. If the motor hums or the fabric pulls, a small upgrade to a stronger needle or a light oiling of the machine can save you a lot of frustration.
What’s the easiest way to make a flat bottom on a beginner tote?
The flat‑bottom trick is one of the simplest ways to give your tote stability without extra fabric. After you’ve sewn the side seams, measure about two inches from each corner of the tube, mark a square, and cut it out – you’ll end up with four ‘L’ shaped pieces. Pin the raw edges together, sew a half‑inch seam from the side edge to the bottom edge, trim the excess, and press flat. The bag now stands on its own, perfect for holding heavier items.
How can I reinforce the handle attachment so it won’t rip?
Handles are the weak point for many beginners, so reinforcing them early saves a lot of disappointment. Cut a piece of lightweight fusible interfacing the same size as the handle’s end, iron it onto the fabric following the manufacturer’s directions, and then stitch a double‑row of stitches around the raw edge. Adding a tiny bar tack – a few backstitches concentrated at each corner – creates a pocket of extra grip that keeps the fabric from pulling through when you load the bag.
Do I really need a lining, and how do I add one without extra hassle?
A lining isn’t strictly required, but it turns a rustic tote into a polished, longer‑lasting piece. The simplest method is to cut a second piece of fabric the exact size of your exterior, wrong‑side‑in, and sew it to the bag leaving a 4–5 inch gap at the top. Turn everything right‑side‑out through that opening, press the seam, and close it with a neat top‑stitch. The lining hides raw edges, adds body, and gives you a hidden pocket for keys or a phone without extra hassle.
Leave a Reply