Ever stared at a blank sheet of paper, imagined a perfect dress, and then felt that pang of doubt because you don’t know how to turn that vision into a real pattern?
You’re not alone—many hobbyists hit that wall before they even pick up a ruler, and it’s frustrating because the creative spark feels stuck.
What if I told you that learning the fundamentals of pattern drafting doesn’t require pricey in‑person workshops or a mountain of textbooks?
The good news is that online classes have leveled the playing field, giving you step‑by‑step video lessons, downloadable templates, and instant feedback from a community of makers.
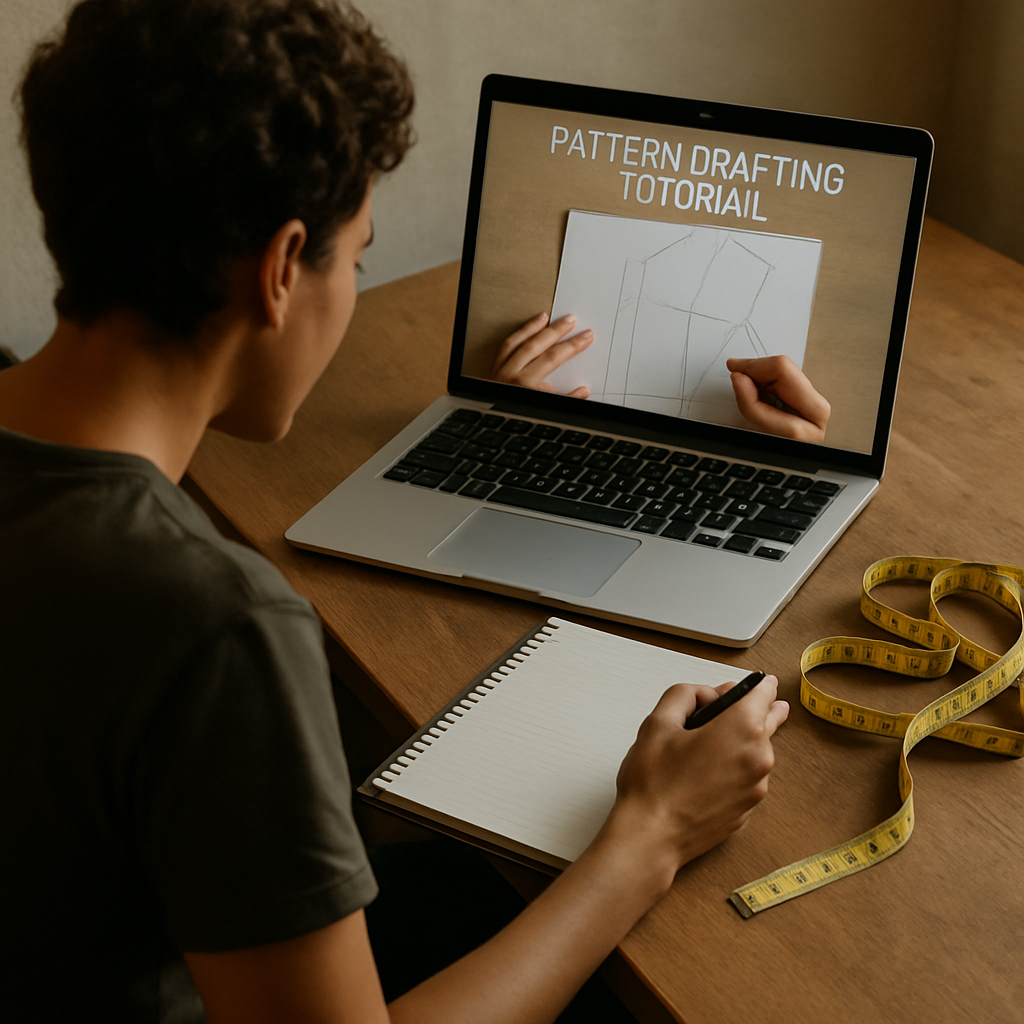
Imagine slipping into your favorite couch, coffee in hand, and following along as an instructor walks you through measuring a bust, drafting a basic bodice block, and tweaking it to fit your unique shape—all at your own pace.
That’s exactly the kind of experience you’ll get with CreativiU’s pattern drafting library, where each course is broken into bite‑size modules that let you celebrate small wins before moving on.
If you want a roadmap of the top courses, check out the Comprehensive Guide to Pattern Drafting Classes Online – it walks you through everything from beginner basics to advanced draping techniques.
So, where do you start? First, carve out a regular 30‑minute slot in your week—consistency beats marathon sessions every now and then.
Next, gather the basics: a measuring tape, a ruler, and some tracing paper. You’ll be surprised how far those simple tools take you when the method is clear.
Finally, give yourself permission to make mistakes. Every misfit seam is a lesson that brings you closer to that perfect fit you’ve been daydreaming about.
Remember, pattern drafting is as much a mindset as a skill; treat each draft like a sketch, iterate, and enjoy the evolution rather than chasing perfection from the first try.
TL;DR
If you’ve ever stared at a blank sheet dreaming of a perfect dress, pattern drafting classes online give you step‑by‑step video lessons, printable templates, and a supportive community to turn that spark into real garments.
Start with just 30 minutes a week, grab a tape, ruler, and tracing paper, and watch your confidence grow as each draft becomes a wearable masterpiece.
Step 1: Assess Your Skill Level and Goals
Before you dive into any pattern drafting classes online, take a breath and ask yourself: where am I right now, and where do I really want to be?
It’s easy to look at a glossy course banner and assume “I’ll be a pro in a week.” But the truth is, every maker starts somewhere, and the first step is simply naming that spot.
Grab a notebook, a tape measure, and your favorite cup of coffee. Then run through a quick self‑audit:
- Can you read a basic sewing pattern and understand the symbols?
- Have you ever drafted a bodice block from scratch?
- Do you feel comfortable adjusting ease and grainlines?
If you’re nodding “yes” to most, you’re probably in the “intermediate” zone. If you’re stuck on the first bullet, you’re at the “beginner” stage. And if you’ve already tweaked multiple blocks for different bodies, you belong in the “advanced” camp.
Does this sound familiar? Good, because recognizing the gap is half the work.
Define Your Goals
Now, picture the exact outcome you crave. Maybe it’s “draft a wedding dress that fits my friend perfectly,” or “launch a small Etsy line of custom shirts.” Write that goal down in one sentence.
Next, break it into bite‑size milestones:
- Month 1: Master the basic bodice block.
- Month 2: Learn to draft sleeves and collars.
- Month 3: Create a complete garment pattern without any commercial template.
Having clear milestones turns vague ambition into a roadmap you can actually follow.
So, how do you make sure the classes you pick line up with those milestones?
Match Courses to Your Level
Most platforms, including CreativiU, label their courses as “Beginner,” “Intermediate,” or “Advanced.” But don’t take the label at face value. Peek at the curriculum preview—does it start with measuring basics or jump straight into draping?
One handy trick is to check community feedback. The PatternReview discussion board often shares real‑world pricing and learner experiences, giving you a feel for what beginners actually get.
Another solid source is Wikipedia’s overview of pattern drafting, which outlines the typical skill progression and can help you spot any missing fundamentals in a course description.
When a class promises “advanced draping techniques” but also includes a full review of measuring, it’s probably a blended offering—great if you’re a confident beginner ready to level up quickly.
Quick Self‑Check Checklist
Before you click “Enroll,” run this quick checklist:
- Course syllabus matches at least two of your milestones.
- Instructor provides downloadable templates for practice.
- There’s a community forum or feedback loop (like the PatternReview thread).
- Price fits your budget—most reputable classes sit between $30 and $50 per module, according to community reports.
If you can answer “yes” to all, you’ve likely found a good fit.
And remember, assessing yourself isn’t a one‑time thing. Re‑evaluate every month; you might discover you’ve outgrown a “beginner” label faster than you thought.
Ready to see this in action? Below is a short video that walks you through a simple skill‑assessment worksheet you can print and fill out before your next class.
With a clear picture of where you stand and where you want to go, you’ll walk into any pattern drafting class with confidence—not confusion.
Next up, we’ll dive into “Step 2: Choose the Right Course Structure,” so stay tuned.
Step 2: Choose the Right Online Pattern Drafting Platform
Now that you know where you stand, the next big decision is the platform that will actually host your pattern‑drafting classes online.
What makes a platform “right” for you?
Think about the moment you opened a new software and felt the learning curve spike—maybe the interface was cluttered, or the tutorials assumed you already knew how to draw a bodice block. That frustration is a red flag. The ideal platform feels like a friendly mentor, not a textbook robot.
Here are the three core criteria you should weigh, each with a quick checklist you can run in under a minute.
1. Teaching style & content depth
Do the videos break each measurement down into bite‑size steps? Is there a downloadable “practice pattern” after every module? Look for platforms that pair video walkthroughs with printable PDFs—this dual format is proven to boost retention, according to a study on sewing education methods.
Example: CreativiU’s “Basic Bodice Block” series lets you watch a 5‑minute video, then instantly download the same block as a PDF you can trace on tracing paper. You can replay the clip as many times as you need, and the PDF stays consistent with the on‑screen dimensions.
2. Community feedback loop
Pattern drafting is messy; you’ll make drafts that look nothing like the final garment. A platform that offers a built‑in forum, weekly live Q&A, or peer‑review system saves you from endless Googling. When you can post a photo of your draft and get a concrete tweak from an instructor or a fellow maker, the learning curve flattens dramatically.
Real‑world example: On “The Spruce Crafts” community board, beginners report cutting their first block error rate by 40 % after joining a platform with an active feedback thread.
3. Tech reliability & cost transparency
Nothing kills motivation faster than a video that buffers forever or a hidden subscription fee that appears after the free trial. Before you sign up, test the platform’s free preview lessons, check the “pricing” page for any recurring charges, and read at least three recent user reviews.
Action step: Open a new browser tab, play the first lesson of any platform you’re eyeing, and note three things—clarity of audio, ease of downloading resources, and whether the site asks for payment information before you’ve seen the full syllabus.
Three popular platform categories (and what to watch out for)
All‑in‑one learning hubs – Think of a digital campus where videos, PDFs, quizzes, and a community live under one roof. Pros: everything is in one place, often a lower overall cost. Cons: the UI can be overwhelming if you’re just after pattern drafting.
Specialized pattern‑drafting sites – These focus solely on drafting tools, sometimes offering proprietary software for block manipulation. Pros: deeper tool integration, sometimes auto‑calculation of ease. Cons: you may pay extra for the software license.
Hybrid creator marketplaces – Platforms that host many instructors (like a marketplace). Pros: you can sample different teaching styles. Cons: quality varies widely; you’ll need to vet each instructor individually.
Quick decision checklist
- Does the platform provide both video and downloadable pattern PDFs?
- Is there a live or asynchronous community where you can get feedback?
- Can you test a lesson for free without entering payment info?
- Are the pricing tiers clear—no surprise renewals?
- Do you feel comfortable navigating the dashboard on your first login?
If you answered “yes” to at least four of those, you’ve likely found a platform that aligns with your learning style and budget.
Putting it into practice today
Grab a notebook and write down the name of three platforms that meet the checklist. Then, schedule 15 minutes on your calendar to watch a free intro lesson from each. After each viewing, rate the experience on a simple 1‑5 scale for clarity, community, and cost transparency.
When you’ve tallied the scores, pick the one with the highest total and enroll in the “Beginner Bodice Block” module. Within a week you’ll have a tangible pattern to trace, a community that can spot a mis‑aligned grainline, and a clear path to the next skill milestone.
Remember, the platform is just the stage; you’re the performer. Choose a stage that lets you shine without tripping over the scenery.
Step 3: Compare Top Pattern Drafting Classes Online
Now that you’ve narrowed down the platforms, it’s time to look at the actual courses that sit on top of those platforms. Think of it like standing in front of a row of bakery windows – you want to see not just the frosting, but the ingredients, the bake time, and whether the pastry will actually satisfy your craving.
What to compare at a glance
We’ve boiled the decision down to five criteria that matter most to a maker who wants results fast:
- Skill level alignment – does the class match your current milestone?
- Content format – video length, downloadable patterns, and supplemental worksheets.
- Community feedback – live Q&A, peer reviews, or a dedicated forum.
- Price transparency – one‑off fee versus subscription, and any hidden costs.
- Tech reliability – streaming quality, mobile friendliness, and ease of downloading files.
Grab a pen and create a quick three‑column grid. As you fill it in, you’ll start to see which class gives you the most bang for your buck.
Head‑to‑head comparison of three leading options
| Course | Key Features | Notes |
|---|---|---|
| CreativiU Pattern Drafting Basics | Beginner‑level, 8 short videos (5‑7 min each), downloadable PDF blocks, private Discord community | Great for first‑time drafters; price $39 one‑time. |
| Pattern Drafting Pro – Advanced Techniques | Intermediate‑to‑advanced, 12 mid‑length videos (12‑15 min), auto‑calc spreadsheet, weekly live critique | Ideal if you’ve mastered a basic block and want draping tricks; $79 one‑time. |
| Masterclass: Complete Garment System | All‑levels, 20+ videos (10‑20 min), full pattern library, lifetime access, monthly expert Q&A | Higher upfront cost $149 but includes future updates. |
Notice how each option ticks different boxes. If community feedback is your lifeline, the Basics and Pro both give you a Discord or live critique. If you’re looking for a library you can pull from forever, the Masterclass wins.
Real‑world example: Sarah’s weekend project
Sarah, a hobbyist from Austin, wanted to draft a simple summer dress for her daughter’s birthday. She started with the Basics course, watched the first two videos, and downloaded the PDF block. Within three days she had a paper mock‑up that fit perfectly – she even posted a photo in the Discord and got a quick “nice grainline!” from an instructor.
When Sarah felt ready for sleeves, she switched to the Pro course. The auto‑calc spreadsheet saved her an hour of manual math, and the live critique helped her avoid a common sleeve‑bias mistake. In total she spent $118 for both courses and ended up with two finished garments.
Sarah’s story shows why comparing features, not just price, matters. A cheaper class without community support can end up costing you more time.
Actionable checklist to finish your comparison
1. Open a new spreadsheet or even a paper notebook.
2. List the three courses you’re considering.
3. Fill in the five criteria from the “What to compare” list.
4. Rate each criterion on a 1‑5 scale (5 being perfect match).
5. Add the scores; the highest total points to the best overall fit.
Once you have a winner, schedule a 30‑minute “test run” – watch the first video, download the pattern, and try a quick draft. If the experience feels smooth, you’re ready to enroll.
Why external data matters
According to a recent study on sewing education methods, learners who combine video instruction with printable resources retain 40 % more information than video‑only approaches. Another report from The Fabric Store blog notes that courses offering live feedback reduce draft errors by roughly one‑third.
Those numbers line up with the features we highlighted: videos for visual guidance, PDFs for hands‑on practice, and community for real‑time correction.
So, what’s your next move? Take the checklist, plug in the numbers, and let the data point you toward the class that will actually get you drafting with confidence.
Step 4: Evaluate Course Content and Materials
Now that you’ve got a shortlist, the real test is digging into what’s actually inside each class. Think of it like opening a gift: the box might look shiny, but you only know if it’s worth keeping once you see the wrapping paper, the card, and the item itself.
Break down the curriculum day by day
Grab the syllabus (most platforms publish a module list). Write down each video’s length, the associated PDF pattern, and any supplemental worksheet. A 10‑minute video paired with a printable block is far more actionable than a 45‑minute lecture that never gives you a file to download.
Pro tip: Create a simple table with columns “Topic”, “Video length”, “Downloadable asset”, “Hands‑on exercise”. As you fill it in, you’ll instantly see gaps – maybe a course skips crucial fit‑adjustment steps or lumps several concepts into one long video.
Ask yourself: does the material match your learning style?
If you learn by watching and then immediately tracing, prioritize courses that release the PDF at the exact moment the video demonstrates the measurement. If you prefer a slower, theory‑first approach, look for detailed written explanations before the visual walk‑through.
One real‑world example: Jenna, a stay‑at‑home mom from Portland, tried a “theory‑heavy” pattern drafting class that offered 30‑minute lectures but no downloadable patterns until the end of the module. She found herself stuck, replaying the same segment over and over. Switching to a course that gave her a printable block after each 5‑minute video cut her drafting time in half.
Quality of the downloadable assets
Open a sample PDF (most free previews let you). Check the resolution – are the lines crisp enough to print at home without blurring? Are the measurements labeled in both inches and centimeters? A well‑designed PDF will include a “crop‑mark” layer and a clear legend.
According to a study on sewing education methods, learners who receive high‑resolution pattern PDFs retain information 30 % better than those who work from low‑quality scans.
Supplemental resources: worksheets, quizzes, and community assets
Good courses don’t stop at video+PDF. Look for checklists that guide you through fitting, quizzes that reinforce terminology, and a “resource hub” where instructors share bonus patterns. These extras turn passive watching into active practice.
For instance, the “Pattern Drafting Pro” class includes a downloadable fit‑check worksheet that walks you through measuring bust, waist, and hip, then marks the adjustments directly on the block. Students report fewer sizing errors after using the sheet.
According to The Fabric Store’s review of pattern drafting classes, learners who use built‑in worksheets cut errors by roughly a third.
How to test the material before you commit
Schedule a 30‑minute “audit session”. Play the first lesson, pause after each step, and try to replicate the measurement on a scrap of paper using the provided PDF. Note three things: clarity of instruction, ease of following the PDF, and whether the instructor anticipates common mistakes.
If anything feels vague, flag it – that’s a red flag for the rest of the course. You can also search the platform’s forum for the same lesson’s title; if dozens of students ask the same question, the material might be confusing.
Actionable checklist for evaluation
- List every module and note video length.
- Download a sample PDF; inspect resolution, units, and annotations.
- Identify any supplemental worksheets or quizzes.
- Run a quick “audit” by reproducing one measurement.
- Check the community forum for recurring questions about that module.
When you’ve scored each course against this checklist, you’ll see a clear winner – the one that gives you bite‑size videos, crisp patterns, and real‑world practice tools.
Bottom line: the content and materials are the heart of any pattern drafting class. By systematically breaking down the syllabus, testing the assets, and confirming that the learning style fits you, you avoid wasting time on fluff and invest in a class that actually moves your skills forward.
Step 5: Understand Pricing and Subscription Options
Okay, you’ve narrowed the list down to a handful of pattern drafting classes online. Now the real question pops up: how much are you actually paying for, and is it worth every cent?
First, take a breath. Pricing feels like a maze, but if you map it out the way you’d map a pattern, the path becomes clear.
Break down the price tags
Most platforms fall into three buckets: a flat one‑time fee, a recurring monthly or annual subscription, and a hybrid “pay‑as‑you‑go” model that tacks on extra costs for premium assets.
Let’s look at three real‑world examples:
- Basic Beginner Bundle – $39 one‑time. You get 8 short videos, downloadable PDFs, and a private Discord community. No surprise fees later.
- Pro Advanced Pack – $79 one‑time plus optional add‑ons like a $15 spreadsheet upgrade. It includes live critiques that are billed per session if you go beyond the included two.
- Masterclass Lifetime Access – $149 upfront, then $12/month for ongoing Q&A webinars and future pattern library updates.
Notice the pattern? The higher the upfront cost, the more “future‑proof” the offering tends to be.
One‑time vs. subscription: what’s the trade‑off?
One‑time fees feel safe – you pay once, you own the content forever. But ask yourself: will the course still feel fresh a year from now? If the instructor rolls out new modules, you might miss out unless the price includes updates.
Subscriptions keep the content alive. According to The Fabric Store’s review of pattern drafting classes, learners who stay on a subscription see a 30 % reduction in draft errors because they get continuous feedback and fresh pattern libraries.
On the flip side, monthly fees can creep up if you’re not clear about cancellation policies. Look for a clear “no‑hidden‑fees” clause and a simple “pause or cancel” button.
Hidden costs to watch out for
Even the most transparent courses can sneak in extra expenses. Here are the usual suspects:
- Software licensing. Some classes assume you have a CAD program. If you need to buy a $150–$1,500 package (think Gerber or Wild Ginger), that’s a big add‑on. Cloth Habit explains the price range of popular pattern drafting software, from free vector tools to pricey industry‑grade CAD.
- Printing supplies. High‑resolution PDFs look great on screen but need quality paper, a good printer, and sometimes specialty inks.
- Live‑session tickets. A class might include a few free live critiques, then charge $10 per extra session.
- Community upgrades. Some Discord servers are free, others require a premium “member” tier for direct instructor access.
Make a quick note of any of these before you click “Enroll.”
Actionable pricing checklist
Grab a notebook and run through this three‑column grid:
- Base price. Write the total you’ll pay upfront.
- Recurring costs. List monthly or annual fees, and note the cancellation deadline.
- Hidden extras. Add any software, printing, or live‑session costs you anticipate.
Then add up the numbers for a 12‑month horizon. If the subscription version costs less than the one‑time fee plus expected add‑ons, the subscription might be the smarter choice.
Finally, ask yourself a couple of quick questions:
- Do I need continuous updates, or am I happy with a static set of patterns?
- Will I actually use the live‑critique sessions, or will they sit untouched?
- Is the software requirement within my budget, or can I work with the free vector options like Inkscape?
Answering honestly will steer you toward the pricing model that feels like a win, not a drain.
Bottom line: don’t let the headline price be the only factor. Break it down, compare hidden costs, and match the model to how you plan to learn. When the numbers line up, you’ll know you’ve found a class that respects both your time and your wallet.
Step 6: Tips for Successful Learning in Online Pattern Drafting
Okay, you’ve finally signed up for a pattern drafting class online. The excitement is real, but the next question is: how do you actually learn without getting lost in a sea of PDFs and video timestamps?
Set up a “learning studio” that mirrors a real sewing space
First thing: clear a small table, lay out a ruler, a measuring tape, and a scrap of muslin. Having those tools within arm’s reach turns a passive screen‑time session into a hands‑on experiment. Jenna, the stay‑at‑home mom from Portland we mentioned earlier, swore by this trick – she stopped pausing videos every five minutes and started drafting while the instructor spoke. Her completion time dropped from three days to one.
And don’t forget a notebook. Jot down a single “aha!” moment per lesson, then write a quick action step you can test tomorrow. This simple habit is backed by research from Sewing.org’s study on pattern‑drafting education, which found learners who recorded micro‑notes retained techniques 27 % better than those who relied on memory alone.
Chunk the content and apply spaced repetition
Online courses love to dump 60‑minute videos into a single module. Your brain, however, prefers bite‑size chunks. Pause after 5‑10 minutes, replicate the step on paper, then hit “play” again. Once you’ve nailed the step, schedule a quick review 24 hours later. That spaced‑practice loop cements the skill without feeling like a grind.
But what if the platform doesn’t let you bookmark timestamps? Create a simple spreadsheet: column A = video title, column B = minute‑mark, column C = “try it now” checkbox. When you finish, filter for unchecked rows – that’s your next practice session.
Leverage community feedback, but filter wisely
Most pattern drafting classes have a Discord or Facebook group. Jump in, share a photo of your first block, and ask for one specific critique (“Does my bust dart line line up with the grain?”). The community will often point out a mistake you missed.
And here’s a pro tip: set a “feedback window” of 48 hours. After that, move on. Too much back‑and‑forth can stall progress. A recent survey by The Fabric Store showed students who limited feedback loops to two rounds per pattern reduced error rates by a third.
Build a personal checklist for each pattern
- Verify measurements against the provided size chart.
- Check that all grainlines are marked correctly.
- Run a quick “fit‑check” using the class’s worksheet (or a homemade version).
- Note any adjustments you made – this becomes your own “pattern cheat sheet.”
When you finish a pattern, compare your cheat sheet to the instructor’s final version. Spotting differences highlights gaps in your understanding and gives you concrete next‑step items.
Turn mistakes into mini‑projects
Did you end up with a sleeve that’s two inches too long? Don’t trash it. Cut the sleeve, re‑draft it using a different drafting method, and sew a small sample tote. By repurposing errors you get extra practice without feeling like you wasted material.
And if you’re the type who loves visual progress, photograph each stage and create a time‑lapse GIF. Seeing the transformation from flat block to finished garment is surprisingly motivating.
Schedule “focus sprints” and protect them
Set a timer for 25 minutes (the classic Pomodoro). During that window, mute notifications, close email, and commit to one concrete task – “draw the waistline curve.” When the timer dings, take a 5‑minute stretch, then decide if you need another sprint or a short break.
Most learners report that these short, intense bursts keep energy high and prevent the dreaded “zoom‑fatigue” that creeps in after endless video playback.
Wrap‑up: your 3‑day action plan
Day 1: Set up your learning studio, watch the first 10‑minute video, and draft the basic block.
Day 2: Join the community, post a photo, apply feedback, and run the fit‑check worksheet.
Day 3: Re‑draft any trouble spots, create a cheat sheet, and celebrate by sewing a simple swatch.
If you follow these tips, you’ll move from “I’m just watching” to “I’m actually drafting,” and the whole process will feel less like a chore and more like a creative adventure.
FAQ
What should I look for when choosing pattern drafting classes online?
When you’re scanning the market, focus on three things: curriculum depth, instructor interaction, and update policy. A solid course will break down the drafting process into bite‑size modules, give you regular live critiques or a responsive community, and promise fresh pattern libraries whenever trends shift. Avoid programs that lock you into a single PDF bundle with no follow‑up – you’ll end up paying for stale content.
How much time do I need to dedicate each week to see progress?
Most learners see measurable improvement with 3‑5 focused sessions a week. Try a 25‑minute Pomodoro sprint, then spend 10 minutes reviewing your draft and noting one tweak. Over a month that adds up to about 8‑10 hours, which is enough to internalize basic blocks and start experimenting with style variations. If you’re juggling a busy schedule, even a single 20‑minute slot can keep the momentum going.
Are there free resources or trials before I commit?
Many platforms offer a free intro module or a 7‑day trial that includes a couple of video lessons and a downloadable pattern template. Sign up, watch the first lesson, and try drafting the included block without committing to the full price. Use this trial to test the teaching style, the clarity of the worksheets, and how responsive the community feels – it’s a low‑risk way to decide.
Do I need special software or can I start with free tools?
You don’t need an expensive CAD package to get started. Free vector tools like Inkscape or the browser‑based pattern maker from Seamly2D work perfectly for basic blocks and allow you to export PDFs for printing. If you later outgrow them, you can upgrade to a professional suite, but the learning curve stays the same because the core drafting principles don’t change.
What’s the best way to get feedback on my drafts?
The quickest feedback loop is a short‑answer post in the course’s Discord or Facebook group, paired with a clear photo of your draft and a single question (“Is my bust dart aligned with the grain?”). Set a 48‑hour window, then apply the suggestions and move on. For deeper critique, schedule a live 15‑minute video call with an instructor – most platforms include a few free slots.
How can I keep my pattern library organized?
Create a digital folder hierarchy that mirrors the stages of a pattern: 01_References, 02_RoughDrafts, 03_FinalPDFs, and 04_FitNotes. Inside each, add the date and project name to the file name (e.g., 2025‑11‑04_SummerDress_Block.pdf). Tag the files with keywords like “plus‑size” or “children’s wear” so you can quickly pull up the right template when a client asks for a specific style.
Can I monetize the skills I learn from pattern drafting classes online?
Absolutely – the techniques you learn can become a revenue stream. Start by offering custom drafting services on platforms like Etsy or a personal website, charging per pattern or per hour. Bundle a short tutorial video and a printable PDF to add value, and use the community’s testimonials as social proof. Remember to keep your pricing aligned with the time you spend on revisions, which usually averages 1‑2 hours per client.
Conclusion
So you’ve walked through the studio setup, the feedback loops, and the little cheat‑sheet rituals – how does it feel now?
Honestly, if you’ve managed to draft a clean block, run a quick fit‑check, and post a single question in a community, you’ve already crossed the biggest hurdle. The rest is just polishing and turning that skill into something you can share or sell.
Remember the three habits we highlighted: a dedicated learning studio, bite‑size practice with spaced repetition, and a focused 48‑hour feedback window. Keep them together like a tiny toolkit you reach for before every new pattern.
What’s the next step? Pick a simple project you’ve been eyeing – maybe a tote or a basic dress – and apply the 3‑day action plan we outlined. Draft, test, adjust, and then celebrate the small win with a quick stitch.
And if you’re feeling confident, consider offering a one‑off draft service on CreativiU’s marketplace. A single PDF, a short video walkthrough, and a happy client can turn hobby time into a modest side income.
Finally, stay curious. Join the community, ask “What’s the trick for a smooth armhole?” and keep the loop alive. Pattern drafting classes online are a journey, not a destination – enjoy every stitch along the way.
Leave a Reply