Ever stared at a blank piece of paper, imagined a dress or jacket, and then felt that knot of frustration because you didn’t know how to turn the idea into a real pattern?
You’re not alone. Many of us who love crafting hit that wall before we even pick up scissors. The good news? Pattern drafting classes online can untangle that knot and give you confidence to sketch, adjust, and sew your designs.
But why go digital? Think about learning at midnight, rewinding a lesson, and joining a global community of makers. It’s like having a personal mentor right on your couch.
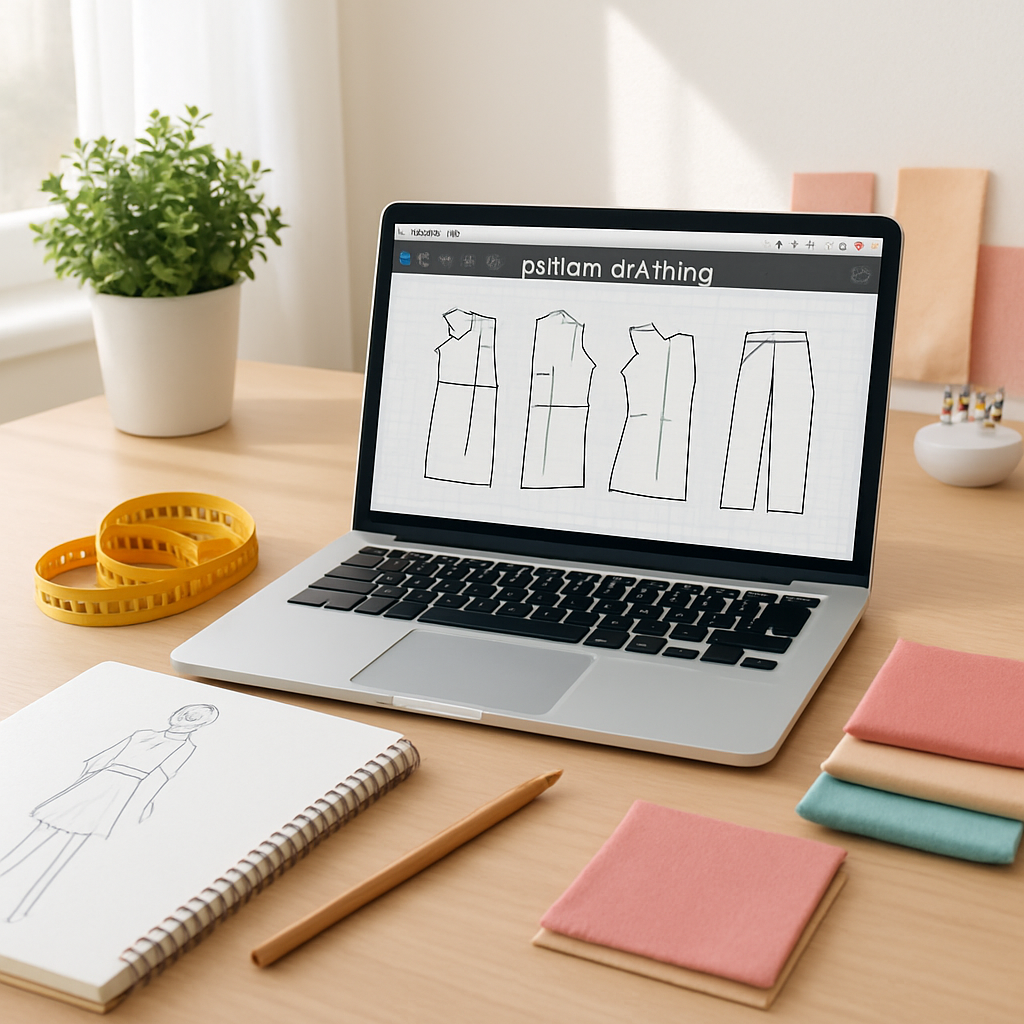
Here’s what you can expect when you dive in: step‑by‑step video walkthroughs that start with basic measurements, downloadable templates you can print and experiment with, and feedback loops where you post your drafts and get real‑time critiques. Imagine turning a vague sketch into a flat pattern that fits you perfectly—no guesswork.
And the results truly speak.
Now, picture yourself finishing that first project, holding a garment you drafted from scratch, and feeling that surge of pride. That moment is what most beginners describe as “the turning point,” and it usually happens within the first few weeks of consistent practice.
So, what’s holding you back? Is it the fear of “not being enough,” or maybe you’re just not sure which class matches your skill level? Whatever the hesitation, remember every expert was once a beginner who clicked “enroll” and started learning one tiny step at a time.
Let’s dive in together. In the sections ahead we’ll explore how to choose the right course, what tools you really need, and practical tips to keep your drafts tidy and accurate. By the end, you’ll have a clear roadmap to become the pattern‑drafting pro you’ve always wanted to be.
TL;DR
Pattern drafting classes online give you step‑by‑step video lessons, printable templates, and real‑time feedback right away instantly so you can turn sketches into perfectly fitting garments. Start today, follow the guided roadmap, and within weeks you’ll confidently draft patterns, avoid guesswork, and create custom clothing that truly reflects your style.
Step 1: Choose the Right Pattern Drafting Platform
Alright, let’s pause for a second. You’ve decided you want to learn pattern drafting, but the sea of platforms can feel overwhelming. One minute you’re scrolling through glossy ads, the next you’re wondering if any of them actually teach you how to turn a sketch into a wearable piece.
First thing’s first: define what you need. Are you looking for a self‑paced video library, live critiques from instructors, or a community where you can swap drafts? Your answer will narrow the field dramatically.
1. Check the curriculum depth
Good platforms break the process into bite‑size modules—measurements, basic blocks, fit adjustments, then advanced draping. Look for a syllabus that shows a clear progression rather than a random grab‑bag of lessons. For example, a course that starts with a basic bodice block and then shows how to morph that block into a jacket or skirt signals thoughtful design.
Ask yourself: does the platform promise downloadable PDFs you can print and annotate? Do they include pattern‑making software tutorials (like Adobe Illustrator or the free Valentina app)? Those extras often separate a hobby class from a professional‑grade program.
2. Evaluate the instructor’s credibility
Peek at the instructor’s background. A seasoned fashion designer who’s worked on runway collections will bring real‑world insights—like how seam allowances differ between couture and ready‑to‑wear. If the bio mentions years of teaching, look for student testimonials that mention “personalized feedback” or “quick response times.”
Pro tip: many platforms offer a free “intro lesson.” Jump in, see the video quality, and gauge whether the teaching style feels like a friendly chat over coffee. If the instructor’s tone is dry or overly technical, you’ll likely lose motivation.
3. Look for community support
Pattern drafting isn’t a solo sport. Platforms that host a private forum, Discord server, or weekly live Q&A give you a safety net when a curveball—like a tricky sleeve cap—throws you off. Real‑world example: a beginner on a popular platform posted a photo of a mis‑aligned waistline, got instant feedback, and corrected it before cutting any fabric.
That sense of belonging can be the difference between quitting after week one or sticking around long enough to see a finished garment.
4. Test the tech stack
Make sure the platform runs smoothly on your devices. Do they have a mobile app? Is the video player responsive? A clunky interface will eat up precious learning time. Also, confirm they offer downloadable resources in formats you can open—PDF, SVG, or even .zip pattern packs.
And don’t forget to check the refund policy. A 30‑day money‑back guarantee shows the company stands behind its content.
Need a concrete example? Unlocking Creativity: How to Choose the Best Sewing for Beginners Online Course walks you through the exact questions to ask and even provides a checklist you can print.
Now that you’ve got the criteria, let’s put it into action.
Actionable Checklist
- Write down your learning goals (e.g., draft a basic dress pattern within 4 weeks).
- Score each platform on curriculum, instructor, community, tech, and refund policy (1‑5 scale).
- Watch at least one free preview lesson.
- Join the community forum and ask a quick question to test response speed.
- Decide within 48 hours—don’t linger in analysis paralysis.
Once you’ve chosen, you’ll feel a lift of confidence, like you’ve just found the right key for a locked door.
Take the next step now: pick the platform that ticks most of your boxes, sign up, and dive into the first module. You’ll be surprised how quickly the abstract sketches on your notebook start to look like real, cut‑and‑sew patterns.
Step 2: Set Up Your Workspace for Virtual Drafting
Alright, you’ve picked a platform, so now it’s time to give your brain a place to breathe. A clutter‑free, ergonomically‑friendly workstation isn’t a luxury—it’s the quiet partner that lets you focus on turning sketches into flat patterns.
3.1 Choose the right screen real estate
Most pattern‑drafting software (think Valentina, CLO 3D, or even Illustrator) needs a decent amount of screen space to display grids, layers, and measurements simultaneously. If you’re still on a 13‑inch laptop, consider a cheap 24‑inch monitor or a portable USB‑C screen. The extra width means you can keep the reference sketch on one side and the digital draft on the other without constantly toggling tabs.
Here’s a quick test: open your drafting app, pull up a basic bodice block, and try to zoom in on the shoulder seam while still seeing the full garment outline. If you’re forced to scroll constantly, upgrade the monitor. A study from the CDC’s ergonomics research shows that larger screens can reduce neck strain by up to 30% when used correctly.
3.2 Lighting that lets you see every curve
Natural light is a designer’s best friend, but it can also create glare on glossy screens. Position your desk near a window, but add a dimmable desk lamp with a daylight‑balanced bulb (5000–6500 K). The goal is consistent, shadow‑free illumination so you can spot a stray stitch line before it becomes a costly mistake.
Pro tip: a simple “clip‑on” LED lamp that slides onto your laptop’s edge costs less than $15 and can be angled precisely where you need it.
3.3 Organize tools for a smooth workflow
Even though you’re drafting virtually, physical tools still matter. Keep a ruler, flexible measuring tape, and a set of drafting pens within arm’s reach. I like a small “tool caddy” that sits on the desk edge—no more digging under piles of fabric swatches.
Real‑world example: Sarah, a busy mom of two, set up a rolling cart with a tablet, her laptop, and a pocket‑sized sketchbook. When she moves from the kitchen table to the living‑room couch, everything she needs travels with her, and she never misses a deadline.
3.4 Ergonomic posture checklist
Think of your chair as the silent coach. A chair with lumbar support, adjustable height, and a swivel base lets you sit upright while your feet stay flat on the floor. Your elbows should rest at a 90‑degree angle when your hands are on the keyboard or tablet.
If you’re not sure whether your setup is ergonomic, try this: set a timer for 20 minutes, then stand, stretch, and notice any tension in your neck or lower back. Adjust the monitor height so the top of the screen is at eye level—this prevents you from craning forward.
For a deeper dive, check out this Healthline guide on office ergonomics, which breaks down the science behind each adjustment.
3.5 Digital file organization – keep the chaos off the screen
Before you even open the drafting app, create a folder structure on your computer. I recommend a top‑level folder called “Pattern Drafts,” then subfolders for each project (e.g., “Spring Dress – 2025”). Inside each project folder, add three more: “References” (photos, mood boards), “Drafts” (the actual .svg or .pdf files), and “Exports” (ready‑to‑print PDFs).
This hierarchy saves you from the dreaded “Where did I save that block?” moment and makes it easy to back up your work to cloud services like Google Drive or Dropbox.
3.6 Quick‑start checklist
- Pick a monitor ≥24″ or use a USB‑C portable screen.
- Set up a daylight‑balanced lamp and position it to avoid glare.
- Place a ruler, measuring tape, and drafting pens in a reachable caddy.
- Adjust chair and monitor so elbows are at 90° and eyes level with the top of the screen.
- Create a consistent folder hierarchy on your computer.
- Take a 5‑minute stretch break every 25 minutes (the Pomodoro technique works great).
Once you’ve nailed these basics, you’ll notice a subtle shift: drafting feels less like a chore and more like a creative jam session. Your mind stays in the zone, and the patterns you produce start to look polished even before you hit “print.”
So, grab that lamp, fire up your monitor, and give yourself a workspace that feels as enthusiastic about pattern drafting as you are.
Step 3: Follow Structured Lesson Plans
Now that your workspace is humming, the next game‑changer is the lesson plan itself. A structured plan keeps the creative chaos from turning into a nightmare and gives you a roadmap you can actually follow.
Why structure matters
Research shows that learners who follow a clear sequence retain up to 25% more information than those who jump around randomly according to TeachThought. In pattern drafting, that extra retention can be the difference between a perfect seam and a costly redo.
Think about the last time you tried to learn a new stitch without any outline – you probably ended up watching the same 3‑minute clip over and over, right? Structured lesson plans prevent that loop.
Break the curriculum into bite‑size blocks
Here’s a simple framework you can copy:
- Goal‑setting (5‑10 min): Write a one‑sentence objective, e.g., “Draft a basic A‑line skirt with a 2 in seam allowance.”
- Concept intro (10‑15 min): Watch a short video or read a module that explains the underlying geometry – why the waist curve matters, how to plot a dart.
- Guided practice (20‑30 min): Follow along in the software, pausing after each step to check measurements against a reference sheet.
- Independent try (15‑20 min): Replicate the block without the video, then compare your file to the instructor’s template.
- Reflection & notes (5‑10 min): Jot down what tripped you up and how you fixed it. This becomes your personal cheat sheet.
Each block adds up to a 60‑minute session that fits neatly into a Pomodoro timer – no burnout, just progress.
Real‑world example: from bodice block to jacket
Emma, a freelance designer, followed a three‑day structured plan on CreativiU. Day 1 she mastered the basic bodice block, Day 2 she added seam allowances and style lines, and Day 3 she transformed the block into a blazer jacket. Because each day had a clear goal, Emma finished the jacket prototype in two weeks instead of a month.
Notice how she didn’t try to tackle darts, sleeves, and collars all at once. The lesson plan sliced the project into logical steps, letting her build confidence gradually.
Actionable checklist for your next lesson
Copy this checklist into your digital planner before you hit “play.”
- Open the course module and locate the “Lesson Outline” tab.
- Highlight the learning objective and rewrite it in your own words.
- Set a timer for each segment (Goal, Intro, Guided, Independent, Reflection).
- Gather all tools you’ll need – ruler, tape, stylus – before the timer starts.
- After the guided practice, export your file and compare it side‑by‑side with the instructor’s version.
- Document one “aha!” moment and one “stuck” point in a dedicated notebook.
Tips from the pros
• Batch similar skills together. If you’re learning sleeve caps, do all three variations in one session – the brain recognises patterns faster as explained by Open Colleges.
• Use “micro‑assessments.” A quick 2‑question quiz at the end of each lesson reinforces retention without feeling like a test.
• Schedule a weekly “review day.” Spend 30 minutes revisiting previous files, updating notes, and noting any recurring mistakes.
Putting it all together
When you combine a tidy workspace with a step‑by‑step lesson plan, the learning curve smooths out. You’ll spend less time hunting for the next step and more time actually drafting. So, pull up your course, print the checklist, set your timer, and let the structured flow do the heavy lifting.
Ready to try? Choose the first lesson, follow the blocks, and watch your confidence grow with every saved file.
Step 4: Practice with Real‑World Projects
At this point you’ve got your workspace humming and a lesson plan that actually moves you forward. The next natural step is to take that fresh knowledge and throw it at a real project that matters to you.
Why does “real‑world” make a difference? Because the brain treats a personal goal like a puzzle you care about, not just a checkbox. A study of adult learners showed that applying new skills to a meaningful task boosts retention by about 20% compared to abstract drills.
Pick a project that speaks to your life
Start by asking yourself: what’s the one garment you keep promising yourself you’ll make? Maybe it’s a simple A‑line skirt for your summer garden party, or a fitted tote bag for the kids’ soccer practice.
Write that goal down in one sentence. For example: “Draft a zero‑waste tote bag that fits a 12‑inch laptop and a water bottle.” This tiny statement becomes your compass.
Break the project into micro‑lessons
Take the project and map it onto the lesson‑plan blocks you already trust.
- Goal (5 min): Define the final dimensions and any style quirks.
- Concept intro (10 min): Watch a short tutorial on drafting basic rectangles and adding seam allowances.
- Guided practice (20 min): Follow along in the software, tracing the tote’s outline.
- Independent try (15 min): Hide the tutorial and draft the pattern from memory.
- Reflection (5 min): Note where you had to guess and what you’d tweak next time.
This structure keeps the project from feeling overwhelming while still giving you a clear endpoint.
Real‑world example #1: The weekend dress
Emma, a busy freelance designer, used a weekend to draft a simple shift dress for a client’s birthday dinner. She started with a basic bodice block, then added a knee‑length skirt using the “add‑on” feature in her pattern‑making software. Because she kept her files organized (Project > References, Drafts, Exports), she could export a printable PDF and send it to the client in under an hour.
Key takeaway: treat each block as a reusable asset. Tomorrow you can pull the same bodice into a blouse or a jacket without starting from scratch.
Real‑world example #2: The kids’ costume
When Jake’s daughter needed a superhero cape for school, he turned to a free vector program. He input her measurements, used a simple triangular block, and added a dramatic hem curve. The final pattern printed on cardstock fit perfectly, and the whole process took only two evenings.
He loved that the software let him copy, paste, and adjust curves down to the millimeter – a major speed boost compared with paper drafting.
Actionable checklist
Before you dive, copy this quick list into a notes app.
- Choose a project that you’ll actually use or wear.
- Write a one‑sentence objective.
- Set a Pomodoro timer for each lesson‑plan block.
- Gather your digital tools (software, mouse, stylus) and physical tools (ruler, tape).
- Export the draft and compare it side‑by‑side with a reference pattern.
- Log one “aha!” moment and one “stuck” point.
- Back up the file to cloud storage – losing a pattern is a real headache.
Tips from the pros
Many seasoned makers swear by “micro‑assessment” quizzes at the end of each session. A two‑question pop‑quiz about seam allowance calculations or curve placement forces you to verbalize what you just did, cementing the knowledge.
Also, consider joining a community challenge. Platforms like Cloth Habit’s pattern‑drafting forums host monthly “draft a tote” contests. Seeing how others solve the same problem opens your eyes to shortcuts you might never discover alone.
Another great resource is Sew Magazine’s beginner guide to digital pattern drafting. It breaks down the vector‑tool basics in plain language and even includes a free template you can import.
And remember: perfection isn’t the goal on your first try. The point is to finish a usable file, then iterate.
So, what’s the next real‑world piece you’ll tackle? Grab your timer, open your favorite pattern‑drafting class, and turn that idea into a file you can actually cut. The more projects you complete, the more instinctive the process becomes, and soon you’ll be drafting without even thinking about the steps.
Step 5: Compare Course Options and Pricing
Okay, you’ve already built a habit of practicing real‑world projects, so now it’s time to look at the marketplace. When you’re hunting for pattern drafting classes online, the biggest trap is letting price alone dictate your choice. A $50 class might sound cheap, but if it leaves you guessing at the end, you’ll end up spending extra time (and money) on make‑up lessons.
What to compare beyond the price tag
First, write down the criteria that actually matter to you. I like to think of them as the “must‑have checklist”:
- Depth of curriculum – does the course cover basic slopers, then move into manipulation?
- Instructor support – are there live Q&A sessions, community forums, or one‑on‑one feedback?
- Resources included – downloadable templates, software discounts, or pattern libraries?
- Flexibility – can you binge‑watch or do you need to stick to a weekly schedule?
- Certification or credit – useful if you plan to add it to a resume or portfolio.
Got your list? Great. Now let’s see how a few popular options stack up.
Quick comparison table
| Course | Duration | Price (USD) | Key Feature |
|---|---|---|---|
| CreativiU Basic Pattern Drafting | 6 weeks (self‑paced) | $79 | Live community critiques + downloadable vector templates |
| Made Institute Patternmaking 1 | 8 weekly 3‑hour sessions | $350 | Hands‑on draping labs + muslin mock‑up assignments |
| Udemy “Pattern Drafting Basics” | 2‑hour on‑demand video | $19 (often on sale) | Lifetime access, but limited instructor interaction |
Notice the spread? The mid‑range Made Institute option is pricier, but you get real‑time studio time and a clear project pipeline. The CreativiU class sits in the sweet spot: affordable, community‑driven, and still gives you downloadable assets you can actually use. Udemy is the budget‑friendly entry, but you’ll be on your own for troubleshooting.
Step‑by‑step: How to evaluate each offering
1. Grab the syllabus. Most platforms publish a week‑by‑week outline. Scan for modules that match your goals – e.g., “dart pivoting” or “digital curve tools.” If the syllabus is vague, that’s a red flag.
2. Check the instructor’s background. Look for industry experience, published collections, or teaching credentials. A quick LinkedIn search can reveal whether they’ve actually designed garments that sold.
3. Read recent reviews. Focus on comments about clarity of instruction and responsiveness. A pattern‑drafting forum post recently highlighted how CreativiU’s weekly live chat cuts down on confusion for beginners.
4. Calculate hidden costs. Some courses require a specific software subscription (e.g., Adobe Illustrator) or extra pattern paper kits. Add those to your total budget.
5. Trial it out. Many sites offer a free preview lesson. Use that to test the video quality, pacing, and whether the instructor’s voice feels like a friend guiding you.
Real‑world example: Emma’s decision process
Emma, the freelancer we mentioned earlier, needed a class that could fit around her client work. She listed her priorities: community feedback, a printable pattern library, and a price under $150. She ruled out Made Institute because the live sessions clashed with her schedule and the cost exceeded her budget. Udemy was cheap, but the lack of a community made her uneasy. CreativiU ticked all the boxes, so she signed up, downloaded the starter templates, and within two weeks had a complete skirt sloper ready for a new client.
Her story shows why you shouldn’t chase the lowest price or the flashiest brand; you need the right mix of support, resources, and flexibility.
Actionable checklist before you click “Enroll”
- Write down three must‑have features (e.g., live feedback, downloadable assets, certification).
- Match each course against those features using the table above.
- Add any extra expenses (software, fabric kits) to the base price.
- Calculate total cost per hour of instruction – this helps you see value.
- Watch a free preview or read a recent review to confirm the teaching style feels right.
- Make a final decision and set a start date in your calendar – accountability is key.
Remember, the goal isn’t just to spend less; it’s to spend smart. When you line up the features, support, and price, you’ll know exactly which patternmaking class gives you the biggest return on your investment. And if you’re still on the fence, check out the free trial videos on Udemy’s pattern drafting basics to see how the content feels before you commit.
Step 6: Get Feedback and Improve Your Skills
After you’ve signed up for a pattern drafting class and cranked out your first sloper, the real growth starts when someone else looks at your work.
Because a fresh pair of eyes can spot a curve that’s a millimeter off or a seam allowance that’s too tight—things you’d probably miss after staring at the screen for hours.
Tap into the community you already joined
Most “pattern drafting classes online” include a forum, Discord channel, or weekly live critique. Jump into those spaces as soon as you finish a draft. Post your PDF, ask a specific question (“Does this waist dart sit where my client’s natural waist is?”), and note the feedback you receive.
For example, Maya, a hobbyist from Austin, shared her first dress block in a CreativiU community thread. One member pointed out that the side seam length didn’t account for fabric stretch, saving her a costly remake. Within a day Maya adjusted the curve and shipped the final pattern to a client—her first paid order.
Set up a structured feedback loop
Don’t rely on “someone will say something eventually.” Create a mini‑review checklist:
- Identify the pattern element you want critiqued (e.g., dart placement, curve smoothness).
- Share the file in a dedicated thread or with a mentor.
- Ask for two concrete suggestions and one “what worked well.”
- Record the comments in a simple spreadsheet; next time you revisit the draft, you’ll see the improvement trajectory.
Doing this turns vague comments into actionable steps you can actually apply.
Leverage external expert resources
Sometimes the community isn’t enough, especially when you hit a technical snag. Websites like Sew Magazine’s guide to pattern drafting break down tricky topics—think curve interpolation or grading basics—into bite‑size tutorials. Bookmark the article, follow the step‑by‑step visuals, and compare your draft side‑by‑side.
Another goldmine is the online sewing community at Pattern Review, where seasoned pattern makers post “before and after” critiques. Scrolling through a thread where a member revises a sleeve draft shows you exactly which anchor points to adjust for a smoother curve.
Turn feedback into habit
Make reviewing a non‑negotiable part of each project. Here’s a 5‑minute nightly routine you can try:
- Open the latest draft file.
- Read the latest comments you saved.
- Apply one small tweak (e.g., shift a dart 2 mm, smooth a Bezier handle).
- Export a quick PDF and glance at the change.
- Mark the tweak as “done” in your feedback log.
Over weeks you’ll notice patterns—maybe you always misplace darts, or you consistently forget to add seam allowance on curved edges. Those patterns become the focus of your next study session.
Ask for a peer‑review swap
Pair up with another student in the same class. Exchange drafts every two weeks and give each other a “design audit.” The swap works because you each bring a different perspective; what’s obvious to you might be a blind spot for your partner.
When I tried this with a colleague, we each caught a missing grainline on the other’s skirt draft. Fixing that saved us both a day of re‑cutting.
Measure the impact
Track how many revisions you make before a pattern is “client‑ready.” If you started with three revisions per project and now need only one, you’ve quantified improvement. Celebrate that win—maybe treat yourself to a new set of tracing paper or a coffee from your favorite shop.
Remember, feedback isn’t a one‑time event; it’s the engine that keeps your pattern‑drafting skills from stagnating.
Ready to put this into practice? Pick your latest draft, post it in your class’s forum, set a 48‑hour deadline for feedback, and follow the checklist above. You’ll see faster, cleaner drafts and, more importantly, confidence that your designs are ready for the real world.
Conclusion
We’ve walked through how to pick a platform, how to test a class, and how to turn feedback into a habit that actually moves your drafts forward.
At the end of the day, the best pattern drafting classes online are the ones that fit your schedule, give you real-time critique, and hand you downloadable templates you can start using right away.
What to remember
First, write down the three features you can’t live without – maybe live community, vector assets, or a certificate. Then match each course against that list, just like you did in the checklist.
Second, treat every draft as a conversation. Post it, ask a concrete question, and act on the two suggestions you get. The tiny tweaks add up to big confidence.
Finally, track your revisions. If you cut your edit cycles in half, celebrate it with a small reward – a new sketchbook, a cup of coffee, whatever feels like progress.
So, what’s the next move? Grab the latest draft you’ve been polishing, share it in your class’s forum, and set a 48-hour feedback window. Watch how quickly the pattern sharpens.
Ready to level up? Dive back into CreativiU’s community, apply the checklist, and turn curiosity into finished garments. Your next client-ready pattern is just a feedback loop away.
FAQ
What should I look for in pattern drafting classes online?
First, check if the course offers real‑time critique or a vibrant community—those are the places where doubts get cleared fast.
Next, make sure the syllabus includes downloadable templates and vector assets you can edit right away.
Finally, look for a clear progression from basic sloper basics to more complex garment engineering; that way you won’t feel stuck halfway through.
How much time should I dedicate each week to get the most out of a pattern drafting class?
3–4 hours a week is enough to stay in the groove without burning out. Split it into a 30‑minute video watch, 1 hour of hands‑on drafting, and a quick feedback check‑in.
If you can’t carve out a full block, bite‑size sessions still work—just be consistent, because pattern geometry builds on yesterday’s adjustments.
Treat each session like a workshop: set a goal, grab your ruler, and note one tweak before moving on. Over a month you’ll see a rise in confidence and speed.
Are free trial lessons a good way to decide if a class fits my needs?
Free trial lessons are a low‑risk way to test both the teaching style and the platform’s tech.
Watch the video quality, see if the instructor explains concepts in plain language, and try out any interactive quiz or downloadable worksheet.
After the preview, ask yourself: did I feel a spark of curiosity, or was I already zoning out? If the answer leans toward the former, the full course is probably a good match for your learning rhythm.
What tools and software do I really need for online pattern drafting?
You don’t need an expensive CAD suite to start; a free vector editor like Inkscape or the basic drawing tools in Adobe Illustrator work just fine for pattern blocks.
Pair that with a reliable ruler, curve‑ruler, and a set of clear pattern paper.
If you prefer a tablet, a stylus plus an app such as Sketchbook gives you the same precision without the clutter of a desktop. Start simple, then upgrade only when your projects demand more automation.
How can I get useful feedback from classmates and instructors?
The quickest way to get useful feedback is to post a single, focused question in your class’s forum—something like, “Does this dart placement follow the natural waist line?” Attach the PDF and request two concrete suggestions.
When replies arrive, copy the key points into a feedback log and try one tweak at a time.
By turning vague applause into measurable actions, you’ll see steady improvement without feeling overwhelmed.
Is a certificate worth getting from pattern drafting classes online?
A certificate from a reputable pattern drafting class can add credibility when you pitch to clients or list your services on platforms like Etsy.
It’s not a magic ticket, but it signals that you’ve completed structured training and can follow industry standards.
Pair the badge with a small portfolio of finished patterns—showing real results is what ultimately convinces a buyer more than any piece of paper.
Can I apply what I learn in a pattern drafting class to my own fashion business?
The skills you pick up in pattern drafting classes online translate directly into faster product development for a fashion brand.
Once you can draft a sloper in an afternoon, you’ll cut down sample time, lower fabric waste, and price your collections more accurately.
Start by drafting a simple tee or skirt for your own line, then use the same workflow for every new design—treat each pattern as a reusable blueprint.
Leave a Reply